
Subscribe to Our Youtube Channel
Related Manuals for Braun Perfusor compact plus


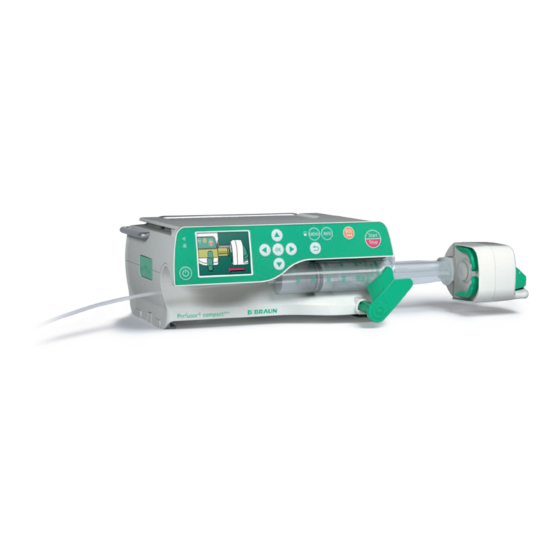
Summary of Contents for Braun Perfusor compact plus
- Page 1 plus Perfusor ® compact Instructions for use Version 1.0 English Valid for software 002A...
-
Page 3: Table Of Contents
Table of Contents Set-up and powering on About this document ..............Setting up and connecting the device ..Purpose ............... plus 7.1.1 Attach/remove the compact Signs, symbols and tags ........stand clamp ............. Warnings ..............7.1.2 Operating the device on a stand...... - Page 4 8.13 Switching off the device Ordering data ..................8.14 Priming the infusion line 19.1 Accessories .................... 19.1.1 Original Perfusor® lines ........Alarms ..............19.1.2 Interface lead ............Device alarms ............19.1.3 Syringes ..............Pre-alarms and operating alarms ....Index .................
-
Page 5: About This Document
About this document 1 About this document Signs, symbols and tags Purpose Symbol Meaning These instructions for use are part of the Key > Key Press the specified keys device and describe how to use the device one after the other. safely and correctly. -
Page 6: Warnings
About this document Warnings Symbol Meaning Danger for people. Non-compliance will lead to death or serious injuries. DANGER Danger for people. Non-compliance could lead to death or serious injuries. WARNING Danger for people. Non-compliance could lead to minor injuries. CAUTION CAUTION Risk of damage or incorrect operation. -
Page 7: Abbreviations
About this document Abbreviations Abbreviation Meaning Electromagnetic compatibility Keep vein open Safety check Light emitting diode High frequency Electrostatic discharge... -
Page 8: Symbols
Symbols 2 Symbols Symbols on the product and packaging Symbol Meaning Symbol Meaning Batch number Caution! Consult instruction for use Serial number Refer to instruction manual Date of manufacture (Follow instruction for use) (year-month-day) Labeling of electric Manufacturer and electronic devices according to directive Humidity limitation 2012/19/EU (WEEE) -
Page 9: Symbols On The Device's Display
Symbols Symbols on the device‘s display Symbol Bedeutung Delivery in progress Delivery stopped Mains electricity connection/battery status Pressure symbol (“manometer”): Indication of P1 to P9 pressure level set with current system pressure (pointer) Attention: pre-alarm Attention: operating alarm Infusion is above the upper soft limit Infusion is below the lower soft limit Pre-alarm temporarily muted... -
Page 10: Intended Use
Intended use 3 Intended use plus The Perfusor® compact infusion syringe pump system is a transportable infusion syringe pump used together with author- ised syringes and accessories. The pump is intended for use in adults, children and newborns for the intermittent or continu- ous administration of parenteral and enteral solutions through standard medical access routes. -
Page 11: Safety Instructions
Make sure that the introductory ensure secure mounting or position- training on the device is given by ing of the device. Changes of position a B. Braun sales representative or and strong vibrations can cause minor another authorised person. changes in the delivery characteristics. -
Page 12: Control
Safety instructions Control 4.1.6 When administering highly-effective drugs, have a second device ready for Stand in front of the device to operate the drug. it. This ensures that you are able to Avoid mechanical effects on the reach all control elements and that the device. -
Page 13: Accessories And Consumables
Safety instructions Accessories and consumables Enteral nutrition 4.1.8 4.1.9 plus Change the disposables according to The Perfusor® compact can be used for your local infection control policy. enteral nutrition. Only use pressure-tested disposable Do not use enteral fluids for the intra- items (min. 2 bar/1,500 mmHg). -
Page 14: Description Of The Device
Description of the device 5 Description of the device Device overview Name Syringe holder Syringe wings bracket Syringe plate sensor Claws Drive head with emergency lock key Release lever... -
Page 15: Interfaces
Description of the device Interfaces Name Stand clamp Accessory port (e.g. staff call, ambulance) Mains connection (socket for power cable. In the event of a power cut, the device switches to battery mode automatically) Infrared interface (communication in station, service) Guide rails for connecting pumps... -
Page 16: Display And Control Elements
Description of the device Display and control elements Element Function On/off key: Switches the device on and off Status display Green LED: Delivery Red LED: Technical alarm, operating alarm Arrow keys: Scroll through menus Change settings Answer yes/no questions Select scale values and change between digits when inputting values Open a function while the infusion is ongoing or suspended... - Page 17 Description of the device Element Function Back key: Return to the last display or last menu level Lock/unlock symbol: The keypad is locked and unlocked by pressing and holding down the menu key. Menu key: Call up main menu and lock/unlock the device Info key: Call up therapy data from the current infusion Bolus key:...
-
Page 18: Display Overview
Description of the device Display overview Alarm status display Alarms are displayed via a notification on the display, a signal tone and flashing of the red LED (operating alarm): Yellow: pre-alarm Display / Function Moving arrows: Delivery in progress (stopped delivery is shown by two bars) Red: operating alarm Mains electricity connection/... -
Page 19: Menu Structure / Device Functions
Menu structure / device functions 6 Menu structure / Main menu > 6.1.1 Rate, volume & time device functions The device offers the option of entering the Main menu delivery rate, a volume or a time limit. If the volume limit and infusion time are entered, the rate will be calculated automatically. -
Page 20: Main Menu > Dose Calculation
Menu structure / device functions Main menu > Dose calculation Main menu > Settings 6.1.3 6.1.4 Menu Function Menu Function Dose unit Select unit: Night mode Turning night mode on/off Brightness Select the brightness: μg Level 1 (=lowest level) - to - Level 9 (=highest level) mmol Audio... -
Page 21: Settings > Service
Menu structure / device functions Settings > Service 6.1.5 After the service code has been entered, the following service settings can be changed: Menu Function Language Select language: German English Date Set date in DD.MM.YYYY format Time Set time Bolus rate Enter default bolus rate Switch KVO on/off Night... -
Page 22: Set-Up And Powering On
Set-up and powering on 7 Set-up and powering on Connecting the device to 7.1.5 the mains electricity Setting up and DANGER! Risk of death from electric connecting the device shock. Only connect the device to a mains plus Attach/remove the compact 7.1.1 power supply with a protective earth- stand clamp... -
Page 23: Turning Night Mode On/Off
Set-up and powering on Configuring the 7.3.4 pressure alarm limit WARNING! Danger to the patient from an incorrectly set pressure alarm limit. Ensure that an appropriate pressure level is selected in order to mini- mize time to alarm. It may be necessary to change the pressure Turning night mode on/off 7.3.1 alarm limit due to various influencing fac-... -
Page 24: Configuring Service Settings
Set-up and powering on Configuring service settings 7.3.5 Alarm level Pressure value Select Service... and press OK 0.100 bar (75 mmHg) to confirm. 0.237 bar (178 mmHg) Enter the service code and press OK to confirm. 0.375 bar (281 mmHg) The “Service Menu”... -
Page 25: Locking/Unlocking The Keypad
Set-up and powering on Locking/unlocking Switching KVO on/off the keypad The pump can continue to deliver after a preselected volume or a preselected time Locking the keypad protects the device with a pre-defined KVO rate (see section 16) against accidental use. has been reached. -
Page 26: Operation
Operation 8 Operation Note: “Support for bolus-free insertion” does not release the user from their duty of Device settings configured care when changing the syringe. Switching on the device Note: Always use the device with the small- est possible syringe, provided the therapy Device connected to the mains elec- permits this. -
Page 27: Starting And Stopping The Infusion
Operation Activating standby Any values still missing are automati- cally calculated and displayed. In the event of longer interruptions, the Note: In addition to the volume and time user has the option of retaining the set val- limit, the infusion rate can also be adjusted ues and continuing the infusion at a later in the Overview screen. -
Page 28: Administering Bolus
Operation Administering bolus Note: Manual bolus administration is lim- ited to a max. 10 s or 10% of the syringe There are three different options for bolus content. The bolus administration is auto- administration: matically stopped, but it can be continued Manual bolus by pressing the Bolus key again. -
Page 29: Using The Drug Database
Operation Using the drug database Start the infusion with the Start/Stop key. DANGER! Danger to the patient from - or - incorrectly selected drug. Confirm the delivery rate by pressing Ensure that the correct drug has been selected. The “Overview” screen is displayed. Select Vol./Time and press OK Up to 3,000 freely selectable drug names, to ... -
Page 30: Calculating The Dose
Operation Calculating the dose Soft limits Soft limits for rate/dose/bolus volume and The Dose calculation function is used to bolus rate can also be stored in the data- calculate the delivery rate in ml/h based on base. These can be exceeded but the fol- the dose parameters entered. -
Page 31: Entering A Combination Of Delivery Rate, Volume And Time
Operation Check the plausibility of the displayed Enter dose. values. The rate is automatically calculated. Start the infusion with the Start/Stop Note: Pressing the OK key brings up the key. Overview screen. Calculate using: Weight Check the plausibility of the displayed values. -
Page 32: Resetting The Therapy
Operation Changing the syringe Volume changed: 8.11 If only the rate has been entered, – Do not remove the syringe if the drive the remaining time is adjusted. head claws are closed. If only the time has been entered, – CAUTION! Damage to the syringe/ the rate (or dose rate) is adjusted. -
Page 33: Switching Off The Device
Operation Priming the infusion line Note: When removing a syringe if the 8.14 syringe plunger plate is not released by the Note: This function is not avail able in the claws, the emergency release button should pump factory default. The function can be pressed. -
Page 34: Alarms
Alarms 9 Alarms Pre-alarms 9.2.1 In the event of a pre-alarm, an acoustic Device alarms signal sounds and a staff call is activated. The display remains in pre-alarm until the If a device alarm is triggered the infusion is operating alarm goes off. Pre-alarms do not stopped immediately. -
Page 35: Operating Alarms
Alarms Operating alarms 9.2.2 In the event of an operating alarm, the infusion is stopped. An acoustic signal sounds, the red LED flashes and a staff call is activated. Display message Meaning “Target volume Preselected volume has been infused reached” “Disposable No infusion solution is left in the syringe. syringe is empty”... -
Page 36: Reminder Alarm
Alarms Reminder alarm Reminder alarms are triggered in the follow- ing cases: A syringe is inserted, the pump is not delivering and the device is not oper- ating for two minutes. A value input was started but not completed and confirmed. After the standby time has elapsed A staff call is activated and the following screen is displayed:... -
Page 37: Cleaning And Care
Do not use disinfectant spray on elec- trical connections. Recommendation: Note for optimal battery 10.2.1 Use disinfectants manufactured by operation B. Braun (e.g., Meliseptol, Melsitt 10% Battery life may vary due to and Melsept SF 10%) for wipe disin- Ambient temperature fection. Varying loads Allow the device to air dry for at least 1 min before operation. -
Page 38: Changing The Battery
The device does not contain any parts that the user can repair themselves. Do not repair defective devices independently. Send defective devices to the B. Braun service. WARNING! Risk of injury and/or mal- function from device modifications. Do not modify the device. Note:... -
Page 39: Disposal
Disposal 13 Disposal 15 Start-up and trumpet curves The device should be returned to B. Braun for further disposal. Significance in 15.1 Observe all country-specific regula- clinical practice tions when disposing of equipment locally. Trumpet curves show the recorded maxi-... -
Page 40: Typical Start-Up And Trumpet Curves
Start-up and trumpet curves Typical start-up and 15.2 trumpet curves Start-up curves Anlaufkurven Trompetenkurven Anlaufkurven Tromp Flow Q(t) [ml/h] Prozentualer Flussfehler Fluss Q(t) [ml/h] Fluss Q(t) [ml/h] Prozen Flow Q(t) [ml/h] 5 ml Omnifix 5 ml Omnifix Delivery rate = 1 ml/h Förderrate = 1 ml/h Förderrate = 1 ml/h Delivery rate = 1 ml/h... - Page 41 Start-up and trumpet curves Trompetenkurven Anlaufkurven Trompetenkurven Trumpet curves Percentage flow error Prozentualer Flussfehler Fluss Q(t) [ml/h] Percentage flow error Prozentualer Flussfehler 50 ml Omnifix 5 ml Omnifix Delivery rate = 1 ml/h Delivery rate = 1 ml/h Förderrate = 1 ml/h Förderrate = 1 ml/h Epmax Epmax...
- Page 42 Start-up and trumpet curves This is particularly important if highly Note: The system accuracy is normally concentrated or life-sustaining drugs with ±2% of the volume, measured using the short half-lives are to be infused at low trumpet curve test method according infusion rates.
-
Page 43: Alarm Times
15.3 15.3.1 Zeit (h:mm:ss) Time [hh:mm:ss] The following graphs show the alarm times 1:26:24 Omnifix® 50 ml of the B. Braun syringe shown according to 1:12:00 1 ml/h pressure and syringe type. 0:57:26 Note: The alarm times for syringes from 0:43:12 other manufacturers may vary slightly. -
Page 44: Technical Data
Technical data 16 Technical data Note: The delivery accuracy, pressure alarm and alarm reaction times apply at room tem- perature and with water as the test material. Different media viscosities and temperatures may lead to deviations. Parameter Value Type of device Infusion syringe pump Product classification According to Directive 93/42 EEC:... - Page 45 Technical data Parameter Value Interfaces Cold connector for mains voltage Accessory port for interface cable 12 V CP and staff call IrDA infrared for communication in the station and for service Operating conditions Temperature +5 °C … +40 °C (+41 °F … +104 °F) Relative humidity 30% …...
- Page 46 Technical data Parameter Value Rate: ≥ 10 ml/h: KVO rate 3 ml/h KVO rate Rate: < 10 ml/h: KVO rate 1 ml/h Rate: < 1 ml/h: KVO rate = rate set using the service program (factory default rate 0.1 ml/h) or current rate if this is lower. History protocol 1,000 history entries The oldest entries are overwritten if necessary.
-
Page 47: Electromagnetic Compatibility
Note: The device must not be stacked, placed or used immediately next to or with other devices, except for B. Braun devices. The device is designed to be used in the fol- lowing electromagnetic environment. The device users and customers should ensure that it is being operated in such an environ- ment. -
Page 48: Electromagnetic Interference Emissions
Electromagnetic compatibility Electromagnetic interference emissions 17.1 Interference emission Compliance Electromagnetic environment measurements guidelines HF emissions Group 1 The device uses HF energy for its internal According to CISPR 11 functions only. As such, its HF emissions rate is very low and it is unlikely to inter- fere with nearby electronic equipment. -
Page 49: Electromagnetic Immunity
Electromagnetic compatibility Electromagnetic immunity 17.2 The device is designed to be used in the electromagnetic environment described below. The device users and customers should ensure that it is being operated in such an environment. Immunity tests Test level Compliance Electromagnetic EN 60601-1-2 level environment guidelines... - Page 50 Electromagnetic compatibility Immunity tests Test level Compliance Electromagnetic EN 60601-1-2 level environment guidelines EN 60601-2-24 Voltage dips, < 5% UT ¹ Complies The supply voltage quality brief supply volt- for ½ periods through should be the same as that age interruptions (>95% dip) the use of of a typical commercial or...
- Page 51 Electromagnetic compatibility Immunity tests Test level Compliance Electromagnetic EN 60601-1-2 level environment guidelines EN 60601-2-24 Radiated HF 10 V/m [E1] 10 V/m The field strength should be interference 80 MHz to 80 MHz to lower than 10 V/m according to IEC 2.5 GHz 6 GHz und d = 12/E1 √P ²...
-
Page 52: Recommended Safe Distances
Electromagnetic compatibility Recommended Note: The deviating test values derived 17.3 from IEC 60601-2-24 are labelled in the safe distances table. However, these test values allow one outage with an alarm while the test values The device is designed for use in an electro- according to DIN EN 60601-1-2 do not magnetic environment in which HF disrup- allow any outages. - Page 53 Electromagnetic compatibility Transmitter Safe distance according to transmitter frequency m rated power 150 kHz to 80 MHz ¹ 80 MHz to 800 MHz 800 MHz to 6 GHz ¹ in W 1.2√P 1.2√P 2.3√P 0.01 0.12 0.12 0.23 0.38 0.38 0.73 7.27 ¹...
-
Page 54: Instructions For Use For Accessories
Instructions for use for accessories 18 Instructions for use for Staff call interface lead 18.2 CP (8718030) accessories Connect device to the staff call system Interface lead 12 V 18.1 CP (8718020) The staff call system must comply with the requirements of VDE 0834. - Page 55 Instructions for use for accessories The device has two different staff call operating modes: Switched off Switched on Switched off operating alarm Static Alarm without off alarm *) Operation 1 sec. Dyn. Alarm without off alarm *) Operation * In “static without off alarm” mode, the staff call can be disabled by pressing the OK key.
-
Page 56: Ordering Data
Ordering data 19 Ordering data Art. no. Name plus 8717030 Perfusor® compact Accessories 19.1 plus Recommended accessories for the Perfusor® compact Original Perfusor® lines 19.1.1 Art. no. Name 8255172 Original Perfusor® line, made of PVC; 50 cm 8722960 Original Perfusor® line, made of PVC; 150 cm 8722862 Original Perfusor®... -
Page 57: Interface Lead
Ordering data Interface lead 19.1.2 Art. no. Name 8718020 Interface lead 12 V CP 8718030 Interface lead staff call CP Syringes 19.1.3 Art. no. Name 8728615 Original Perfusor® syringe, 20 ml 8728623 Original Perfusor® syringe, 20 ml with needle 8728801F-06 Original Perfusor® syringe, 50 ml, protected against light, yellow with filter needle 8728810F-06 Original Perfusor®... -
Page 58: Index
Index Drive head 14 Drug database 19, 29 Abbreviations 7 Accessories 13, 54, 56 Administering bolus 28 Electrical connection 13 Alarm levels 24 Electromagnetic compatibility 47 Alarms 12, 18, 34 Electromagnetic immunity 49 Alarm status (display) 18 Electromagnetic interference emissions 48 Alarm times 43 Ending the infusion 32 Enteral nutrition 13... - Page 59 Set-up 11, 22 Soft limits 30 Main menu 19 Software 11 Mains connection 22 Maintenance 37, 38 Stacking 11 Manual bolus 28 Staff call 12, 44 Menu structure 19 Standby 27 Stand clamp 15, 22 Starting and stopping the infusion 27 Night mode 20, 23 Start-up 11, 22 Night schedule 21, 25...
- Page 60 Manufactured by: Distributed by: B. Braun Melsungen AG B. Braun Melsungen AG 34209 Melsungen Hospital Care Division Germany 34209 Melsungen Tel +49(0) 56 61 71-0 Germany www.bbraun.com Tel +49 (0) 56 61 71-0 www.space.bbraun.com Fax: +49 (0) 56 61 71-20 44 www.bbraun.com...
Need help?
Do you have a question about the Perfusor compact plus and is the answer not in the manual?
Questions and answers