Advertisement
Platinum Range
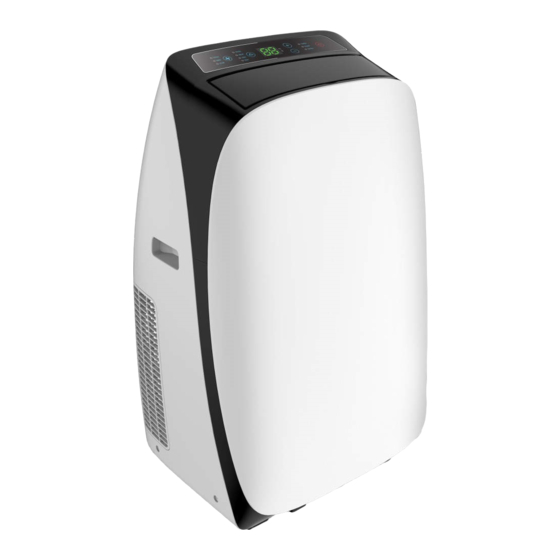
PLAC12000HP
PORTABLE AIR CONDITIONER WITH HEAT PUMP
USER MANUAL
HIGH
COLL
MID
HEAT
LOW
DRY
FAN
C
F
TIMER
SLEEP
SWING
Thank you for choosing ElectrIQ.
Please read this user manual before using this innovative Air Conditioner and
keep it safe for future reference.
Visit our page www.electrIQ.co.uk for our entire range of Intelligent Electricals
Page 1 of 18
Advertisement
Table of Contents

Related Manuals for ElectrIQ Platinum Series


Summary of Contents for ElectrIQ Platinum Series
- Page 1 SLEEP SWING Thank you for choosing ElectrIQ. Please read this user manual before using this innovative Air Conditioner and keep it safe for future reference. Visit our page www.electrIQ.co.uk for our entire range of Intelligent Electricals Page 1 of 18...
-
Page 2: Table Of Contents
CONTENTS 1.SAFETY INSTRUCTIONS …………………………………….. 2.FEATURES AND PARTS LIST ………………………….. 3. ACCESSORIES ……………………………………….…..4.INSTALLATION ………………………………….……………. 5.VENTING ………..………………………………….……………. 4.OPERATION AND SETTINGS ……………………………. 5.WATER-DRAINAGE …………………………………………. 6.MAINTENANCE ……………………………………………… 7.TROUBLE SHOOTING ………………………………….. 8.APPENDIX ……………………………………………………. Page 2 of 18... -
Page 3: 1.Safety Instructions
SAFETY INSTRUCTIONS Important! Carefully read the instructions before operating the unit This appliance is for indoor use only. Rating: This unit must be only connected to a 220-240 V / 50 Hz earthed outlet. Installation must be in accordance with regulations of the country where the unit is used. ... -
Page 4: 2.Features And Parts List
FEATURES AND PARTS LIST Features Designer inspired luxury model Louvres outlet closes automatically when shutting down the unit, this prevents dust and dirt entering the machine. LED screen, indicates temperature and operation mode LCD Remote control with temperature function and follow me function ... - Page 5 Parts list Front view Rear view 1. Air outlet grille (cold/hot) 10. Recessed handle 2. Control panel 11. Drain port 3. IR receiver 12. Air outlet (hot/cold) 4. Recessed handles 13. Lower air inlet filter frame 5. Front Panel 14. Drain (heat pump model only) 6.
-
Page 6: Accessories
Accessories: Parts Description Quantity Exhaust hose sash window adaptor type 1 set A (oval) type B (round) With window sider kit and bolt 1 piece Wall exhaust adapter Round adapter 1 piece Nut and bolt or plastic locking bolt 1 set (not supplied with all models) Remote control 1 piece... -
Page 7: 4.Installation
INSTALLATION 1. Installation Warning:Before using this unit, please keep it upright for at least 3-4 hours. This unit can easily be moved from one room to another. While moving the unit please note that it must always be kept upright and then placed on an even surface. 1. -
Page 8: 5.Venting
VENTING THE AIR CONDITIONER Your window kit has been designed to fit most standard horizontal sash and vertical sliding windows. However, it may be necessary to extend or reduce the size of the sliding adapter to match certain types of window. Please refer to fig. A and fig. B for minimum and maximum window openings. -
Page 9: 4.Operation And Settings
OPERATION AND SETTINGS This portable air conditioner boasts four functions: cooling, heating, dehumidifying and fan. The fan has three speeds: high, medium and low Temperature operating ranges are: 16-32 C for cooling and heating mode. The unit will also display operating function, temperature, fault diagnostic and protective functions on the LED screen. - Page 10 2. Remote control Drawing of Remote Control panel: 1. ON/OFF:Press this key to turn the unit on/off. 2. SET (UP): Press this key to turn up the temperature or adjust timer. 3. SET (DOWN): Press this key to turn down the temperature or adjust timer.
- Page 11 1. ON/OFF:Press this key to turn the unit on/off. The remote LCD screen will be on up when the unit is on 2. SET (UP): Press this key to turn up the temperature or adjust timer. 3. SET (DOWN):Press this key to turn down the temperature or adjust timer. On temperature setting mode it will increment or decrement with 1 Celsius degree at a time between 16-32⁰C On timer setting mode it will increment or decrement with 0.5 hours at a time between 0.5-10 hrs and 1...
- Page 12 temperature next to where the remote is placed. The follow function is disabled in fan mode. 11. Screen off: turns the display led lights off, ideal for night operation. Unit will work normal under the initial setting but with the led lights off. Press the key again and the led lights will turn on. 12.
- Page 13 3. Multi protective function 3.1 Anti-freezing protecting control: When the ambient temperature is low while in Cooling Mode, the compressor and water motor will stop working if the copper coil temperature reaches <2℃ for over 20 seconds. When the copper coil temperature increases to >8℃, the protection will be stopped automatically. 3.2、Water-full protection: When the water level in the internal water tank is surpassing the maximum level, the unit will alert automatically and “P1”...
-
Page 14: 5.Water-Drainage
WATER-DRAINAGE 1. Manual drainage: 1.1 When the internal water tank is full the unit will stop working and P1 will show on the LED screen. 1.2 Shut off the unit and unplug. Try not to move the model abruptly as this may cause water to spill out from internal water tank. -
Page 15: 6.Maintenance
Maintenance Cleaning Please shut off the unit and unplug from the mains before cleaning or performing any maintenance Clean the surface Clean the plastic housing with a duster or a soft wet cloth. Do not use chemical solvents (such as benzene, alcohol or gasoline) as they may cause irreversible damage. Air filter cleaning a) Clean the air filters every 2 weeks. -
Page 16: 7.Trouble Shooting
Troubleshooting Do not repair or disassemble the unit by yourself, unauthorized repair attempts will invalidate the warranty and may cause bodily harm. Trouble Reason Solution No power supply Power-on and turn on the unit. Water-full indicator illuminated Drain the internal water tank The unit does Timer function is active Cancel Timer function... -
Page 17: 8.Appendix
APPENDIX Disposal: Do not dispose this product as unsorted municipal waste. Collection of such waste must be handled separately as special treatment is necessary. Recycling facilities are now available for all customers at which you can deposit your old electrical products. - Page 18 ElectrIQ UK SUPPORT www.ElectrIQ.co.uk/support Please, for your own convenience, make these simple checks before calling the service line. If the unit still fails to operate call: 0871 620 1057 or complete the online form 1. Has the unit been standing upright for at least 2 hours? 2.
Need help?
Do you have a question about the Platinum Series and is the answer not in the manual?
Questions and answers