Table of Contents
Advertisement
Quick Links
Advertisement
Table of Contents

Subscribe to Our Youtube Channel
Related Manuals for Mio MiVue 82 Series


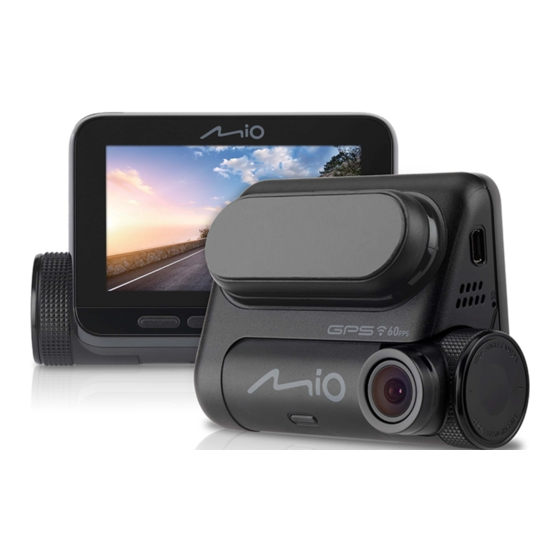
Summary of Contents for Mio MiVue 82 Series
- Page 1 User Manual MiVue...
-
Page 2: Table Of Contents
Precautions and notices ..............3 Getting to know your Mio ..............3 Using a memory card ................5 Formatting a card ...............5 Using your Mio in a vehicle ...............6 Turning your Mio on and off ..............8 Recording in driving mode ..............8 Continuous recording ..............8 Event recording ................9... - Page 3 Installing MiVue Manager ............20 Playing the recording files ............20 For more information ..............22 Caring for your device ..............22 About GPS ................23 Regulatory information .............24 CE ..................24 WEEE ................25 Safety precautions ..............25 About charging ..............25 About the charger ..............25 About the battery ..............26...
-
Page 4: Precautions And Notices
● A window mount is needed when using your Mio in a car. Make sure that your Mio is placed in an appropriate place, so as not to obstruct the driver’s view or deployment of airbags. - Page 5 ❻ and no reflective material appears near the lens. Parking indicator Glows in white when the system enters the parking ❼ mode. (This is applicable only when your Mio is in the smart parking detection mode.) Microphone Records sounds. ❽...
-
Page 6: Using A Memory Card
Do not apply pressure to the centre of the memory card. ✎ The memory card slot is not hot-swappable. Insert the memory card before powering on your Mio. DO NOT remove the memory card during recording. Turn the device off before removing the memory card. ✎... -
Page 7: Using Your Mio In A Vehicle
6/4. Use cable clips to secure the power cord so that it does not interfere with driving. To ensure the highest quality recordings, you are advised to place your Mio near the rear view mirror. - Page 8 > 3 cm CAUTION: Connect the power source to the cradle for powering. Do not power the device from both the cradle and the Micro-USB connector on the device.
-
Page 9: Turning Your Mio On And Off
Turning your Mio on and off Once the vehicle engine is started, your Mio automatically powers on. When you power on your Mio for the first time, follow the on-screen prompts to complete the following: Select your preferred language. Set up the correct date and time for your recordings. Press... -
Page 10: Event Recording
By default, if an event happens, such as a sudden impact, high speed driving, an aggressive turn or an accidental crash during continuous recording, the G sensor will prompt your Mio to start recording the event. The event recording will save the duration from seconds before the event until seconds after the event. -
Page 11: Parking Mode
5 minutes, depending on Auto Entry settings. For this mode, you must use an additional power source such as Mio Smart Box uninterruptible power cable which is sold separately. -
Page 12: Capture Mode
Parking mode. The parking recordings can be found in the “Parking” category for file playback. Capture mode Your Mio allows you to take a photo: press The photos can be found in the “Photo” category for file playback. Playback mode... -
Page 13: Safety Camera Alerts
Press to view the previous/next file. When viewing a photo, you can press to delete the file. When viewing a video, you can press to do the following: ● Play/Pause: Starts or pauses the playback. Move to Event: Moves the continuous recording to the “Event” category. ●... -
Page 14: Adding A Safety Camera
MiTAC does not warrant that all types and locations of safety camera data are available as cameras may be removed, relocated or new cameras installed. Occasionally, MiTAC may offer you updates of safety camera data. Visit the Mio website for available downloads and follow the instructions to complete update. -
Page 15: Getting Connected
✎ This feature is not available on all models. ✎ The WIFI connection between your Mio and smartphone is not Internet-enabled. Setting up a WIFI connection ✎ The MiVue Pro app is compatible with iOS 9.0 (and above) and Android 5.0 (and above) devices. -
Page 16: Customising The Settings
and paired with the MiVue Pro app. Once the devices are connected, the screen will display the main page ( Customising the settings To customise the system settings, press ✎ Not all setting items and options are available for all models. Item Description File Playback... - Page 17 Item Description ● LDWS: Select Beep or Voice to enable the Lane Departure Warning System (LDWS) function. The system will alert you when it detects that the GPS car speed is over 60 km/h and the car has strayed from its intended lane. ●...
- Page 18 Item Description ● Threshold: Sets the speed value for your Mio to start offering alerts. ● Cruise Speed Alert: Sets the limit for the cruise speed. When you drive at a cruise speed over the set value, you will receive alerts by your Mio.
- Page 19 Item Description ● LED Indicator: Turns on or off the parking indicator on the dash cam. (This is applicable only when your Mio is in the smart parking detection mode.) Video Recording ● Video Clip Length: Sets the length of each video clip for a continuous recording.
-
Page 20: Mivue Manager
● Version: Displays the software information. Format Formats a memory card. (All data will be erased.) MiVue Manager™ MiVue Manager is a tool for you to view the videos recorded on a Mio dash cam. ✎ Not all features are available for every model. -
Page 21: Installing Mivue Manager
(Windows or Mac) according to your computer's operating system. Playing the recording files Remove the memory card from your Mio and access the card on the computer via a card reader. You are advised to copy the recording files to your computer for backup and playback. - Page 22 Starts or pauses the playback. ❷ Changes the playback speed to 1/4x, 1/2x, 1x (default), 1.5x, or 2x. ❸ Mutes or unmutes the volume. ❹ Adjusts the volume level. ❺ Plays the video in full screen. ❻ Displays the playback progress. You can click on a point along the track bar to move ❼...
-
Page 23: For More Information
Opens the Settings Menu. The Settings items are described as follows: ❺ ● Change Language: Sets the display language of MiVue Manager. ● Change Skin: Sets the colour scheme of MiVue Manager. ● Check for Update: Checks if there is any new version of MiVue Manager. (Internet access is required for this feature.) ●... -
Page 24: About Gps
on portable devices with LCD panels may be used to help protect the screen from minor scratches. ● Never clean your device with it powered on. Use a soft, lint-free cloth to wipe the screen and the exterior of your device. ●... -
Page 25: Regulatory Information
Regulatory information For regulatory identification purposes, MiVue 82x series is assigned a model number of N631. Products with the CE marking comply with the Radio Equipment Directive (RED) (2014/53/EU) - issued by the Commission of the European Community. Compliance with these directives implies conformity to the following European Standards: ●... -
Page 26: Weee
Declaration of conformity Hereby, MiTAC declares that this N631 is in compliance with the essential requirements and other relevant provisions of Directive 2014/53/EU. WEEE This product must not be disposed of as normal household waste, in accordance with the EU directive for waste electrical and electronic equipment (WEEE – 2012/19/EU). -
Page 27: About The Battery
● Connect the charger to a proper power source. The voltage requirements are found on the product case and/or packaging. ● Do not use the charger if the cord becomes damaged. ● Do not attempt to service the unit. There are no serviceable parts inside. Replace the unit if it is damaged or exposed to excess moisture. - Page 28 Revision: R00 (7/2019) Trademark All brand and product names are trademarks or registered trademarks of their respective companies. Disclaimer Specifications and documents are subject to change without notice. MiTAC does not warrant this document is error-free. MiTAC assumes no liability for damage incurred directly or indirectly from errors, omissions, or discrepancies between the device and the documents.
- Page 29 MiTAC Europe Ltd www.mio.com...
Need help?
Do you have a question about the MiVue 82 Series and is the answer not in the manual?
Questions and answers