
Related Manuals for Clarke IBC25


Summary of Contents for Clarke IBC25
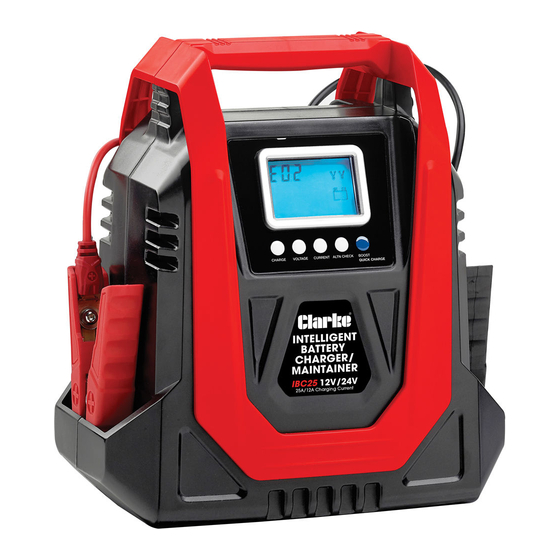
- Page 1 INTELLIGENT BATTERY CHARGER/MAINTAINER MODEL NO: IBC25 PART NO: 6267013 OPERATION & MAINTENANCE INSTRUCTIONS ORIGINAL INSTRUCTIONS LS0719 - ISS 1...
-
Page 2: Safety Symbols
Thank you for purchasing this CLARKE Battery Charger / Maintainer. Before use, read this manual thoroughly and follow all instructions given. 1. The IBC25 is designed for charging all types of 12V lead-acid and 24V lead- acid batteries, including WET (Flooded), MF (Maintenance-Free), EFB (Enhanced Flooded Battery), GEL, AGM (Absorbed Glass Mat) batteries. -
Page 3: Safety Instructions
WARNING: WEAR EYE PROTECTION, HAND AND CLOTHING PROTECTION. AVOID TOUCHING EYES WHILE WORKING WITH A BATTERY. SEE YOUR LOCAL CLARKE DEALER FOR ALL YOUR PPE REQUIREMENTS. SAFETY PRECAUTIONS FOR WORKING IN THE VICINITY OF A BATTERY 1. If battery electrolyte contacts skin or clothing, wash immediately with soap and water. -
Page 4: Charger Location
Have it checked and repaired if damaged. 9. Any repair must be carried out by the manufacturer or an authorized CLARKE repair agent in order to avoid danger. CHARGER LOCATION 1. Place the charger as far away from the battery as possible. -
Page 5: The Charging Process
THE CHARGING PROCESS STEP 1: DIAGNOSIS Check if the battery has connected with the charger and also check the battery voltage. STEP 2: DESULPHATION If battery voltage is too low, the program automatically generates a pulsing current to remove sulphate. STEP 3: ANALYSE Check if the battery voltage reaches to the minimum threshold after desulphation, and charging begins if the battery voltage is OK. - Page 6 OVERVIEW Parts & Service: 020 8988 7400 / E-mail: Parts@clarkeinternational.com or Service@clarkeinternational.com...
-
Page 7: Connecting To The Battery
CONNECTING TO THE BATTERY CAUTION: A MARINE (BOAT) BATTERY MUST BE REMOVED AND CHARGED ON SHORE. TO CHARGE IT ON BOARD REQUIRES EQUIPMENT SPECIALLY DESIGNED FOR MARINE USE. 1. Identify the polarity of battery posts. The positive battery terminal is typically marked by these letters or symbol (POS,P,+). -
Page 8: Operation
OPERATION 1. Connect the battery as described on page 8. 2. Plug in the mains plug and switch it on. 3. The charger will automatically detect the battery voltage (12V or 24V). 4. After 10 seconds the charger will begin charging the battery using the following mode 12V/5A or 24V/3.5A. - Page 9 ADVANCED CHARGING MODES The following modes are advanced charging modes that require your full attention before selecting. USING 12V BOOST WARNING: DO NOT USE BOOST MORE THAN TWO TIMES IN A 24-HOUR PERIOD. IF TWO BOOSTS CANNOT SUCCESSFULLY START YOUR VEHICLE, HAVE YOUR BATTERY REPLACED OR EVALUATED BY A LOCAL BATTERY STORE.
- Page 10 USING 12V ALTERNATOR CHECK ALTERNATOR % (12V ONLY) - 1. Connect the charger to the battery an shown on page 7 and switch on at the mains power supply NOTE: The battery must be installed in the vehicle. 2. Press and hold the ALTN CHECK button for 3 seconds. •...
-
Page 11: Troubleshooting
TROUBLESHOOTING ISPLAY AUSE OLUTION E01 (with The charger is overheating The charging will automatically pause buzzer) with the alarm sound. Do NOT cut off the power supply and the charger will work again when cooled down. 1) Open-circuit 1) Connect the red and black clamps to the battery posts 2) Dirty Battery Posts 2) Clean the battery posts... -
Page 12: Care And Maintenance
WARNING: ALWAYS BE SURE THE CHARGER IS UNPLUGGED BEFORE PERFORMING ANY MAINTENANCE OR CLEANING. ANY REPAIRS MUST BE DONE BY A QUALIFIED CLARKE SERVICE TECHNICIAN. 1. Wind up the leads when not in use. Examine the leads at regular intervals for damage and have them replaced if necessary. -
Page 13: Environmental Recycling Policy
It must be disposed of according to the laws governing Waste Electrical and Electronic Equipment (WEEE) at a recognised disposal facility. SPECIFICATIONS Model Number IBC25 Input Voltage 230V AC, ~ 50Hz Battery charging voltages: 12V & 24V DC... -
Page 14: Component Parts
COMPONENT PARTS Part Name Part Number Back Shell GTIBC2501 Front Shell GTIBC2502 Middle Shell GTIBC2503 Front Handle GTIBC2504 Back Handle GTIBC2505 Rubber Feet GTIBC2506 Display Panel GTIBC2507 LCD Surround GTIBC2508 Transparent Screen GTIBC2509 LCD Support GTIBC2510 PCB A GTIBC2511 PCB B GTIBC2512 5020 Fan GTIBC2513... -
Page 15: Declaration Of Conformity
DECLARATION OF CONFORMITY Parts & Service: 020 8988 7400 / E-mail: Parts@clarkeinternational.com or Service@clarkeinternational.com...
Need help?
Do you have a question about the IBC25 and is the answer not in the manual?
Questions and answers