
Related Manuals for Clarke IBC7


Summary of Contents for Clarke IBC7
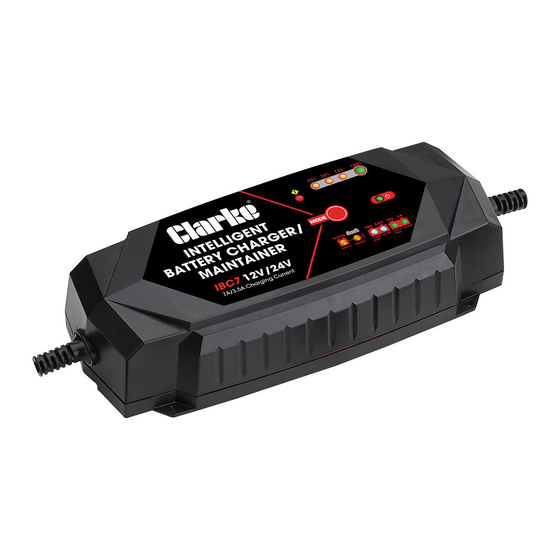
- Page 1 INTELLIGENT BATTERY CHARGER / MAINTAINER MODEL NO: IBC7 PART NO: 6267008 OPERATION & MAINTENANCE INSTRUCTIONS ORIGINAL INSTRUCTIONS GC0918 - ISS 1...
-
Page 2: Environmental Recycling Policy
Battery Charger will give you long and satisfactory service. GUARANTEE This CLARKE product is guaranteed against faulty manufacture for a period of 12 months from the date of purchase. Please keep your receipt as proof of purchase. -
Page 3: Safety Precautions
6. Never touch the negative and positive leads together. 7. Never attempt any repairs yourself. If you have a problem with your charger contact your local Clarke dealer or contact Service@Clarkeinternational.com 8. When charging is completed, ensure that the vehicle battery leads are secured to the proper terminals which should be clean, and lightly smeared with petroleum jelly to prevent corrosion. -
Page 4: Electrical Connections
ELECTRICAL CONNECTIONS WARNING! READ THESE ELECTRICAL SAFETY INSTRUCTIONS THOROUGHLY BEFORE CONNECTING THE PRODUCT TO THE MAINS SUPPLY. Before switching the product on, make sure that the voltage of your electricity supply is the same as that indicated on the rating plate. This product is designed to operate on 230VAC 50Hz. - Page 5 Output (charging) lead Charging lead positive clamp CHARACTERISTICS The IBC7 is designed for charging all types of 12V/24V lead-acid batteries including WET (flooded), GEL, MF (Maintenance Free), EFB (Enhanced flooded battery), and AGM (Absorbed Glass Mat) batteries. It is suitable for charging battery capacities from 14 to 200 Amp-Hours (12V) / 14 to 100 Amp-Hours (24V) and maintaining all battery sizes.
- Page 6 WALL MOUNTING The IBC7 has four external holes for mounting. Mount the charger in the desired location with M3 self-tapping screws. Make sure there are no obstructions behind the mounting surface. It is important to consider the distance of the charger mounting from the vehicle battery location.
- Page 7 PREPARATION 1. If necessary, remove the battery from a vehicle to charge it. 2. Always remove the grounded terminal from the battery first. 3. Ensure all accessories in the vehicle are switched off to prevent sparking. 4. Clean the battery terminals. Be careful to keep any corrosive matter from coming in contact with eyes.
- Page 8 WHEN THE BATTERY IS INSTALLED IN THE VEHICLE 1. Route the leads carefully to reduce the risk of damage by the bonnet, door, or engine parts. 2. Keep away from the fan blades, belts, pulleys, and other parts that can cause injury.
-
Page 9: The Charging Process
THE CHARGING PROCESS The IBC7 has a sophisticated computer system that performs a 7 - stage automatic charging cycle as follows: STEP 1: DIAGNOSIS Checks that the battery has connected with the charger and also checks the battery voltage. STEP 2: DESULPHATION If battery voltage is too low, this step automatically generates a pulsing current to remove sulphate. -
Page 10: Charging Settings
CHARGING SETTINGS The IBC7 has the following selectable charging settings: EXPLANATION In Standby mode, the charger is not charging or providing any STANDBY power to the battery. Energy Save is activated during this mode, drawing microscopic power from the electrical outlet. When selected, a green LED will illuminate. - Page 11 USING THE 12V/24V REPAIR MODE 12V/24V Repair is an advanced battery recovery mode for repairing idle, damaged, stratified or sulfated batteries. Not all batteries can be recovered. Batteries tend to become damaged if kept at a low charge and/or never given the opportunity to receive a full charge.
-
Page 12: Operation
OPERATION TO BEGIN CHARGING THE BATTERY 1. Verify the voltage and chemistry of the battery. 2. Confirm that the battery clamps are correctly connected or eyelet connectors secure and that the power plug is plugged into a power outlet. 3. All LEDs will flash once after starting and will go into the last memory mode automatically after 10 seconds. - Page 13 When the ERROR LED warning is flashing it denotes a potential error condition. Only use the charger after correcting the error. If the cause is not apparent, consult a qualified person such as your Clarke dealer. The following error warnings can occur.
-
Page 14: Care & Maintanence
CARE & MAINTANENCE This battery charger requires minimal maintenance. As with any appliance or tool, a few common sense rules will prolong its working life. WARNING: ALWAYS BE SURE THE CHARGER IS UNPLUGGED BEFORE PERFORMING ANY MAINTENANCE OR CLEANING. ANY REPAIRS MUST BE DONE BY A QUALIFIED SERVICE TECHNICIAN. -
Page 15: Troubleshooting
TROUBLESHOOTING Problem Cause Solution ERROR light flashes Battery not connected or Connect battery correctly. open circuit If unsuccessful have the battery tested by a The battery voltage is to low qualified technician. to accept a charge. The battery is wrongly connected (reverse polarity) Overload... -
Page 16: Component Parts
COMPONENT PARTS ESCRIPTION PCB-A PCB-B CT7000 clamp CT7000 steel hanging hook CT7000 top shell CT7000 bottom shell CT7000 Sealing ring 0-ring Input cable Outlet cable Parts & Service: 020 8988 7400 / E-mail: Parts@clarkeinternational.com or Service@clarkeinternational.com... -
Page 17: Specifications
SPECIFICATIONS Model Number IBC7 Input voltage / Current 220-240V, 50Hz, 1A Battery charging voltages: 12V and 24V Power Max 120W Output current 7A (12V), 3.5A (24V) Charging steps 8 steps, (smart charger) Charging Battery Capacity 14-200 Ah (12V), 14-100 Ah (24V) -
Page 18: Declaration Of Conformity
DECLARATION OF CONFORMITY Parts & Service: 020 8988 7400 / E-mail: Parts@clarkeinternational.com or Service@clarkeinternational.com... - Page 19 NOTES __________________________________________________________________________ __________________________________________________________________________ __________________________________________________________________________ __________________________________________________________________________ __________________________________________________________________________ Parts & Service: 020 8988 7400 / E-mail: Parts@clarkeinternational.com or Service@clarkeinternational.com...
Need help?
Do you have a question about the IBC7 and is the answer not in the manual?
Questions and answers