Table of Contents
Advertisement
Advertisement
Table of Contents

Subscribe to Our Youtube Channel
Related Manuals for Parker SciLog LabTec


Summary of Contents for Parker SciLog LabTec
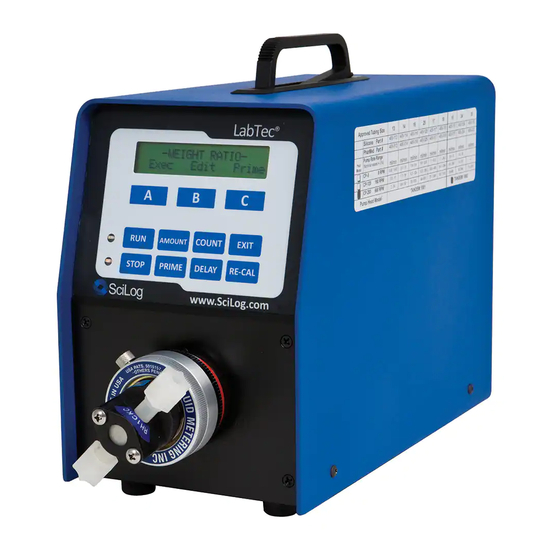
- Page 1 SciLog LabTec™ ® Installation, Operating & Maintenance Instructions...
- Page 2 ® ® Parker has a continuous policy of product development and although the Company reserves the right to change specification, it attempts to keep customers informed of any alterations. This publication is for general information only and customers are requested to contact our Process Filtration Sales Department for detailed information and advice on a product’s suitability for specific applications.
-
Page 3: Table Of Contents
Contents Introduction ........................... 6 Installation & Start-Up ....................... 7 Maintenance & Cleaning ......................... 7 LabTec™ System Specifications ....................8 Installation of USB Drivers ......................10 Quick Start: ‘Automated Weighing and Dilution of Food Samples for Bacteriological Analysis’ ........................ 11 Quick Start: ‘Dispensing by Volume’... - Page 4 Precautions READ this manual BEFORE operating or servicing this equipment. FOLLOW these instructions carefully. DO NOT allow untrained personnel to operate, clean, inspect, service or tamper with this equipment. ALWAYS DISCONNECT this equipment from the power source before cleaning or performing maintenance.
- Page 5 CONSERVEZ ce manuel pour future référence. DÉBRANCHEZ TOUJOURS cet équipement de la source de courant avant de nettoyer ou d’exécuter l’entretien. APPELEZ PARKER pour pièces détachées, renseignements et entretien. ATTENTION DÉBRANCHEZ TOUT COURANT DE CETTE UNITÉ AVANT DE FAIRE L’INSTALLATION, D’EFFECTUER L’ENTRETIEN, LE NETTOYAGE OU AVANT DE RETIRER LE FUSIBLE.
-
Page 6: Introduction
+1 805 604 3401 email: dhprocess@parker.com email: dhpsales.na@parker.com www.parker.com/dhpharma www.parker.com/dhsingleuse Parker customer service personnel will be able to serve you more efficiently if you have the following information: • Serial number and model name of the equipment • Installation procedure being used •... -
Page 7: Installation & Start-Up
Parker recommends a factory cleaning, testing and recalibration be done to your LabTec™ at least once a year, to maintain the accuracy of the unit and reduce your downtime. -
Page 8: Labtec™ System Specifications
Hardware Specifications Dimensions W: 5.75¨ (14.6 cm); Height 8.5¨ (21.2 cm); D: 11¨ (27.9 cm) Weight 14 lb (6.4 Kg) Enclosure Aluminium / Steel; Corrosion Resistant, Recessed Handle. 1. Tandem™ 1082 peristaltic pump head with 600-RPM motor Thick-walled (0.090¨) pump tubing: #15, 24 and #35. Flow Range: 59 to 2258 mL / min. - Page 9 Hardware Specifications Provides for foot / hand operated remote start / stop Footswitch Interface control of the dispensing system. ‘Printer’ Female DB9 connector for data collection with Printer or PC ‘S1’ Male DB9 connector for RS-232 connection to an electronic scale. ‘S2’...
-
Page 10: Installation Of Usb Drivers
Installation of SciLog Universal USB Drivers: ® Note: Administrative rights to your computer are required for this procedure Please follow the procedure below: • Find and connect the white USB thumb drive labeled SciDoc. • This will contain a folder labeled: SciLog Universal Driver V3.0.0. -
Page 11: Quick Start: 'Automated Weighing And Dilution Of Food Samples For Bacteriological Analysis
Quick Start: “Automated Weighing and Dilution of Food Samples for Bacteriological Analysis” Equipment: You will need the following items to get started: Parker Part N°. Description Quantity Any container 200-LABT-1682 LabTec™ CP-200 w/1082 Head 100-VIPER6 Mettler ICS Model (6 Kg x 0.1 g) - Page 12 1. For weight ratio applications such as this one, the only thing that must be setup prior to editing and running the program is the scale (or scale) that is in use. If purchased from Parker, this has already been done. If purchased separately, obtain the needed settings from Parker Technical Support.
- Page 13 Program Editing and Execution: 1. From the main menu, press “Up” or “Down” to scroll between the modes until you reach “WT RATIO”, and “Select” it. 2. From this screen, you can now “Prime” the system with fluid, or enter either an “Exec” (Execute) or “Edit”...
- Page 14 4. Press “Exec” key, select “Exec 1”, the LabTec™ will show the following display: SCALE INITIALIZATION Please Wait While the message is being displayed, the LabTec™ checks the scale communication and the following display is shown if all is well: WGT RATIO SET: 9.00 Press RUN When Ready Press the “RUN”...
- Page 15 Note: The following may affect your accuracy, and should be considered: 1. Parker suggests you use #24 tubing, and move the portion inside the pump 3-4 inches toward the discharge side of the pump periodically to avoid wearing it out. As the tubing becomes worn, your dilutions may take longer, and you may get debris in the diluent.
-
Page 16: Quick Start: 'Dispensing By Volume
6. Route the remaining tubing to the solution reservoir and attach it as appropriate. Note: If you purchased the LabTec™ with your aliquot sizes preprogrammed by Parker the calibrations have been done for you. If this is not the case, or you have performed a Factory Reset, you will need to edit the individual aliquots (Edit 1-10) as shown below. - Page 17 600 rpm motor and a ™ 1082 head is installed. If you have a different head, please refer to the manual or contact Parker for assistance. Each EDIT (1 – 10) allows a choice of tubing, and then accesses built-in master calibration curves.
- Page 18 Program Editing and Execution At this point, you need to consider the parameters of the dispensing that you are going to do. The following is a list of the various parameters available, and their defaults. Adjust these parameters based on the volume that you are dispensing. DISPENSE VOLUME: Defines the volume to be dispensed in milliliters.
- Page 19 3. Press “C” to select EDIT 1, and “C” again to select “DISP VOLUME”. Use the “A” or “B” keys to increase or decrease the selected volume to 100.00 mL. Then press “C” to select. DISP VOLUME: 100.00 Decr Select 4.
- Page 20 Note: The following may affect your accuracy, and should be considered: 1. Parker suggests you use #15 or 24 tubing, and move the portion inside the pump 3-4 inches toward the discharge side of the pump periodically to avoid excessive wear. As the tubing becomes worn, you will want to run the RE-CAL feature again.
-
Page 21: Quick Start: 'Dispensing By Weight
7. Route the remaining tubing to the solution reservoir and attach it as appropriate. Note: If you purchased both the LabTec™ and the scale from Parker, all the settings for both units have been configured. If the display shows “Scale Error, Press any key” after trying to initialize the scale, check Setup: Scale: Scale Manuf., and confirm the proper choice for the... - Page 22 Program Editing and Execution At this point, you need to consider the parameters of the dispensing that you are going to do. The following is a list of the various parameters available, and their defaults. Adjust these parameters based on the weight that you are dispensing. Consult Part C, Section 5.0, of the LabTec™ Manual to edit your weight dispensing parameters.
- Page 23 3. Press “C” again to select “DISP WEIGHT”. Use the “A” key to increase the selected weight to 200.00 mL. Then press “C” to select. WEIGHT 200.00gm Incr. Decr. Select 4. Next, use the “A” and “B” keys again to scroll to “SNIFFLE” and press “C” to select. Use the “A” key to increase this to 0.3, and press “C”...
- Page 24 Documentation The LabTec™ will output data to a printer or a PC at the completion of each dispense for archival purposes. The following is an example of that data, and the abbreviations used. 09/24/09; 16:42; LABT 0.11X; Weight; CW; Tubing=15; Units=psi; Exec 1; Weight set= 100.00G ; Count= 1;...
- Page 25 Note: The following may affect your accuracy, and should be considered: 1. Parker suggests you use #15 or 24 tubing, and move the portion inside the pump 3-4 inches toward the discharge side of the pump periodically to avoid excessive wear.
-
Page 26: Hardware Overview
Part A: LabTec™ Hardware: 1.0 Hardware Overview The LabTec™ has been designed to automate batch-dispensing of liquids from the low milliliter (0.5 mL) to liter range. The LabTec™ allows you to optimize the dispensing rate per aliquot as well as the dispensing precision and accuracy, while monitoring pressure if a fi er is in use. -
Page 27: Front Panel: Data Entry & Display
2.0 Front Panel: Data Entry & Display The front panel consists of a user interface, which includes an alphanumeric display and a membrane keypad to select operational modes and alarm settings. The display is a two line, 20 character each, liquid crystal display (LCD). The display is backlit to allow easy viewing over a wide range of lighting conditions. -
Page 28: Back Panel: Interface Options
External I/O Temperature The LabTec™ back panel provides interfacing ports for: • Parker Printer (P/N: 080-095) or PC RS-232 connection: Female DB9, labeled “Printer”. • Electronic Scale: Male DB9, labeled “S1”. (S2 and S3 are not utilized in the LabTec™.) •... - Page 29 3.1 Printer Port The LabTec™ can be connected to a PC for data collection or to a Parker Printer via the female DB9 RS-232 port labeled “Printer”. You need a Parker RS-232 cable (P/N 080-073) to connect to a PC for data archival.
- Page 30 3.8 External I/O Connector DB37 connector used to interface with various devices on other Parker Lab System models. It is used on the LabTec™ to interface with a foot switch (P/N: 080-059) and allows remote Start / Stop control of the LabTec™.
-
Page 31: Dual Channel Peristaltic Pump Head
The peristaltic pump head is specifically designed for use with the LabTec™ system. The Parker pump heads (models 1082 & 1081) will provide you with rugged reliabili- ty as long as common sense maintenance and good quality pump tubing are used. For most dispens- applications, you should be using the 1082 (P/N: 080-1082) together with either #24 or #15(thick- walled) silicone pump tubing. - Page 32 Pump Head Installation 1. Identify the front and back of the . Two 8-32 mounting cap screws, as well as the pump shaft tang that extends from the back of the pump head. 2. Facing the front of the , open the pump head by moving the black lever 180° to the left.
- Page 33 Pump Tube Installation Note: Do NOT mount or dismount the pump head while the LabTec™ is powered. Do NOT change pump tubing while the LabTec™ is powered. When using both upper and lower pump channels simultaneously, the same type of tubing should be used in each channel.
-
Page 34: Magnetic Gear Pump Head: Model 201
Any particulates or abrasives will rapidly wear down the rotating gears and will decrease pumping capacity. A gear replacement kit for the 201 (P/N: 080-320) is available from Parker. Note: Dispensing liquids with a viscosity greater than 1000 centipoises should be avoided. -
Page 35: Fmi Piston Pump Heads: General Information
6.0 FMI Piston Pump Heads: General Information The LabTec™ FM-200 and FM-520 pumps use rotating, reciprocating piston pump heads of various sizes. In this style of pump head, the rotating piston moves to and from inside a cylinder; sucking in fluid at the inlet while transferring and releasing the fluid at the outlet. - Page 36 6.2 FMI Pump Heads: Installation The following are directions to mount a FMI pump head on a LabTec™ controller. If you purchased the LabTec™ controller with a FMI pump head already mounted, you can disregard these directions. However, if you purchased your FMI pump head separately, you will need to mount the pump head.
- Page 37 6.4 FMI Pump Heads: Cleaning Cleaning of Pump Head: Routine flushing with solvent before shutdown will work for most applications. Set the LabTec™ for maximum pump speed, let the pump run until solvent appears clear at discharge port. This should be for a minimum of 2 minutes. Do not leave process material in the pump head overnight.
-
Page 38: Pressure Sensor Installation
® sensors re easy to change when the need arises, and are readily available from Parker in packs of 5. They may be sanitized using several methods, CIP with NaOH or alcohol, autoclaved up to twice, or gamma irradiated. -
Page 39: Part B: Labtec™ Software
Part B: LabTec™ Software 1.0 Software Overview: Main Menu The main menu of the LabTec™ consists of five (5) operational modes as shown on the next page. By using the “Up” and “Down” keys, one can readily scroll through the main menu. Press the “Select” key to enter a chosen operational mode, i.e. - Page 40 - WEIGHT - WGT FACTOR Mode Select DOWN SELECT DOWN SELECT Mode Select - SETUP - SCALE MANUF. SCALE MANUF. METLER DOWN SELECT Mode Select T= 0.00 p1=_ _ . _ DOWN SELECT Mode Select WEIGHT - WEIGHT DISPENSE - - EDIT 1 - - WEIGHT - DISP WEIGHT DOWN...
-
Page 41: Weight Ratio
2.0 Weight Ratio Mode: Edit Menu Mode Select WT RATIO DOWN SELECT SELECT - WEIGHT RATIO - EXEC EDIT PRIME EDIT - EDIT 10 - SELECT - EDIT 1 DOWN SELECT DOWN SELECT SELECT SELECT WGT FACTOR: 9:00 - WEIGHT - WGT FACTOR... - Page 42 2.0 Weight Ratio: Weight Ratio Dispensing; Edit SUMMARY: In the Weight Ratio Dispensing mode, the LabTec™ provides automated sample weighing and sample dilution. With this operational mode, the LabTec™ must be connected to an electronic, top-loading scale. The SETUP: Scale sub mode provides electronic scale options, i.e.
- Page 43 2.1 Weight Ratio Mode: Execute Menu Mode Select WT RATIO DOWN SELECT SELECT - WEIGHT RATIO - EXEC EDIT PRIME EXEC - EXEC 1 - DOWN SELECT SELECT SCALE INITIALIZATION Please Wait DOWN WGT RATIO SET: 9:00 Please RUN when Ready ...
-
Page 44: Volume Dispense Mode: Edit
3.0 Volume Dispense Mode: Edit Menu Mode Select VOLUME DOWN SELECT SELECT - VOLUME DISPENSE - EXEC EDIT PRIME EDIT - EDIT 10 - SELECT - EDIT 1 DOWN SELECT SELECT DOWN SELECT SELECT DISP VOL: 10:00 - VOLUME - DISP VOLUME INCR... - Page 45 / motor / tubing combination. Once optimized and calibrated, the LabTec™ dispenses user-programmable batch volumes with dependable precision and accuracy. Note: If you requested pre-configured aliquots from Parker, then the LabTec™ was delivered to you optimized, calibrated and ready for use.
- Page 46 3.2 Volume Dispense Mode: Execute Menu Mode Select VOLUME DOWN SELECT SELECT - VOLUME DISPENSE - EXEC EDIT PRIME EXEC - EXEC 1 - DOWN SELECT SELECT VOLUME SET: 10.00 mL Press RUN when Read 2.0 mL 0.0 mL Alternate screens when...
- Page 47 Again, a simple optimization and RE-CAL, and you’re done. If you have not requested Parker to pre-configure and optimize the dispensing aliquots for you, or are editing a new one, you need to confirm the aforementioned settings.
-
Page 48: Weight Dispense Mode: Edit
4.0 Weight Dispense Mode: Edit Menu Mode Select WEIGHT DOWN SELECT - WEIGHT DISPENSE - EXEC EDIT PRIME EDIT - EDIT 10 - SELECT - EDIT 1 DOWN SELECT SELECT DOWN SELECT SELECT WEIGHT: 100:00gm - WEIGHT - DISP WEIGHT INCR DECR SELECT... - Page 49 4.0 Weight Dispense Mode: Edit Menu, Continued SUMMARY: In the Weight Dispense mode, the LabTec™ is connected to an electronic, toploading scale while dispensing by weight. The SETUP: Scale submenu provides electronic scale options, i.e. scales that can be interfaced with the LabTec™: Mettler, Ohaus, and Sartorius. The selected scale is connected to port S1 on the rear panel of the LabTec™.
- Page 50 4.1 Weight Dispense Mode: Execute Menu Mode Select WEIGHT DOWN SELECT - WEIGHT DISPENSE - EXEC EDIT PRIME EXEC - EXEC 1 - DOWN SELECT SELECT SCALE INITIALIZATION Please Wait DOWN WEIGHT SET: 100.00gm Please RUN when Ready ...
-
Page 51: Setup
5.0 Setup Mode Select SETUP DOWN SELECT SELECT SELECT - SCALE - SCALE MANF. - SETUP - SCALE SCALE MANF: METLER DOWN SELECT DOWN SELECT EDIT - CLOCK - TIME OF DAY TIME: 12:00 - SETUP - CLOCK SELECT INCR DECR... - Page 52 ETHERNET: Allows setting of the IP Address, Subnet Mask and Gateway values for Modbus TCP / IP communication via the Ethernet Port. Modbus communication not available at the time of this printing. PRINTER: Select communications parameters for Parker printer (P/N 080-095) or PC. Default settings are Print Time (Default = 30 sec.), Type (Seiko), Baud Rate (9600), Stop Bits (2), Parity (None),...
- Page 53 UNITS: Select from: .001 gm, .01 gm, 0.1 gm, Kg, T, Lbs, OzT, Oz, C, Dwt. Default = .01 gm. A Mettler Toledo ICS425 series scale is the most frequently purchased scale sent with the system. If a different scale is required, please contact Parker for configuration information. ...
- Page 54 You will also need P/N 080-072ICS Cable, Mettler Balance, ICS M-12. Scales purchased with the system through Parker will be configured and tested to- gether with the LabTec™ as a system at the factory.
- Page 55 5.2 Setup: Clock - SETUP - CLOCK DOWN SELECT SELECT SELECT TIME: 12:00 - CLOCK - TIME OF DAY INCR DECR SELECT DOWN SELECT DOWN SELECT PRINT: TIME OF DAY - CLOCK - PRINT ENABLE INCR DECR SELECT...
- Page 56 5.3 Setup: Test Mode: - SETUP - TEST MODE DOWN SELECT SELECT SCALE ERROR SCALE INITALIZATION Hit Any Key Please Wait STAR KEY STAR KEY - TEST - 10% 00000 - TEST - ANALOG - TEST - PRESSURE 00.0 00.0 00.0...
- Page 57 - PRINT - PARITY PRINTER: Allows the setting of RS-232 communication parameters needed for connection to a Parker serial printer or to a PC for data collection. These settings control the output for both the Printer and USB Ports. PRINT TIME: Controls how fast the LabTec™ sends data points in Minutes: Seconds. Max is 30:00 min- utes;...
- Page 58 5.6 Setup: Pressure Sensor - SETUP - PRESSURE SENSOR DOWN SELECT SELECT PRESSURE: RANGE PRESSURE RANGE: 60.0 DOWN SELECT DOWN SELECT DOWN PRESSURE: UNITS PRESSURE UNITS: psi DOWN SELECT DOWN SELECT DOWN PRESSURE: SOURCE ...
- Page 59 Note: Do not Zero P1, P2 or P3 unless a sensor is connected. This will cause the sensor to read 0.0 all of the time, regardless of the actual pressure. FILTER: This feature filters out the pulsations in the pressure signal due to the peristaltic nature of the pump head.
- Page 60 5.8 Setup: Pump - SETUP - PUMP DOWN SELECT SELECT SELECT KEY BLEEP: - PUMP - KEYPAD BLEEP DOWN SELECT DOWN SELECT DOWN ARE YOU SURE? SELECT - PUMP - FACTORY RESET EXIT DOWN SELECT ...
- Page 61 5.8 Setup: Pump, continued: SETUP: Pump provides configuration of global settings related to the pump. Generally, the default values here do not need to be changed. Any changes required for a particular system will be made at the factory, and would only need to be modified if a “Factory Reset” is performed. KEYPAD BEEP: Determines if the buttons “beep”...
-
Page 62: Data Acquisition
USB driver appear at the beginning of this manual. The LabTec™ Printer Port is required for use with a Parker thermal serial printer. By using both ports, the data can be simultaneously captured on a PC and a Printer. - Page 63 6.2 LabTec™ SciDoc Data Collection Software: SciDoc is a software package that captures the data output of the LabTec™ and places it in an Excel spreadsheet. It consists of a copy of WinWedge32 from TalTech Inc. and a custom spreadsheet with built in macros.
- Page 64 Clicking on OK leaves the operator this screen, ready to start collecting data from the LabTec™. When ready, press Exec on the LabTec™, and then RUN. The data will automatically be placed in the cells of the spreadsheet. The text box in the upper left of the spreadsheet contains the header information, listing the Mode, the date and time, all operating parameters, alarm settings and alarm limits.
- Page 65 LabTec™ to PC: For PC Connections via the Printer Port a Parker RS-232 Cable (P/N: 080-073) is needed. When not using the Parker printer, this allows process data to be “dumped” into a PC for archiving. The list of settings below must match those in Setup: Printer of the LabTec™, and Print Delay should be set to “0”.
-
Page 66: Part C: Labtec™ Dispensing Applications
DEMICAP P/N: ZESGB-020-HH-PS3, 1500 to 2000 liters of media can be dispensed with a single filter cartridge. However, the actual filtration capacity is heavily dependent on the particulate load of the solution to be filtered. Your Parker Territory Manager can help identify the filter suited for your application. - Page 67 1.2 Scale Installation: In the Weight Ratio Dispensing mode, the LabTec™ must be connected to a top loading electronic scale. The scale parameters which are relevant to the particular scale must be entered and stored in the scale’s memory. Carefully check that all required parameters have been entered and accepted by the scale.
-
Page 68: Weight Ratio Dispensing How To Get Started
If a data printout is desired, connect the cable (P/N: 080-096) between the LabTec™ “Printer” port and the Parker printer (P/N; 080-095). In the LabTec™ Setup: Printer submenu, make sure all the printer communications parameters have been entered. Turn on the printer, in the LabTec™ select the Weight Ratio mode, then press “Exec”... - Page 69 Place the sample bag or container onto the scale and underneath the dispensing tip. Press “RUN” key or the foot switch. The LabTec™ will show the following display: REMOVING TARE WEIGHT Please Wait This display is followed by: Press RUN When SAMPLE IS IN VESSEL Place the sample into the sample bag or container, only an approximate sample weight is needed.
- Page 70 2.1 Weight Ratio Dispensing: Parameter Guide, 1082 Silicone: #15 & #24 The following information should be used as a general guide in selecting optimal dispensing parameters: This data was collected with a 600 RPM LabTec™ Dispenser mounted with a 1082 pump head;...
- Page 71 2.2 Weight Ratio Dispensing: Parameter Guide, Magnetic Gear Pump: The following information should be used as a general guide in selecting optimal dispensing parameters. This data was collected with a 3400-RPM LabTec™ Dispenser mounted with a 201 Micropump Head. A check valve (P/N: 400-530) was used as a dispensing spout. The “Slow Factor”...
-
Page 72: Dispensing By Volume: General Considerations
Head provides a faster dispensing capability. However, the 201 Micropump Head is not recommended for solutions containing particulates or shear sensitive solutions. Note: If you requested a custom calibration from Parker, then the LabTec™ was delivered to you calibrated and is ready for use. -
Page 73: Dispensing By Volume: How To Get Started
4.0 Dispensing by Volume: How to get started Select your pump tubing; use #24 or #15 Silicone tubing if you have a 1082 peristaltic pump head. Select #24 tubing if you intend to dispense aliquots larger than 10 mL, use #15 pump tubing if you intend to dispense aliquots smaller than 10 mL. - Page 75 4.1 Dispensing By Volume: Parameter Guide, 1082: Silicone: 15 & 24 The following information should be used as a general guide in selecting optimal dispensing parameters: This data was collected with a 600 RPM LabTec™ Dispenser mounted with a 1082 pump head;...
- Page 76 4.2 Dispensing By Volume: Parameter Guide, 1081 PharMed: #13, 14, 16, 25, & 17 The following information should be used as a general guide in selecting optimal dispensing parameters This data was collected with a 600 RPM LabTec™ Dispenser mounted with a 1081 pump head;...
- Page 77 4.3 Dispensing By Volume: Parameter Guide, Magnetic Gear Pump: 201 Micropump Head The following information should be used as a general guide in selecting optimal dispensing parameters. This data was collected with a 3400 RPM LabTec™ Dispenser mounted with a 201 Micropump Head.
-
Page 78: Dispensing By Weight: How To Get Started
5.1 Dispensing By Weight: How to Get Started If a data printout is desired, connect the cable (P/N: 080-096) between the LabTec™ “Printer” port and the Parker printer (P/N; 080-095). In the LabTec Setup: Printer submenu, make sure all the ®... - Page 79 Press “Exec” key, select “Exec 1”, the LabTec™ will show the following display: SCALE INITIALIZATION Please Wait While the message is being displayed, the LabTec™ checks the scale communications parameters and the following display is shown: WEIGHT SET: 25:00 G Press RUN When Ready Place the sample bag or container onto the scale and underneath the dispensing tip.
- Page 80 5.2 Dispensing By Weight: Parameter Guide, 1082; Silicone: 15 & 24 The following information should be used as a general guide in selecting optimal dispensing parameters: This data was collected with a 600 RPM LabTec™ Dispenser mounted with a 1082 pump head;...
- Page 81 5.3 Dispensing By Weight: Parameter Guide, Magnetic Gear Pump: The following information should be used as a general guide in selecting optimal dispensing parameters. This data was collected with a 3400 RPM LabTec™ Dispenser mounted with a 201 Micropump Head. A check valve (P/N: 400-530) was used as a dispensing spout. The “Slow Factor”...
-
Page 82: Care And Use Of Sterilizing Filters
6.0 Care and Use of Sterilizing Filters Many laboratories use sterilizing filters instead of autoclaving to sterilize media. Using filters instead of autoclaving increases productivity in the laboratory and protects technicians from handling hot and / or heavy containers. Autoclaving is very labor intensive and also uses a great deal of energy. When using filters, as with any technology, there is a protocol you should develop and always should be followed to safely and effectively implement your application. -
Page 83: Part D: Troubleshooting
Troubleshooting the Filters: 1. Your filter should be changed on a regular basis. Try to choose a filter size that will accommodate the total volume you need filtered in a day, the flow rate you need through the filter. 2. - Page 84 When this occurs: Check the following: Possible solution 1. If it occurs with no tubing in the head, call Parker. You may need Does “Check Pump Head” occur a new motor. with no tubing in the head? When “Check Pump Head” error occurs with your peristaltic head.
- Page 85 When “Check Pump Head” error oc- curs with your piston or magnetic gear 2. Are you pumping a gritty solution, 2. If it still won’t turn, contact Parker head. or one that can crystallize if allowed to arrange an RGA to send your...
- Page 87 “Device Error”, refer to the Com Port. the previous troubleshooting subject for help with Com Port errors. Parker Hannifin Corporation Parker Bioscience - North America 2340 Eastman Avenue Durham Road Oxnard, California, USA 93030 Birtley, Co. Durham toll free: 877 784 2234...
- Page 88 Notes: ................................................................................................................................................................................................................................................................................................................................................................................................................................................................................................................................................................................................................................................................................................................................................................................................................................................................................................................................................................................................................................................................................................................................................................................................................................................................................................................................................
- Page 89 Notes: ................................................................................................................................................................................................................................................................................................................................................................................................................................................................................................................................................................................................................................................................................................................................................................................................................................................................................................................................................................................................................................................................................................................................................................................................................................................................................................................................................ ...
- Page 90 Parker Hannifin Manufacturing Ltd Parker Hannifin Corporation © 2015 Parker Hannifin Corporation. All rights reserved. Bioscience - Europe Bioscience - North America IOMI-AK2_001_RevB Durham Road 2340 Eastman Avenue Birtley, Co. Durham Oxnard, California, USA 93030 DH3 2SF, England toll free: 877 784 2234...
Need help?
Do you have a question about the SciLog LabTec and is the answer not in the manual?
Questions and answers
My computer is down. Can I manually empty the tubing using the key pad on the pump? The pump has power.
Yes, you can manually operate the Parker SciLog LabTec pump using the keypad in Manual Mode. You can adjust the pump speed by pressing the "Amount" key, making the necessary adjustment, and pressing "Select." This allows you to empty the tubing without needing a computer.
This answer is automatically generated