ENERGY KINETICS EK1 Owners And Installation Manual
Standard boiler, oil heat edition
Hide thumbs
Also See for EK1:
- Manual (57 pages) ,
- Installation & service manual (38 pages) ,
- Owners and installation manual (37 pages)
Table of Contents
Advertisement
This product meets the Energy
®
Star
guidelines for efficiency
INSTALLER:
PLEASE HANG THIS INSTRUCTION MANUAL AND ASSESSORY INSTRUCTIONS VISIBLY
NEXT TO THE BOILER USING THE SUPPLIED POUCH.
CONSUMER: PLEASE RETAIN THIS INSTRUCTION MANUAL AND ACCESSORY INSTRUCTIONS FOR
FUTURE REFERENCE.
Standard Boiler
Owner and Installation Manual
Oil Heat Edition
Manufactured By:
Energy Kinetics, Inc.
51 Molasses Hill Road
Lebanon, NJ 08833
(908) 735-2066
www.energykinetics.com
TWENTY NINTH EDITION – JULY 2005
®
ASME certified by EKI.
Certificate plate is under the
jacket on the steel vessel.
Advertisement
Table of Contents

Subscribe to Our Youtube Channel
Related Manuals for ENERGY KINETICS EK1


Summary of Contents for ENERGY KINETICS EK1
-
Page 1: Standard Boiler
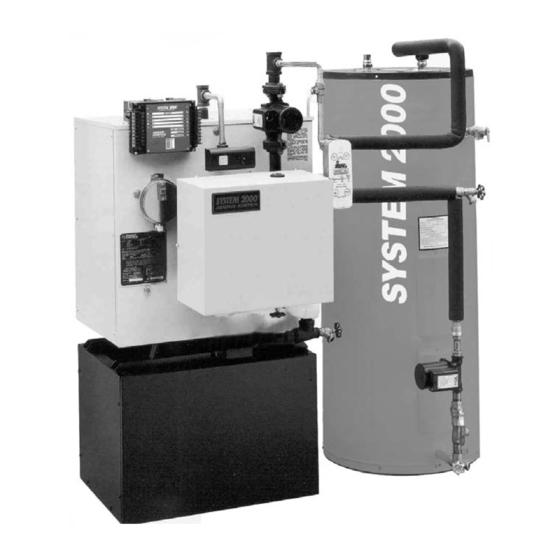
Standard Boiler Owner and Installation Manual Oil Heat Edition Manufactured By: ASME certified by EKI. This product meets the Energy Energy Kinetics, Inc. Certificate plate is under the ® Star guidelines for efficiency jacket on the steel vessel. 51 Molasses Hill Road... -
Page 2: Record Of Installation
RECORD OF INSTALLATION INSTALLER NAME: INSTALLER ADDRESS: INSTALLER CITY, STATE: DATE INSTALLED: NOTES: INSTALLER NOTE: ALL INSTALLATIONS MUST BE MADE IN ACCORDANCE WITH ALL STATE AND LOCAL CODES THAT MAY DIFFER FROM THIS MANUAL. All installations must be made in accordance with all State and Local Codes, which may differ from this manual and in accordance with the following Codes, as applicable: N.F.P.A. -
Page 3: Table Of Contents
Table of Contents: Page Topic Page Topic Record of Installation Wiring and Controls Table of Contents Electrical Connection - Line Voltage Please read this first Line Voltage Wiring Diagram SYSTEM 2000 Boiler - Principle of Operation Low Voltage Wiring Digital Energy Manager - Principle of Operation Low Voltage Wiring Diagram Receiving and Unpacking Install Digital Manager... -
Page 4: System 2000 Boiler - Principle Of Operation
The System 2000 EK1 Boiler can heat water up to 120,000 BTU’s per hour and the EK2 Boiler up to 240,000 BTU/hr. -
Page 5: Digital Energy Manager - Principle Of Operation
Fire Protection Association Bulletin NFPA Installation of Oil Burning Equipment and all applicable codes. Installation Clearance to Clearance for Service Clearances Combustibles Minimum Recommended FRONT 12” 12” 18” EK1 BACK 6” 12” 18” OR MORE EK2 BACK 6” 18” 24” OR MORE RIGHT SIDE W/ FLUE 6” 12” 15”... -
Page 6: Combustion Air
35 feet. For longer runs up to 40 feet with up to five 90 degree elbows, immediately increase pipe size by 1", to 3" for EK1 and 4" for EK2. An unglued or Tek-screw joint allows the door to swing down when the air inlet pipe is disconnected. -
Page 7: Chimney Venting
The metal liner diameter and length should be as recommended by the metal liner manufacturer. Corrugated metal liners should be at least 5" diameter for EK1 and 6" diameter for EK2. Connection of a flexible metal liner directly to the flue collar of the boiler is an acceptable connection method and is recommended. -
Page 8: Fuel System
Oil Burner Settings: EK1 Boilers are shipped from the factory preset for 0.85 GPH firing rate and EK2 Boilers are shipped from the factory preset for 1.40 GPH firing rate. The SYSTEM 2000 Boiler can be fired over a range of firing rates to suit the needs of the application. -
Page 9: General Assembly
When the stand is level, the pitch is correct and the front of the boiler will be higher than the back. The Boiler Stand or EK1 System 2000 Boiler is pitched 1/4" Block Base and the EK2 System 2000 Boiler is pitched 7/16". -
Page 10: Piping
Zone Control By Valve: The SYSTEM 2000 Boiler is designed to provide multi-zone control of the heating system and domestic hot water. Energy Kinetics recommends and supplies two wire, full port, 24 volt zone valves for control of each heating zone. A system with a single heating zone still requires a zone valve to provide control for preheat of unit and to maintain minimum temperature during operation. -
Page 11: Heat Exchanger And Bypass
NOTICE: The heat exchanger is piped at the factory and its location and orientation should not be altered without consulting with Energy Kinetics. The heat exchanger is mounted in the bypass line at the boiler with a ball valve. Systems without a heat exchanger are piped at the factory with the bypass line and ball valve. The bypass valve must be at least partially open for the boiler to operate properly. -
Page 12: Electrical Connection - Line Voltage
Set thermostat heat anticipators to 0.1 amps (or "gas" if gas/electric option). Call Energy Kinetics to request alternate low voltage wiring diagrams to handle special situations such as air handler wiring, heat pump wiring, isolation relays for thermostats, and isolation relays for heat motors or circulators, etc. -
Page 13: Low Voltage Wiring Diagram
The Digital Energy Manager is designed for hot water and up to four (4) heating zones. Use Energy Kinetics supplied zone valves with two wire connections. For more than four heating zones, use Energy Kinetics expanded 10 or 15 zone Digital Energy Manager, or call Energy Kinetics for alternatives. -
Page 14: Hydronic Control Settings
Control Model No. Normal Setting HIGH LIMIT AQUASTAT White Rodgers Model 1145-42 Maximum (Located front and center of boiler) Energy Kinetics PN: 10-0415 Differential: 215 – 205 HOT WATER TANK Normal THERMOSTAT Energy Kinetics PN: 10-0414 (To suit individual installation) -
Page 15: Oil Burner Operation
Oil Burner Operation: NOTICE: For reliable operation, set Air-Fuel mixture conservatively based on installation conditions. CO reading should be taken through 1/4" test port in the puff switch opening just underneath burner. Use ¼” steel or copper sample tube and extend at least eight (8) inches into front cover to obtain accurate readings. Smoke test and stack temperature should be taken at flue outlet. -
Page 16: Security System Interface Wiring
Figure 4B. NOTICE: Home security systems may require an “abort delay” of one second to avoid a transient signal on Manager power-up. If an abort delay is not available, use Energy Kinetics System Monitor (provided separately part # 10-0168). -
Page 17: Digital Manager Operation Summary
Digital Manager Operation: WARNING: Do Not Jump! If you apply 24VAC to any digital sensor lead with the sensor connected to the Manager, you will burn out both the sensor and the Manager in less than a second. NOTE: The Manager cannot lockout the primary control on the burner. - Page 18 1) Look at the Manager 2) See what it is telling you is supposed to be happening. 3) See if it is happening, and if it is not, find out why (see below). 4) If you do not find the problem, perform the 2 Minute Digital Manager Diagnostic to check all Manager functions. These are input lights.
-
Page 19: Manager
1, 2, and 3. If problem persists, call technical support or replace manager. Note malfunction on warranty tag and return manager to Energy Kinetics. If problem goes away, there is a problem with the output wiring – check all wiring, re-connect quick connector and repeat steps 1, 2 and 3 until problem is resolved. -
Page 20: Troubleshooting With Digital Manager
To test the functioning of each output zone, never apply a jumper to the Digital Manager output terminals. The easiest way to test each zone output is to remove the red sensor lead. The Manager should go into Service Board mode. -
Page 21: Operation Without The Digital Manager
Thermostat calls but it will not activate manager. If a Plug-In Relay Fails: Replace with spare relay. If a spare is not available, temporarily install a relay with 24VAC coil and 120VAC contacts. Contact Energy Kinetics for connection details. Diagnostics with the Digital Manager:... -
Page 22: Annual Maintenance
(7) Problem • Check for 24 volts between 24VAC common and zone in question. • Zone Output Light On • Check zone valve or circulator on zone calling for • operation. Zone Valve does not open • (8) Normal Operation A dull yellow light is common with a power- •... -
Page 23: Replacement Parts
The combustion chamber is of high quality material and will normally not need to be replaced. A replacement chamber, if required, is available from Energy Kinetics. The proper part number for the System 2000 Boiler chamber must be specified when ordering. For interim operation, the unit may be run without a combustion chamber if necessary. Ensure that the burner head is protected by the amulet, wet pack or a similar material. - Page 24 Chamber Liner: Front (EK1) 10-0408-2 Jacket: Left Side (EK2) 10-0402-2 Chamber Liner: Front (EK2) 10-0409 Jacket: Top for side flue opening (EK1) 10-0403 Insulation Board: Front (EK1) 10-0409-1 Jacket: Top for vertical flue opening (EK1) 10-0403-2 Insulation Board: Front (EK2) 10-0409-2...
-
Page 25: Limited Lifetime Warranty
In the event that such pressure vessel is found to be defective in material or workmanship during the fist ten years, Energy Kinetics will repair or replace the pressure vessel at its option and include a labor allowance per the published schedule. -
Page 26: Limited Warranty
The End User is required to make available for inspection by Energy Kinetics or its representative, the parts claimed to be defective and, if requested by Energy Kinetics, to ship said parts prepaid to Energy Kinetics at the above address for inspection or repair. In addition, the homeowner agrees to make all reasonable efforts to settle any disagreement arising in connection with this claim before resorting to legal remedies in courts.
Need help?
Do you have a question about the EK1 and is the answer not in the manual?
Questions and answers