Table of Contents
Advertisement
Available languages
Available languages
Quick Links
Advertisement
Chapters
Table of Contents

Related Manuals for Gastroback Design Vacuum Sealer Plus 46008


Summary of Contents for Gastroback Design Vacuum Sealer Plus 46008
- Page 1 BEDIENUNGSANLEITUNG DESIGN VAKUUMIERER PLUS Art.-Nr. 46008 »Design Vakuumierer Plus« Bedienungsanleitung vor Gebrauch unbedingt lesen! Modell- und Zubehöränderungen vorbehalten! Nur für den Hausgebrauch!
-
Page 2: Table Of Contents
Wir legen viel Wert auf Ihre Sicherheit. Deshalb bitten wir Sie, alle Hinweise und Anleitungen, die mit dem Gerät geliefert werden, sorgfältig und voll- ständig durchzulesen, bevor Sie das Gerät in Betrieb nehmen. Dadurch lernen Sie auch alle Funktionen und Eigenschaften Ihres Gerätes kennen. - Page 3 Gegenstände vor Nässe und Schmutz ein nützlicher Helfer sein. Bitte lesen Sie diese Bedienungsanleitung sorgfältig durch. Sie können am schnellsten alle Vorteile Ihres neuen Vakuumierers nutzen, wenn Sie sich vor Inbetriebnahme über alle Eigenschaften informieren! Wir wünschen Ihnen viel Freude mit Ihrem neuen Vakuumierer. Ihre Gastroback GmbH...
-
Page 4: Ihren Neuen Vakuumierer Kennenlernen
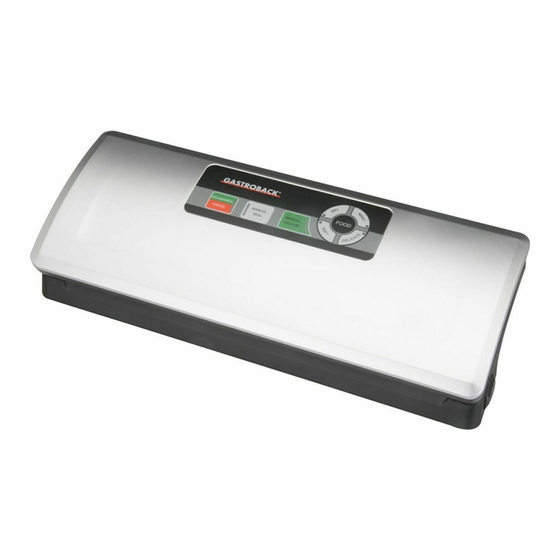
IHREN NEUEN VAKUUMIERER KENNENLERNEN Schweißband Aufbewahrungskammer für den Vakuumierschlauch Dichtungsringe Startschalter für das Vakuumieren in Behältern Öffnungstaste (links und rechts am Gerät) Anschluss für Vakuumierschlauch (für das Vakuumieren in Behältern) Schweißdichtung Vakuumkammer Netzkabelaufwicklung an der Rückseite Verriegelung INKLUSIVE 10 Folienbeutel Weitere Folienbeutel und Folienrollen sind bei uns erhältlich: - Folienbeutelsets Art-Nr.: 46115 (20 x 30 cm) und Art-Nr.: 46119 (25 x 40 cm) - Folienrollensets Art-Nr.: 46100 (20 x 600 cm) und Art-Nr.: 46101(28 x 600 cm) - Page 5 FOOD VACUUM&SEAL MANUAL MANUAL CANCEL SEAL VACUUM BEDIENMENÜ Taste »VACUUM & SEAL/CANCEL« (Automatikprogramm) Benutzen Sie das Automatikprogramm, wenn Sie vakuumieren und versiegeln wollen. Das Programm kann jederzeit durch erneutes Drücken der Taste abgebrochen werden. Während das Programm arbeitet, leuchtet die Kontrollleuchte rot.
-
Page 6: Sicherheitshinweise
Reparaturen und technische Wartung am Gerät dürfen nur von dafür autorisierten Fachwerkstätten durchgeführt werden. Wenden Sie sich gegebenenfalls bitte an Ihren Händler. Fragen zum Gerät beantwortet: Gastroback GmbH, Gewerbestr. 20, 21279 Hollenstedt, Telefon: (04165) 22250 ALLGEMEINE HINWEISE ZUR SICHERHEIT •... - Page 7 dem Verpackungsmaterial spielen lassen. • Niemals harte oder schwere Gegenstände auf das Gerät oder Teile davon legen. Achten Sie darauf, dass niemand das Gerät am Kabel herunterreißen kann. • Stellen Sie das Gerät auf einer gut zugänglichen, ebenen, trockenen und ausreichend stabilen Arbeitsfläche auf.
-
Page 8: Vorsichtsmaßnahmen Beim Umgang Mit Elektrizität
Gerät, bevor Sie das Gerät bewegen oder zur Aufbewahrung wegstellen. Verriegeln Sie immer zuerst den Deckel damit Schweißband und Dichtungen bei Transport und Lagerung geschützt sind. Niemals • das Gerät und seine Zubehöre mit Scheuermitteln oder harten Scheuerhilfen (Beispiel: Topfreiniger) reinigen. Niemals scharfe Reinigungsmittel (Beispiel: Bleiche) für die Reinigung verwenden. -
Page 9: Heiße Oberflächen - Verbrennungsgefahr
len. Niemals Flüssigkeiten in das Gerät oder über das Gerät oder das Kabel gießen oder darüber verschütten. Ziehen Sie in diesem Fall sofort den Netzstecker aus der Steckdose und reinigen Sie das Gerät (siehe ›Pflege und Reinigung‹). • Das Gerät ist nicht für den Dauerbetrieb geeignet. Bitte warten Sie nach einem Vaku- umiervorgang bei geöffnetem Deckel ca. -
Page 10: Technische Daten
TECHNISCHE DATEN Modell: Art.-Nr. 46008 Design Vakuumierer Plus Stromversorgung: 220 - 240 V Wechselstrom, 50 Hz Maximale Leistungsaufnahme: 120 Watt Länge des Netzkabels: ca. 1,25 m Gewicht: ca. 1,4 kg Abmessungen: ca. 37,0 cm x 14,4 cm x 7,4 cm (Breite x Tiefe x Höhe) Prüfzeichen: VORTEILE DES VAKUUMIERENS Sauerstoff, Licht und Temperaturen über 0 °C lassen Lebensmittel schnell verderben. -
Page 11: Wichtige Hinweise Für Eine Optimale Funktion
WICHTIGE HINWEISE FÜR EINE OPTIMALE FUNKTION • Verwenden Sie keine beschädigten oder ungeeigneten Behälter zum Vakuumieren. Behandeln Sie Behälter, die unter Vakuum stehen, stets besonders vorsichtig, um auch nach dem Vakuumieren ein Platzen zu verhindern. Nahrungsmittel, die in einem geplatzten Behälter waren, dürfen nicht mehr zum Verzehr verwendet werden, da eventuell enthaltene Splitter zu schweren Verletzungen führen könnten. -
Page 12: Tipps Für Beste Ergebnisse
TIPPS FÜR BESTE ERGEBNISSE • Streichen Sie überschüssige Luft vorsichtig aus dem Folienbeutel, bevor Sie mit dem Vakuumiervorgang beginnen, um den Vakuumiervorgang zu optimieren und die Vakuumpumpe nicht zu überlasten. • Bevor Sie frischen Fisch verpacken, entfernen Sie unbedingt die Innereien. •... -
Page 13: Haltbarkeits-Tabelle
HALTBARKEITS-TABELLE Lebensmittel normale Aufbewahrung* vakuumverpackt* frisches rohes Fleisch 3 Tage 9 Tage gekochtes Fleisch 5 Tage 15 Tage frischer Fisch 2 Tage 5 Tage Früchte und Gemüse 5 Tage 15-21 Tage Würstchen/Schinken 7 Tage 20 Tage Suppe 2 Tage 10 Tage Sahnegebäck 2 Tage 8 Tage... -
Page 14: Überhitzungsschutz
ÜBERHITZUNGSSCHUTZ • Ein Überhitzungsschutz schaltet das Gerät bei Überhitzung automatisch aus. Das Gerät arbeitet dann zunächst nicht mehr. Diese Schutzfunktion bewahrt Ihr Gerät vor Schäden durch Überlastung und kann anspringen, wenn Sie viele Vakuumiervorgän- ge in zu kurzer Zeit gestartet haben oder bei Raumtemperaturen über 35 °C arbei- ten. -
Page 15: Das Gerät Betriebsbereit Machen
DAS GERÄT BETRIEBSBEREIT MACHEN WARNUNG: Niemals kleine Kinder mit dem Gerät oder seinen Teilen oder den Folien/Beuteln spielen lassen. 1. Packen Sie das Gerät vorsichtig aus. Stellen Sie sicher, dass keine Fremdkörper (Beispiel: Verpackungsmaterial) im Inneren des Gerätes liegen oder kleben. Die Dich- tungsringe sowie Schweißband und Schweißdichtung müssen sauber und eben sein, da andernfalls kein Vakuum erzeugt werden kann und/oder die Beutel nicht luftdicht ver- schlossen werden können. - Page 16 Hinweis: Denken Sie daran, dass nach dem Füllen des Folienbeutels mindestens 8 cm Folie über der Beutelfüllhöhe zum Versiegeln leer bleiben müssen. Wenn Sie mit einer Folie von der Folienrolle beginnen, dann werden außerdem mindestens 2 cm Folie für die untere Schweißnaht des Beutels gebraucht.
-
Page 17: Vakuumieren Im Folienbeutel
7. Drücken Sie die beiden Öffnungstasten an den Außenseiten des Geräts, um den Deckel wieder zu öffnen und entnehmen Sie den Folienbeutel. WICHTIG: Das Schweißband des Geräts kann nach mehr- fachem Betrieb heiß werden. Achten Sie direkt nach einem Schweißvorgang darauf, dass keine hitzeempfindlichen Gegen- stände auf das Schweißband kommen und dass Sie das Schweißband nicht berühren. - Page 18 3. Schließen Sie den Deckel und drücken ihn an den markierten Stellen fest nach unten, bis er auf beiden Seiten hörbar einra- stet. Erst wenn der Deckel fest verschlossen ist, ist das Gerät betriebsbereit. 4. Wählen Sie auf dem Bedienmenü die zu vakuumierende Lebensmittelart aus.
-
Page 19: Vakuumieren Im Behälter
VAKUUMIEREN IM BEHÄLTER Geeignete Vakuumier-Behälter erhalten Sie bei uns. Art.-Nr. 46110: Behälterset 3-tei- Art.-Nr. 46111: Behälterset 2-teilig lig (6-eckig) 3 Spezial Vakuumierdosen: (eckig) 2 Spezial Vakuumierdosen: Inhalt: Inhalt: 700 ml, 1.400 ml und 2.000ml, 1.000 ml und 2.800 ml, Vakuumier- Vakuumierschlauch. - Page 20 Das andere Ende stecken Sie in das mittlere Loch über den blau- en Kunststoffverschluss auf den Deckel des Behälters (bei Behälter Art.-Nr. 46111). Wählen Sie im Menü den zu vakuumierenden Lebensmitteltyp: (siehe Abb. O) »DRY« (Trocken), »MOIST« (feucht), »SOFT« (weich), »DELICATE« (zart). Wenn Sie keine Aus- wahl treffen, wird automatisch die Einstellung »DRY«...
-
Page 21: Manuelles Vakuumieren
8. Wenn Sie keine Behälter mehr vakuumieren wollen, dann ziehen Sie das Anschluss- stück des Vakuumschlauches einfach nach oben aus dem Vakuumanschluss des Gerätes. MANUELLES VAKUUMIEREN Wenn Sie Schritt für Schritt vakuumieren und zu einem späteren Zeitpunkt versiegeln wollen, drücken Sie die Taste »MANUAL Vacuum«. - Page 22 Problem Die einfache Lösung Es bleibt zu viel Luft im Folienbeutel • Prüfen Sie ob: - der Folienbeutel korrekt angelegt ist (siehe: ‚Vakuumieren im Foli- enbeutel‘) und ob das Ende des Folienbeutels bis in die Vakuumkam- mer reicht. - die Dichtungen sauber und unbeschädigt sind. - Nahrungsmittelteile im Folienbeutel über der Schweißdichtung lie- gen.
-
Page 23: Pflege Und Reinigung
Problem Die einfache Lösung Es entsteht kein Vakuum im Behälter • Prüfen Sie ob: - der Vakuumschlauch unbeschädigt ist und korrekt am Gerät und am Behälter angeschlossen ist (siehe: ›Vakuumieren im Behälter‹). - der Deckel des Behälters richtig geschlossen ist und die weiße Gummidichtung auf dem Behälterdeckel richtig in der Öffnung des Deckels befestigt ist. - Page 24 REINIGEN DER VAKUUMIERBEUTEL 1. Waschen Sie die Vakuumierbeutel in warmem Wasser mit einem milden Spülmittel aus. 2. Wenn Sie die Vakuumierbeutel in der Spülmaschine reinigen wollen (nicht über 70° C), breiten Sie die Innenseiten der Beutel in der oberen Ablage aus, so das die gesamte Oberfläche von dem Spülwasser erreicht wird.
-
Page 25: Aufbewahrung
Wenn Sie das Gerät durch ein neues ersetzen, ist der Verkäufer gesetzlich ver- pflichtet, das alte mindestens kostenlos zur Entsorgung entgegenzunehmen. INFORMATION UND SERVICE Weitere Informationen erhalten Sie im Internet unter www.gastroback.de. Wenden Sie sich mit Problemen, Fragen und Wünschen gegebenenfalls an: GASTROBACK Kundenservice, Tel.: 04165/2225-0... -
Page 26: Gewährleistung/Garantie
Gewährleistungsfall die Kosten und das Risiko des Transportes. Hinweis: Kunden aus Deutschland und Österreich: Für die Reparatur- und Serviceabwicklung möchten wir Sie bitten, Gastroback Produkte an folgende Anschrift zu senden: Gastro- back GmbH, Gewerbestr. 20, 21279 Hollenstedt. Kunden anderer Länder: Bitte kontaktieren Sie Ihren Händler Bitte haben Sie dafür Verständnis, dass unfreie Sendungen nicht angenommen werden... - Page 27 OPERATING INSTRUCTIONS DESIGN VACUUM SEALER PLUS Art.-No. 46008 »Design Vacuum Sealer Plus« Read all provided instructions before first usage! Model and attachments are subject to change For household use only!
- Page 28 We attach a certain importance to your safety. Thus, we ask you to read all provided instructions and information in this booklet carefully and complete- ly, before you start running the appliance. This will help you to know all functions and properties of your new appliance. We especially ask you to adhere strictly to the safety information mentioned in these instructions.
- Page 29 These instructions for use will inform you about the various functions and features which makes it easy to take pleasure in your new vacuum sealer. We hope that you will enjoy your new vacuum sealer. Your Gastroback GmbH...
-
Page 30: Knowing Your New Vacuum Sealer
KNOWING YOUR NEW VACUUM SEALER Sealing element Hose storage Upper and lower gaskets Canister switch Lock Release Buttons (on both sides of the appliance) Air intake (for vacuuming with canisters) Sealing strip Vacuum chamber Power cord storage at the back of the appliance Locking hook Included 2 Vacuum Sealer Rolls Additional vacuum sealer bags and rolls are available:... - Page 31 FOOD VACUUM&SEAL MANUAL MANUAL CANCEL SEAL VACUUM Control Panel Button »VACUUM & SEAL/CANCEL« (automatic program) Use the automatic program, if you want to vacuum and seal. The program can be interrupted at any time by pres- sing the button again. While the program is working, the indicator light illuminates red. When a sufficient vacu- um is created, the sealing indicator light (»Manual Seal«) illuminates blue and the vacuum bag is sealed.
-
Page 32: Important Safeguards
IMPORTANT SAFEGUARDS Carefully read all instructions before operating this appliance and save for further reference. Do not attempt to use this appliance for any other than the intended use, described in these instructions. Any other use, especially misuse, can cause severe injuries or damage by electric shock, moving parts, heat or fire. - Page 33 • Do not place the appliance near the edge of the table or counter or on sloping or wet surfaces or where it can fall. During operation free space of 20 cm to the sides and 1m above the appliance should be left for sufficient ventilation. Do not place any cloth or tissue under or on the appliance, to avoid any risk of fire, electric shock or overheating.
-
Page 34: Important Safeguards For Electrical Appliances
IMPORTANT SAFEGUARDS FOR ELECTRICAL APPLIANCES The appliance is driven electrically. Place the appliance near a suitable wall power socket to connect the appliance directly to a protected mains power supply with protec- tive conductor (earth/ground) connected properly. Ensure that the voltage rating of your mains power supply corresponds to the voltage requirements of the appliance (220-240 V, 50 Hz, AC, rated for at least 8 A). -
Page 35: Hot Surfaces - Risks Of Burns
HOT SURFACES – RISKS OF BURNS The Design Vacuum Sealer Plus is designed for vacuum packing food and other items. The sealing band and vacuum pump are electrically driven. The sealing band gets hot during operation. • The sealing band will be still hot, even a short time after sealing. This holds especially after repeated operation. -
Page 36: Advantages Of Vacuum Packing
ADVANTAGES OF VACUUM PACKING Air, light and temperature above 0 °C make food easily perishable. The process of vacu- um packing removes up to 90% of air inside the bag or container and seals it air-tight. However, please note that perishable food must still be cooled or cooked. But in most cases vacuum packing elongates shelf life considerably. -
Page 37: Tips For Best Results
powdery or finely ground) and damage the vacuum pump. Always work with special care, when vacuum packing runny food or beverages. • Pre-freeze moist food before vacuum sealing (1 – 2 hours). This way no liquids can get sucked into the appliance and the food will not get pressed. •... -
Page 38: Shelf Life Timetables
CAUTION: Only use the Seal Only button for this. Ensure not to spill the water on or in the appliance. • Frothy food and beverages are not suited at all for vacuum packing. Example: cookies made from beaten egg white. •... -
Page 39: Overheat Protection
pasta (uncooked) pantry 2 years 3 years rice (uncooked) pantry 6 months 2 years sugar pantry 2 years 3 years fresh vegetables freezer 10 months 3 years OVERHEAT PROTECTION • A thermal cut-out (overheat protection) will switch OFF the appliance automatically, when overheated. -
Page 40: Getting The Appliance Ready For Use
GETTING THE APPLIANCE READY FOR USE WARNING: Do not let young children play with the appliance or any part of it or the foils/bags. 1. Unpack the appliance and remove all promotional materials and packaging. DO NOT remove any warning labels or the model label. Ensure that there are no foreign objects (e.g. - Page 41 If in doubt, just place another seal near the first one. Note: Foil bags and film rolls are available from Gastroback: -- Vacuum sealer bag sets art-no.: 46115 (20 x 30 cm) and art-no.: 46119 (25 x 40 cm) -- Vacuum sealer roll sets art-no.: 46100 (20 x 600 cm) and art-no.: 46101(28 x...
-
Page 42: How To Vacuum-Pack In A Plastic Bag/Foil
HOW TO VACUUM-PACK IN A PLASTIC BAG/FOIL 1. After sealing the bottom of the bag and ensuring that the seam is air-tight, you can fill the bag. For this, observe the hints and tips, given in section ›Tipps for Best Results‹. TIP: Do not overload the plastic bag. -
Page 43: How To Vacuum Seal A Container
For this, you can take out the dripping tray. 9. Unplug the appliance, when you have finished operating. HOW TO VACUUM SEAL A CONTAINER Suitable vacuum containers are available from Gastroback. Art.-No. 46110: Container set 3-piece Art.-No. 46111:... - Page 44 Note: Do not overfill the container. When vacuum sealing food in a container leave 3 cm of free space underneath the lid of the container. 4. Take the provided vacuum hose and connect the narrow adapter plug to the vacuum port at the right side of the appli- ance.
-
Page 45: Manual Vacuum
Note: To test the vacuum, you can try to move the lid - it should not move. 5. On canisters 46111 you have the option to label the date of vakuuming on the lid of the containers. 6. Remove the vacuum hose from the container. If you wish to vacuum seal another container, wait approximately 2 minutes to let the appliance cool down. -
Page 46: Solving Problems
SOLVING PROBLEMS If any problems occur during operation, you will find solutions in the following table. Problem The Easy Solution The appliance does not operate when Check, whether the appliance is properly connected to the power • trying to start it. outlet and check if the power outlet does work. - Page 47 Problem The Easy Solution After the sealing process is finished the pla- • Folds, crumbs, grease or humidity on the sealing section of the stic bag is losing its vacuum bag can cause leaking. Open the bag, clean the interior of the bag in the section where you wish to seal it and seal the bag again.
-
Page 48: Care And Cleaning
CARE AND CLEANING WARNING: Always unplug the appliance and wait some minutes to let the appli- ance cool down, before moving or cleaning the appliance. Do not touch the sealing band shortly after operation. Ensure that the appliance is always out of reach of young children. -
Page 49: Storage
CLEANING ACCESSORIES Wash the vacuuming accessories in warm water with a mild detergent, do not immerse the lids of the vacuum containers under water. 1. The vacuum containers are dishwasher safe. Do not clean the lids of the vacuum containers in the dishwasher, but wipe with a damp cloth. 2. -
Page 50: Notes For Disposal
INFORMATION AND SERVICE Please check www.gastroback.de for further information. For technical support, please contact Gastroback Customer Care Center by phone: +49 (0)4165/22 25-0 or e-mail info@gastroback.de. Please refer to our home page for a copy of these operating instructions in pdf format. - Page 51 period, please send defective appliances to the given address. You will get a free quo- tation and, thereafter, can decide, whether we shall repair the appliance to the costs possibly accrued, send back the defective appliance for free of charge, or dispose of the appliance for free of charge.
- Page 52 GASTROBACK GmbH Gewerbestraße 20 . 21279 Hollenstedt / Germany Telefon + 49 (0) 41 65 / 22 25 - 0 . Telefax + 49 (0) 41 65 / 22 25 -29 info@gastroback.de . www.gastroback.de...
Need help?
Do you have a question about the Design Vacuum Sealer Plus 46008 and is the answer not in the manual?
Questions and answers