
Related Manuals for Jenn-Air JUIFX15HX


Summary of Contents for Jenn-Air JUIFX15HX
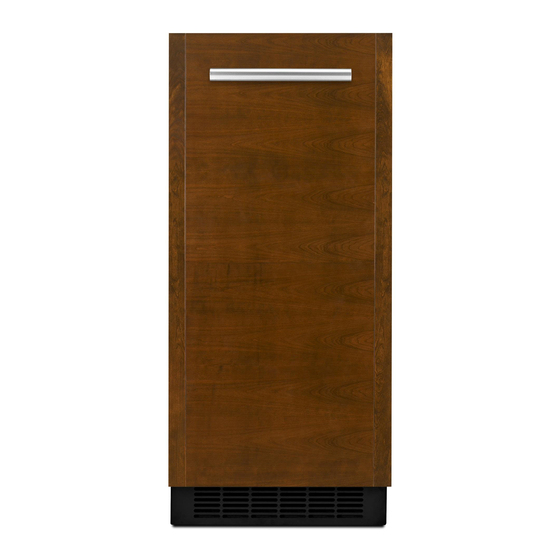
- Page 1 INSTALLATION GUIDE INTRODUCTION BUILT-IN UNDERCOUNTER ICE MAKER GUIDE D’INSTALLATION MACHINE À GLAÇONS ENCASTRÉE SOUS LE COMPTOIR W11320441A INTRODUCTION | 1...
-
Page 3: Safety
INTRODUCTION SAFETY Your safety and the safety of others are very important. We have provided many important safety messages in this manual and on your appliance. Always read and obey all safety messages. This is the safety alert symbol. This symbol alerts you to potential hazards that can kill or hurt you and others. All safety messages will follow the safety alert symbol and either the word “DANGER”... -
Page 4: Table Of Contents
TABLE OF CONTENTS INTRODUCTION REGISTERING YOUR PRODUCT IDENTIFICATION INTRODUCTION APPLIANCE Safety ................3 Registering Your Appliance ......4 Gain access to our concierge-level customer Your product identification, which includes Product Identification ........4 support by registering your appliance. We make the model and serial number, is listed on the product registration simple and straightforward product rating plate. -
Page 5: Getting Started
GETTING STARTED BEFORE INSTALLATION TOOLS REQUIRED PARTS PROVIDED Gather the required tools and parts before Gather the required tools before starting Cabinet brackets starting installation. Read and follow the installation. Drain hose and clamp (in hose bag) - on instructions provided with any tools listed. -
Page 6: Vacation Or Extended Time Without Use
GETTING STARTED VACATION OR EXTENDED UNPACK THE ICE MAKER OPTIONAL PERSONALIZATIONS TIME WITHOUT USE When you will not be using the ice maker for WARNING REVERSING THE DOOR an extended period of time, turn off the water For instructions on how to reverse the door, and power supply to the ice maker. -
Page 7: Site Preparation
SITE PREPARATION SITE PREPARATION PRODUCT AND OPENING DIMENSIONS Product Dimensions Product width ⁄ " (37.8 cm) Product height ⁄ " (85.7 cm) Product depth ⁄ " (56.1 cm) (no door) Opening Dimensions Opening width 15" (38.1 cm) 34" min (86.4 cm) Opening height E ⁄... -
Page 8: Location Requirements
SITE PREPARATION SITE PREPARATION LOCATION REQUIREMENTS Installation must comply with all governing codes and ordinances. TEMPERATURE It is recommended that you install the ice maker in a well-ventilated area with temperatures above 55°F (13°C) and below 110°F (43°C). Best results are obtained between 70°F and 90°F (21ºC and 32°C). -
Page 9: Electrical Requirements
SITE PREPARATION ELECTRICAL REQUIREMENTS IMPORTANT: IMPORTANT: WARNING This ice maker has been designed for flush ■ Use an outlet that cannot be turned off by a ■ install in instances where the power supply, switch. Do not use an extension cord. water supply, and drain are located in a It is recommended that this product not be ■... -
Page 10: Water Supply Requirements
SITE PREPARATION WATER SUPPLY REQUIREMENTS Before connecting the ice maker, ensure that IMPORTANT: REVERSE OSMOSIS WATER SUPPLY the water supply lines are insulated against Connect to potable water supply only. A reverse osmosis system may be used if the ■ freezing conditions. -
Page 11: Drain Supply Requirements
SITE PREPARATION DRAIN SUPPLY REQUIREMENTS GRAVITY DRAIN SYSTEM DRAIN PUMP SYSTEM Drain pump maximum capability: For every Connect the ice maker drain to your drain in The ideal installation has a standpipe with a 1 ft (0.31 m) of rise, subtract 10 ft (3.1 m) of accordance with all state and local codes and 1½"... -
Page 12: Door Reversal
DOOR REVERSAL If door reversal is not needed, skip “Door Reversal” section. REMOVING HINGE COVERS WARNING Electrical Shock Hazard Disconnect power before servicing. Replace all parts and panels before operating. Failure to do so can result in death or electrical shock. Unplug the ice maker or disconnect power. - Page 13 DOOR REVERSAL WARNING Hinge cover Crush Hazard Articulated hinges are self closing and many pinch points exist prior to cabinet installation. Do not remove hinge covers until product is Remove the screws attaching top and Using pliers, remove the hinge covers ready to be installed.
-
Page 14: Removing The Hinges
DOOR REVERSAL REMOVING THE HINGES WARNING Excessive Weight Hazard Use two or more people to move and install ice maker. Failure to do so can result in back or other injury. Lay down the ice maker as shown in the illustration. Be sure to cover the floor with cardboard or hardboard to avoid damaging it. - Page 15 DOOR REVERSAL Remove the screws and the top metal Remove the screw from the top and Using Torx T25 screwdriver unscrew bracket using the Phillips screwdriver. bottom end caps using the Phillips the door hinge screws completely Place them aside. screwdriver.
- Page 16 DOOR REVERSAL REMOVING THE HINGES (CONT.) Remove the plastic screw cover from Remove the door and place it aside. the inside of the hinges and place Swap the hinge screws to the opposite them aside. side. 16 | DOOR REVERSAL...
- Page 17 DOOR REVERSAL Remove the screw cap cover and Swap the magnetic door catch to other Remove the screws and hinges replace on the other side. side. from the cabinet with the Torx T25 screwdriver and place them aside. WARNING Crush Hazard Articulated hinges are self closing and many pinch points exist prior to cabinet installation.
-
Page 18: Preparing The Bottom Hinges
DOOR REVERSAL PREPARING THE BOTTOM HINGES Grill cover screws Unscrew and remove the grill cover Remove the screw cover and place using a TORX T20 screwdriver. Place it on the other side as shown in the them aside. illustration. 18 | DOOR REVERSAL... - Page 19 DOOR REVERSAL Reinstall the grill cover. DOOR REVERSAL | 19...
-
Page 20: Reversing The Hinges
DOOR REVERSAL REVERSING THE HINGES Take the original bottom hinge, flip it Install the hinge screws (placed aside and place it in the top hinge position in step 7 of “Preparing the Bottom on the opposite side. Slide onto the Hinges”) half way on the desired side of cabinet hinge screws. - Page 21 DOOR REVERSAL WARNING Excessive Weight Hazard Use two or more people to move and install Plastic screw cover ice maker. Failure to do so can result in back or other injury. Reinstall the top and bottom end caps Reinstall the plastic screw cover to on the door (the top right end cap is original locations on the hinges.
-
Page 22: Installation
INSTALLATION If ice maker is not connected to the water supply, skip this section and go to “Installing the Drain Pump and Drain Hose” section. INSTALLING THE DRAIN PUMP - If Ice Maker is Currently Installed SITE PREPARATION NOTES: WARNING Connect drain pump to your drain in ■... - Page 23 INSTALLATION Drain cap Turn off water supply. Wait 5 to 10 Unscrew the drain cap from the Disconnect water supply line. minutes for the ice to fall into the bottom of the water pan located inside storage bin. Remove all ice from bin. the storage bin.
-
Page 24: Installing The Drain Pump And Drain Hose
INSTALLATION INSTALLING THE DRAIN PUMP AND DRAIN HOSE NOTE: Do not kink, smash or damage tubes or wires during installation. Screws Mounting tab slot Install the drain pump on the right side Unscrew the screws attaching rear of the ice maker base. Tip the drain panel to ice maker. - Page 25 INSTALLATION Vent tube Wiring Cable Screws cover Plastic retainer Ice maker power cord, clamp and screw Unscrew the screws attaching wiring Route the vent tube through the Unscrew and remove the power cord cover to the ice maker and remove plastic retainer as shown in the clamp mounted to the ice maker side the wiring cover.
- Page 26 INSTALLATION INSTALLING THE DRAIN PUMP AND DRAIN HOSE (CONT.) Ice bin outlet Receptacle of the 7/8" adjustable hose clamp drain pump Drain tube (ice bin to drain pump) 7/8" adjustable hose clamp Drain pump reservoir inlet Coil the ice maker power cord into a 4" New drain tube is provided in the (10.2 cm) diameter coil.
- Page 27 INSTALLATION Cable tie Holes to fix the cable tie For floor applications, drain tube can be routed this way Install the cable tie on the rear panel Route the drain pump discharge tube, Using a cable tie, fix the drain tube to using two holes provided on the rear power cord, and water inlet through rear panel as shown in the illustration.
-
Page 28: Connecting The Water Supply
INSTALLATION CONNECTING THE WATER SUPPLY IMPORTANT: Plumbing shall be installed in accordance ■ with the International Plumbing Code and any local codes and ordinances. Use copper tubing or JennAir supply line, ■ Part Number 8212547RP, and check for leaks. Install tubing only in areas where ■... - Page 29 INSTALLATION Flush out tubing by placing the free Remove and discard the short, plastic Turn shutoff valve on. Check for leaks. end of the tubing into a container or tube from the end of the water line Tighten any connections (including sink, and turning on the main water inlet.
-
Page 30: Leveling And Securing
INSTALLATION LEVELING AND SECURING WARNING Excessive Weight Hazard Use two or more people to move and install ice maker. Failure to do so can result in back or other injury. Move the ice maker in front of its final location. Be sure to cover the floor with cardboard or hardboard to avoid damaging it. - Page 31 INSTALLATION WARNING Hinge cover Crush Hazard Articulated hinges are self closing and many pinch points exist prior to cabinet installation. Do not remove hinge covers until product is Remove the screws attaching top and Using pliers, remove the hinge covers ready to be installed.
- Page 32 INSTALLATION LEVELING AND SECURING (CONT.) Install the door panel according to the instructions in the “Custom Wood Door Panel” section or instructions received with the stainless steel panel received with kit. Use ice maker leveling legs to align ice maker door to the adjacent cabinet opening.
- Page 33 INSTALLATION Cabinet bracket Slide ice maker into the cabinet while Be sure that the ice maker is at desired Attach the cabinet brackets (provided managing the utility connection depth. Secure the top and bottom with ice maker) to the holes in the positions behind the ice maker.
-
Page 34: Custom Wood Door Panel
INSTALLATION If stainless steel panel is installed, skip “Custom Wood Door Panel” section. CUSTOM WOOD DOOR PANEL Remove screws and the top metal Reinstall top metal bracket using bracket using the Phillips screwdriver. screws removed in the step 1. Remove and place them aside. Skip this step and go to the step 4 if the door reversal has been completed. - Page 35 INSTALLATION From inside the door, install the wood Adjust the panel side to side to achieve Replace the top and bottom end caps screws through the slotted holes in the a desired gap on both sides. Install the into the door. Fix the bottom end cap metal brackets.
-
Page 36: Connecting The Drain
INSTALLATION CONNECTING THE DRAIN WARNING Electrical Shock Hazard Plug into a grounded 3 prong outlet. Do not remove ground prong. Do not use an adapter. Style 1—For a gravity drain system, be sure that the ice maker drain tube is Do not use an extension cord. - Page 37 INSTALLATION Plug in ice maker or reconnect power. Turn on ice maker. Wait for rinsing cycle, approximately 5 minutes, to be sure the ice maker is operating properly. INSTALLATION | 37...
-
Page 38: Installing Auxiliary Grill
INSTALLATION INSTALLING AUXILIARY GRILL The auxiliary grill is an optional accessory. It can be used to align the toe grill with the rest of the cabinets (while not obstructing ventilation of the ice maker). NOTE: Install auxiliary grill only after finishing the complete ice maker installation. - Page 39 INSTALLATION INSTALLATION | 39...
-
Page 40: Appendix
APPENDIX ACCESSORIES IMPORTANT: A drain pump is necessary when a floor drain is not available. A Drain Pump kit, Part Number 1901A, is available for purchase at https:/ /www.jennair.com/ NOTE: It may be desirable to insulate the drain line thoroughly up to the drain inlet. An Insulation Sleeve kit, Part Number W10365792, is available for purchase at https:/ /www.jennair.com/...
Need help?
Do you have a question about the JUIFX15HX and is the answer not in the manual?
Questions and answers