
Subscribe to Our Youtube Channel
Related Manuals for Cavaliere 30


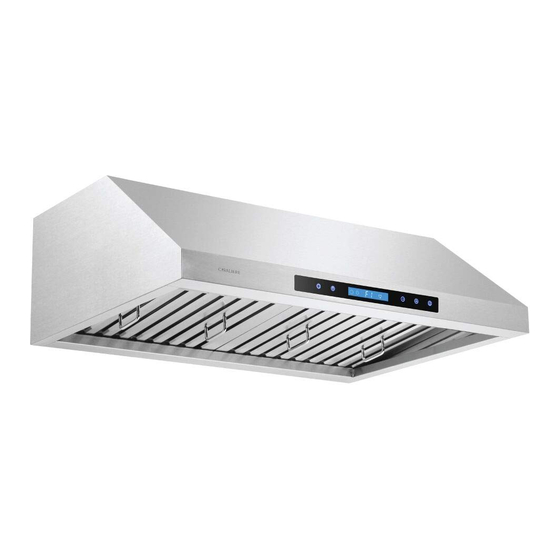
Summary of Contents for Cavaliere 30
- Page 1 UNDERCABINET RANGE HOOD 30 Installation & User Manual Installer: Leave this guide with the homeowner . Homeowner: Keep this guide for future reference. 23801-23805-2019d...
- Page 2 Important Safety Notice READ ALL INSTRUCTIONS BEFORE INSTALLING AND OPERATING THIS APPLIANCE Your safety and the safety of others is very important. We have provided many important safety messages in this manual and on your appliance. Always read and obey all safety messages. All safety messages will tell you what the potential hazard is, tell you how to reduce the chance of injury, and tell you what can happen if the instructions are not followed.
- Page 3 Important Safety Notice • Ducted fans MUST always be vented to the outdoors. • DO NOT vent exhaust into spaces between walls, crawl spaces, ceiling, attics or garages. fire. • Any old duct work should be cleaned or replaced if necessary to avoid the possibility of a grease Check all joints on duct work to insure proper connection and all joints should be properly taped.
-
Page 4: Table Of Contents
Table of Contents INSTALLATION Tools Needed ...............3 Troubleshooting ............15 Parts Supplied .............4 Use and Care Information ........16 Venting Requirements ..........5 Specifications ............16 Height & Clearance ...........6 Measurements and Diagrams ......17 Duct Size Upgrade Calculator ......6 Electric Schematic ...........18 Venting Methods ............7 MAINTENANCE Electrical Requirements... -
Page 5: Parts Supplied
Parts Supplied Range Hood (Design will vary with model) Baffle Filter Spacer Range Hood Mounting Bracket Stainless Steel Baffle Filter Grease Catch Qty: 6 PCS Qty: 6 PCS Qty: 6 PCS (For dry wall or sheet rock only) Flexible Duct Tube Pg 4... -
Page 6: Venting Requirements
Hood Height ~30"). For the most efficient & quiet operation: Under Cabinet • A distance of 27” to 30” is recommended Range Hood between stove top and the bottom of range hood. Min:27’’ • "27" is the lowest recommended for safe Max:30’’... -
Page 7: Height & Clearance
Height & Clearance IMPORTANT: • A minimum of an 8" round duct must be used to maintain maximum airflow efficiency. • A flexible 8" round duct is provided for convenience and for use in difficult installations, however always attempt to use a smooth metal rigid type of ducting to maximize airflow efficiency. -
Page 8: Venting Methods
Venting Methods • This range hood is factory set for venting through the roof or wall. • Vent work can terminate either through the roof or wall. To vent through a wall, a 90° elbow is needed. IMPORTANT: • NEVER exhaust air or terminate duct work into spaces between walls, crawl spaces, ceiling, attics or garages. -
Page 9: Electrical Requirements
Electrical Requirements IMPORTANT: Observe all governing ordinances and local codes. (Please consult with a qualified electrician for any electrical wiring) It is the customer’s responsibility: • To contact a qualified electrical installer. • To assure that the electrical installation is adequate and in conformance with National Electrical Code, ANSI/NFPA 70 —... -
Page 10: Preparation
Preparation Advanced Preparations: Familiarize yourself with the controls of the range hood by reading through Range Hood Operations, Page 13. Place the range hood on a flat, stable surface. Connect the Severe Injury range hood to a designated standard outlet (please refer the Rotating fan can cause severe product label for the suitable voltage of this unit) and turn injury. -
Page 11: Installation
Installations (refer to Page 4 for Parts Supplied): 1. Measure the distance between the stove top and the bottom of range hood. A *distance of 27” to 30” is recommended. *Due to different ceiling height configurations, recommended height may not be applicable. - Page 12 Installation (Continued) Mounting this range hood onto a vertical wall using the Range Hood Mounting Bracket: 1) Attach the Range Hood Mounting Bracket onto the range hood body. (Recommended to use an anti-vibration thread glue) Fasten screws securely. Figure 3. 2) Using references from the 'Height &...
-
Page 13: Installation
Installation (Continued) Install the baffle filters into the range hood. Figure 8. a) Angle the baffle filter so that the rear edge of the baffle filter enters the range hood cavity, and touches the back wall of the range hood. b) Then lift the front edge of the baffle filter so that it aligns with a groove in the lower front panel of the range hood assembly. -
Page 14: Range Hood Operations
Range Hood Operations Control Panel, Display and Functions: In addition to the remote control feature, this range hood is also equipped with a heat sensor that will self-calibrate in 5 seconds when the range hood is first electrically activated and beeps when self-calibration is done. To con- serve energy, the LCD panel will turn off automatically after 5 seconds of inactivity. - Page 15 Range Hood Operations Control Panel, Display and Functions: Activating Light Function: • Press Light button once to turn on the lights, and once again to turn off the lights. CAUTION: DO NOT touch the lights or surrounding surface until turned OFF and allowed to cool. Activating Power-Off Delay Function: •...
-
Page 16: Troubleshooting
Troubleshooting If the range hood or light • Check if the range hood has been plugged in, make does not operate after sure that all power has been turned back ON, and all installation: electrical wiring are properly connected. Swap out light bulb to working ones to determine •... -
Page 17: Use And Care Information
Use and Care Information Operations: • Read and understand all instructions and warnings in this manual before operating the appliance. Save these instructions for future reference. • Always leave safety grills and filters in place. Without these components, operating blowers could catch on to hair, fingers and loose clothing. -
Page 18: Measurements And Diagrams
Measurements and Diagrams 1. All measurements in parenthesis are in millimeters. 2.All inch measurements are converted from millimeters, therefore inch measurements are estimated. Overall (PS13): Overall (PS37): Rear Knocknut Holes: Hood-mounting Bracket: Pg 17... -
Page 19: Electric Schematic
Electric Schematic Black Live AC_L Neutral White AC_N Green Fan (-) White MO_N White Lamp (-) Blue Fan 1 MO_1 Pink Fan 2 MO_2 Fan 3 MO_3 Orange Fan 4 MO_4 MOTOR Yellow Yellow Black Lamp (+) * Subject to change without notice, please contact your local reseller for details. Pg 18... -
Page 20: Maintenance
• They are required to be kept clean for performance and safety concerns, and may require replacement if neglected. Filters should be cleaned after every 30 hours of use or sooner depending on usage • conditions. Remove and clean by hand or dishwasher. NOTE: Some newer dish detergents may cause •... - Page 21 Maintenance (Continued) Hazard of Burns! Light bulb become extremely hot when turned on. DO NOT touch bulb until switched off and cooled. Touching hot bulbs could cause serious burns. Replacing The Light Bulb: • Check the range hood tag for lamp specifications. Halogen bulbs will not work on "LED" models (they will lightly pulse or flash).
-
Page 22: Warranty
Warranty One Year Parts Warranty: For one year from the date of original purchase, your local reseller will provide free of charge, non-consumable replacement parts or components that failed due to manufacturing defects. Subject to the conditions and limitations set forth below, your local reseller will, at its option, either repair or replace any part of its products that prove defective by reason of improper workmanship or materials. -
Page 23: Disclaimer
Disclaimer Carefully inspect all items for damages before accepting delivery. Note and picture any damages to the external box, contents or item to the carrier and written on the freight bill or delivery receipt. Request name and signature of the carrier’s agent and keep copy to support your claim. - Page 24 21700 Barton Road, Colton, California 92324 USA Phone Number: (800) 827-5950 CavaliereHoods.com...
Need help?
Do you have a question about the 30 and is the answer not in the manual?
Questions and answers