
Subscribe to Our Youtube Channel
Related Manuals for IWAKI PUMPS APN-085-D4 Series


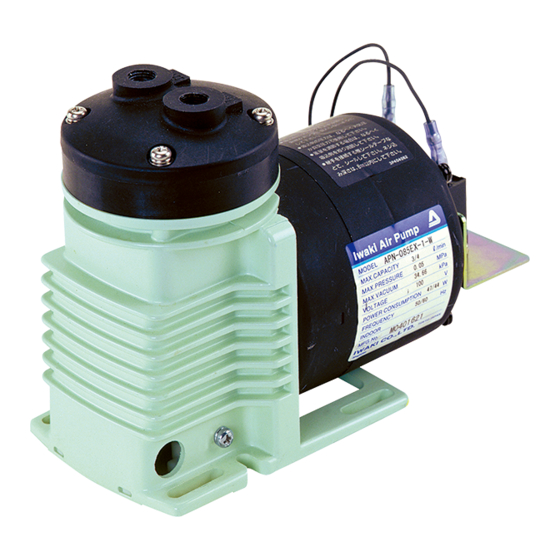
Summary of Contents for IWAKI PUMPS APN-085-D4 Series
- Page 1 IWAKI Air Pump APN-085-D4 Instruction Manual Read this manual before use of product...
-
Page 2: Table Of Contents
Important Instruction Thank you for selecting an IWAKI APN-085-D4 air pump. This instruction manual deals with "Safety Instructions", "Outline", For the Safe and "Installation", "Operation" and "Maintenance" sections. Correct Handling of the Pump Please read through this instruction manual to ensure the opti- ●... -
Page 3: Safety Instructions
Safety Instructions WARNING CAUTION ● Turn off power before service ● Qualified personnel only Risk of electrical shock. Be sure to turn off The pump should be handled or operated power to stop the pump and related devices by a qualified personnel with a full under- before service is performed. - Page 4 Safety Instructions CAUTION CAUTION ● Do not use a damaged pump ● Damaged power cable Use of a damaged pump could lead to an Do not use any damaged power cable for electric shock or death. the prevention of a fire or electrical shock. The cable is not replaceable, so that the Prohibited ●...
-
Page 5: Outline
Outline Before use, check the specification, limitation and hazardous 2. Operating principle nature of the pump. The APN-085-D4 is a diaphragm type air pump and is 1. Unpacking & Inspection designed to be built into various devices such as a gas analyser and for contamination-free gas compression, Open the package and check that the product conforms vacuum and delivery. -
Page 6: Identification Code
Outline 4. Specifications 3. Identification code ■ Pump Performance at 24VDC (power voltage) and 5VDC (control signal) APN - 085 L V X - D4 - 02 Motor Connection Max. dis- Lowest Max. air Max. charge Weight starting Power Rated b c d Type flow... -
Page 7: Outer Dimension
Outline ■ APN-085L 5. Outer dimension ø72 ø8 ■ APN-085 ø4 APN-085-L type ø72 APN-085-L type 2-Rc1/4 or 2-G1/4 ø71 2-Rc1/4 (130) (130) 21.5 18.5 ■ APN-085H ø8 ø4.8 ø72 APN-085-H type ø72 2-Rc1/4 or 2-G1/4 (130) - 5 - - 5 -... -
Page 8: Performance Curve
Outline 7. Overview & Label 6. Performance curve ■ APN-085 Vacuum 74.65kPa [abs] 0.10 Pump head Vacuum 87.98kPa [abs] 0.08 Outlet Vacuum 101.3kPa [abs] Discharge pressure 0.06 (MPa) 0.04 Inlet 0.02 Nameplate Model and MFG. No. 101.3 AIR FLOW 87.98 (Production number) are (L/min) described. -
Page 9: Part Names & Structure
Outline 8. Part names & Structure ■ APN-085 L/H ■ APN-085 Part names Q'ty Part names Q'ty Part names Q'ty Part names Q'ty Pump head 19 Connecting rod 1 set Pump head 19 Connecting rod 1 set Valve 20 Bracket Valve 20 Bracket Valve seat... -
Page 10: Installation
Installation 1. Before Installation ● Do not install the pump in a place where the pump can Read through this instruction manual before use. Carry get wet. Avoid using wet gas, out installation work with a full understanding. or internal condensation will build up and consequently CAUTION result in the short lives of the... - Page 11 Installation ● Do not tube two or more ● Observe the rated voltage pumps in series. It may pre- specified on the name plate. vent the motor from starting Applying any voltage than and lead to a burn out. the rated one may result in failure.
-
Page 12: Installation/Tubing/Electrical Wiring
Installation 2. Installation/ Tubing/ Electrical wiring 5. Pump fixation Set the pump baseplate on a WARNING concrete foundation and fasten anchor bolts tightly to prevent If you notice any abnormal or dangerous conditions, suspend the pump from vibrating during operation immediately and inspect/solve problems. operation. - Page 13 Installation 2.3 Electrical wiring 3. Tube size Select proper tube size, otherwise liquid leaks and failure Electrical wiring must be performed by a qualified electrician. may result. We are not responsible for personal injury or property dam- CAUTION age due to nonobservance of this warning. Contact us or your Use of a wrong tube size bears the risk of coming off, nearest distributor for wiring as necessary.
- Page 14 Installation 7. After wiring work, check that the system is free from the 5. For wire lead colours, red and black are for power volt- inductive noise at start-up. age. Yellow and black leads are for external variable 8. Noise accompanies the high-speed switching of the drive signal.
-
Page 15: Operation
Operation 1. Before operation Suction valve ● Always use a suction valve to adjust an air flow. ● Dropping or subjecting the Keep a discharge pump to strong impact, fail- valve full open. ure may result. Handle the pump with care. ●... -
Page 16: Pump Operation
Operation ● Do not use solvents such as ■ Operation benzine, alcohol, thinner for Operate the pump according to the following steps. maintenance or cleaning, Procedure Points to be Checked otherwise a coat discolours Check tubing, wir- • See "2.2 Tubing" and "2.3 or comes off. - Page 17 Operation ■ Stop and Storage Points to be • After starting, check a pressure checked during gauge to see if suction and dis- Before a long period of stoppage (1 week or more): operation charge line pressure are correct ● Release pressure and turn off main power. and an air flow meter to see if the ●...
-
Page 18: Maintenance
Maintenance 2. Maintenance & Inspection 1. Troubleshooting Turn off power on sensing danger and check the follow- Handling of the pump, maintenance and inspection should ing. In case trouble can not be solved, contact us or your be carried out within the descriptions of this instruction nearest distributor. - Page 19 Maintenance ■ Wear parts ■ Storage If pump performance has remarkably reduced, replace dia- Protect the pump from dust during storage. phragms and valves with new ones. Wear part duration varies Do not store the pump: with the pressure, temperature and characteristics of gas/ •...
-
Page 20: Wear Part Replacement
Maintenance 3. Wear part replacement ■ Diaphragm replacement Screw For a long period of operation wear parts need to be <APN-085> Pump replaced periodically. 1. Unscrew all the pump head head fixing screws and take out CAUTION Valve the pump head, valve and Mating points valve seat. - Page 21 Maintenance ■ Valve replacement NOTE1. Do not loosen the motor fixing screws during mainte- nance work. <APN-085> 1. Unscrew all the pump head NOTE2. Contact your nearest distributor for the replacement of fixing screws and take out the connecting rod and the motor. the pump head and valve.
- Page 22 ■ Valve replacement ■ Diaphragm replacement <APN-085L/H> <APN-085L/H> 1. Unscrew all the pump head 1. Unscrew the pump head fix- Valve Screw ing screws and take out the fixing screws and take out Pump head Pump head pump head and valve. the pump head, valve and valve seat.
- Page 23 - 21 -...
- Page 24 IWAKI Norge AS TEL : (47)23 38 49 00 FAX : 23 38 49 01 China IWAKI Pumps (Guangdong) Co., Ltd. TEL : (86)750 3866228 FAX : 750 3866278 Singapore IWAKI Singapore Pte. Ltd. TEL : (65)6316 2028 FAX : 6316 3221 China GFTZ IWAKI Engineering &...
Need help?
Do you have a question about the APN-085-D4 Series and is the answer not in the manual?
Questions and answers