Advertisement
Quick Links
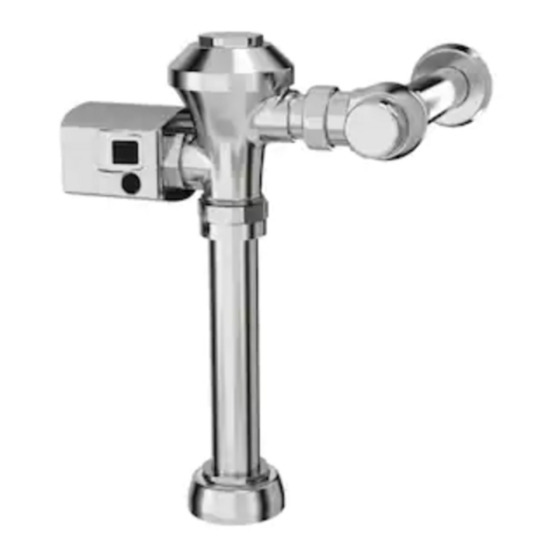
Ultima
Flush Valve
With Side-Mount Operator,
Diaphragm-Type
OPERATING PRESSURE:
25 psi (flowing)-80 psi (static)
FLOW REQUIREMENT:
25 gpm (94.6 L/min.)
Certified to comply with:
• ASSE 1037
• ANSI/ASME A112.19.2
• ADA Compliant
NOTE TO INSTALLER: Please give this manual to the customer after installation.
To learn more about American Standard Products visit our website at: www.americanstandard-us.com
or e-mail us at: CRTTEAM@lixilamericas.com
For Parts, Service, Warranty or other Assistance,
please call (844) CRT-TEAM / (844) 278-8326 (In Canada: 1-800-387-0369)
© 2019 AS America Inc.
Sensor-Operated
™
Toilet
(In Toronto Area only: 1-905-306-1093)
Urinal
OPERATING PRESSURE:
20 psi (flowing)-80 psi (static)
FLOW REQUIREMENT:
10 gpm (37.9 L/min.)
1
MODEL NUMBERS
6145SM
6147SM
M965890 Rev. 1.1 (1/19)
Advertisement

Subscribe to Our Youtube Channel
Related Manuals for American Standard Ultima 6147SM


Summary of Contents for American Standard Ultima 6147SM
- Page 1 • ANSI/ASME A112.19.2 • ADA Compliant NOTE TO INSTALLER: Please give this manual to the customer after installation. To learn more about American Standard Products visit our website at: www.americanstandard-us.com or e-mail us at: CRTTEAM@lixilamericas.com For Parts, Service, Warranty or other Assistance,...
-
Page 2: Care Instructions
Thank you for selecting American Standard...the benchmark of fine quality for over 100 years. To ensure that your installation proceeds smoothly--please read these instructions carefully before you begin. All American Standard Products Are Water Tested At Our Factory. UNPACKING Some Residual Water May Remain In The Valve During Shipping Remove the Flush Valve items from the carton. - Page 3 Roughing-in Dimensions Roughing-in Dimensions FINISHED WALL FINISHED WALL Fig.1 Fig.2 38 mm-127 mm 38 mm-127 mm 147 mm 108 mm-133 mm 147 mm 108 mm-133 mm (1-1/2-5") (5-13/16") (4-1/4" to 5-1/4") (1-1/2-5") (5-13/16") (4-1/4" to 5-1/4") SUPPLY SUPPLY DN 19 mm DN 19 mm (3/4"...
- Page 4 Fig. 3 FLUSH VALVE INSTALLATION FINISHED WALL CENTER LINE OF FIXTURE SPUD INSTALL SWEAT ADAPTER; Fig. 3 Turn water supplies off before CAUTION beginning (A-B)= Note: Install Optional Sweat Adapter (Supplied) for 32mm copper pipe supply line. (1-1/4") FILE EDGES 1.
- Page 5 INSTALL FLUSH VALVE; Fig. 6a & 6b Fig. 6a 1. As shown in Fig. 6a, insert the side INLET FLANGE (1) on the FLUSH VALVE (2) into the SUPPLY STOP (3). Lubricate the INLET FLANGE O-RING (4) with water if necessary.
- Page 6 ACTIVATION; Fig. 8 Fig. 8 Note: Four (4) “C” Cell batteries are not factory installed inside the Flush unit. 1. Remove BATTERY TRAY (1) by loosening SCREW (3). 2. Load 4 “C” Alkaline BATTERIES (5) onto BATTERY TRAY (1). 3. Install battery tray into SIDE MOUNT OPERATOR (2) and tighten SCREW (3) using WRENCH (4) provided.
- Page 7 If these items do need replacement they must be purchased separately or order the complete flush valve assembly from American Standard. 1. Remove COVER (1) from SUPPLY STOP (2) if installed. Fig. 14.
- Page 8 P ro du c t n a m e s l i s t ed h e re i n a re t ra d em a rk s of A S A m e r ic a , In c. ©2 0 1 9 To learn more about American Standard Selectronic Products visit our website at: ®...
- Page 9 P rod u ct n a m es l i s t e d he re i n a re t r ad e m a r k s o f A S A m e ri ca , In c . ©2 0 1 9 To learn more about American Standard Selectronic Products visit our website at: ®...
Need help?
Do you have a question about the Ultima 6147SM and is the answer not in the manual?
Questions and answers