
Subscribe to Our Youtube Channel
Related Manuals for CONVECTAIR OPERA


Summary of Contents for CONVECTAIR OPERA
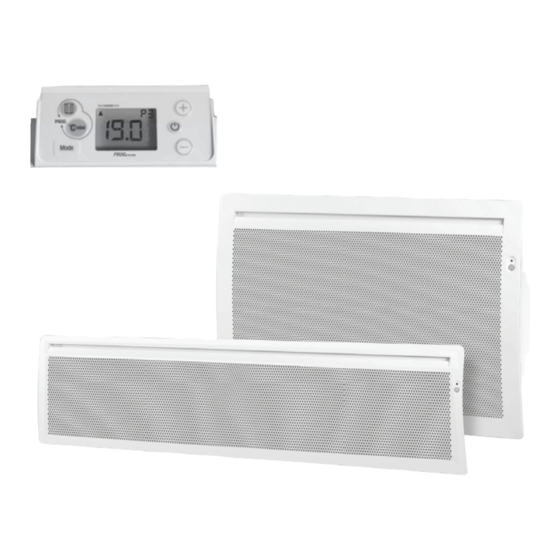
- Page 1 OPERA Radiant panel heater Horizontal and Low Installation & Operating Instructions ATTENTION :...
-
Page 2: Table Of Contents
Dear owner, - Congratulations on the purchase of this premium electric heater from CONVECTAIR, manufacturer of the highest quality heating product in the elec- trical industry. - To obtain the best results and the ultimate in performance and comfort, please take a moment to read the installation and maintenance instructions shown in this manual. -
Page 3: Safety
Safety Please read carefully the whole installation and use instruc- tions (*), and in particular the following CAUTION, HOT SURFACE Some parts of the appliance may become hot and cause burns. A very close attention has to be taken if children or vulnerable persons are present. - Page 4 WARNING : DO NOT COVER If the appliance is covered, there is a risk of overheating. The logo reminds this risk. Do not cover or obstruct the air inlet or outlet as this could cause overheating and damage the appliance. Do not insert anything in the appliance.
- Page 5 Covering the heater can result in Tout obstacle Any obstacle severe overheating. ex : voilages ex : curtains The above logo is a warning of 8’’ this risk. (0,2m) 0.2 m 8’’ Do not cover or obstruct the air 0.2 m (0,2m) inlet or outlet on the unit as this could cause overheating and da-...
-
Page 6: Installation
INSTALLATION Installation : 1- Free the mounting bracket by pressing and pulling Locking both locking tabs (Fig. B). 2- Fasten the mounting bracket to the wall using at least 4 screws (max Ø 5.5 mm) making sure that the levelling and height are correct. 3- Engage the lower legs into the slots at the bottom and back of the heater. - Page 7 Fig.D Hole Spacing Outline of unit Height Horizontal Model Power (W) 1000 1500 2000 Spacing 177mm 6,15/16’’ 319mm 12,9/16’’ 534mm 21’’ 637mm 25,1/16’’ 847mm 33,3/8’’ 1057mm 41,5/8’’ Width 230mm 9,1/16’’ 264mm 10,3/8’’ 262mm 10,5/16’’ Height 440mm 17,5/16’’ 440mm 17,5/16’’ 440mm 17,5/16’’...
-
Page 8: Electrical Connection
4- Carefully put back all wires inside the box, close and screw the cover. 5- Hook the CONVECTAIR unit onto the mounting bracket tabs with the unit slightly angled towards you. Push the CONVECTAIR towards the wall until it is engaged on both locking tabs. -
Page 9: Quickstart Guide
QUICKSTART GUIDE - Turning ON/STANDBY the heater : - Turning ON/STANDBY the heater : Turning ON/STANDBY the heater : Press the key to turn the heater ON or STANDBY.. - To set the temperature - To set the temperature To set the temperature To set the desired temperature, press - The MODE selector - The MODE selector... -
Page 10: How To Use Your Heater
HOW TO USE YOUR HEATER Consumption « Open Window» indicator Programme function Heating - Custom (P4/P5/P6) Press both key to : indicateur - Programme the Temperature heater setting keys - Set the time Location of the programming cassette (optional). Mode selection key Reset to ideal Heating ON/STANDBY key temperature... - Page 11 2.2 - Comfort Mode / Setting the desired temperature: Press the keys to raise or lower the desi- To ensure that the temperature stabilises at the desired temperature, the doors of the room should be closed. 2.3 - The MODE selector : Press repeatedly on the Mode key.
- Page 12 2.4 - AUTO Programming mode This mode enables automatic operation of the heater (over pilot wire) from a central programming system or power management system. AUTO Mode Press successively on the key until the Mode AUTO symbol is displayed Pressing on the for 3 seconds toggles between the AUTO and PRESET Note : Mode...
- Page 13 In Comfort, Economy and Frost Protection override mode, Frost Protection and Heating OFF commands sent by the central programming or energy rate mana- gement systems will have priority. This is indicated by a blinking AUTO symbol. Central Programming System or Energy Rate Management System Selected functions Command over pilot wire:...
- Page 14 2.7 - Setting the time and date : set the time and date of your heater (factory default 00:00). also reset the time on your device. A- Setting the time : PROG Press the keys for 3 seconds to access the programming menu. The «Pr»...
- Page 15 Setback ECO Mode : Press successively the key until the Setback Mode Mode (ECO) is displayed. Mode keys. To change the ECO set point temperature: Press on the Mode Press the keys until obtaining the desired ECO temperature. Press the Mode It is recommended to use this mode for temporary absences between 2 and 24 hours, or overnight.
- Page 16 Option 1 : (default mode) : standby off, press si- Eco order from internal pro- gramming or pilot wire is keys for 10 prioritary even if detector is seconds until detection option 1, 2 or 3 Option 2 : appears. Eco order from program- ming is not prioritary.
- Page 17 ECO Mode movement or P2 ...P6 Priority to comfort Detection Movement detection mode and programming Command over Pilot Wire Result or interne programming AUTO Gradual transition Comfort to ECO (in 1:30 hr) absence Comfort Mode movement Priority to energy savings Detection Movement detection mode without programming...
- Page 18 2.8.5 - Consumption indicator : It is a device behaviour indicator that allows viewing the Indicateur de consommation energy consumption status of your heater. This indicator allow to monitor and adjust the desired temperature depending on its impact on consumption. 2.8.6 - Heating Indicator : indicator shows that your heater is warming up.
- Page 19 Operating Mode 2.8.8 - sable programmes P4/P5/P6 PROG In this mode, the heater operates in automatic daily mode according to the Comfort set point or the Setback set point. Mode If you wish to assign a daily program for each day of the week : Mode - Press simultaneously for 3 seconds the...
- Page 20 DESCRIPTION OF THE PRESET PROGRAMMES P1/P2/P3 OR CUSTOMISABLE PROGRAMMES P4/P5/P6 Preset Select Meaning programme Monday to friday du Lundi au Vendredi 17h à 23h 5h à 9h ture set point in the morning from 5:00 to 9:00 0h 2 4 10 12 14 16 18 20 22 24 The P2 programme sets the Comfort tempera- Monday to friday...
- Page 21 OPERATING MODE: CUSTOM PROGRAMMING - P4/P5/P6 : In this mode, the heater operates in automatic daily mode at the Comfort or Setback set points. To do this : PROG Regardless of the current operating mode : - Press these keys simultaneously for 3seconds.
- Page 22 HOW DO I CUSTOMISE THE PROGRAM? EXEMPLE - P4 For example for MONDAY (programme LU:P4), we wish to set the Comfort set point Select : interval Result Ex. 6:00 to 9:00 Mode Mode Mode You are now customising Mode programme P4.See 6:00 to 9:00 has activation been...
- Page 23 2.9 - Coordinating the displays (thermostat/thermometer) : Exceptionally, under certain conditions, there is may be a difference between the heater’s display and the thermometer display.In such a case, the two displays can be coordinated. All doors and windows must be closed. Wait for the temperature to stabilise in the room (at least 6 hrs.) and to the extent possible, avoid movement sin the room.
- Page 24 2.10 - LOCKING AND SETTING SUPPLEMENTARY FUNCTIONS : This mode allows you to lock or unlock some options and to set some parameters. Mode Switch off the appliance, then press on for 3 se- conds. Once the screen displays , press on for 3 seconds, and the Mode Press...
-
Page 25: Maintenance
TAIR heater - Figure N. Operation and Maintenance TIPS Your CONVECTAIR heater will become hot when in use. Caution is advised when young children are present. Do not insert small objects through the front louvers : this could cause electrical In certain cases, it is possible for yellowing of the grille to occur over time. -
Page 26: Troubleshooting
TROUBLESHOOTING PROBLEM CHECK ACTION Make sure that the digital display is Press active. Mode Press successively on the until the Comfort setting is displayed. If the digital display still does not turn on. Make sure that the system circuit breakers are functional and press Make sure that the Comfort mode is on. - Page 27 Optional accessories : several programming modules can be grammer or the Power Carrier Master and Receiver modules. For more information, call your CONVECTAIR electrician or dea- ler, or contact CONVECTAIR directly (see contact info at the end of this booklet).
- Page 28 2 years against all defects 5 years on heating element All CONVECTAIR units are subject to a double warranty: 2 years on all parts and manufacturing defects and 5 years on the heating element itself. Warranty is applicable from date of purchase by the customer and under certain (purchase and/or installation).
Need help?
Do you have a question about the OPERA and is the answer not in the manual?
Questions and answers