Table of Contents
Advertisement
Quick Links
Advertisement
Table of Contents

Subscribe to Our Youtube Channel
Related Manuals for Multitech QuickCarrier USB-D MTD-MNA1


Summary of Contents for Multitech QuickCarrier USB-D MTD-MNA1
- Page 1 ® QuickCarrier USB-D MTD-MNA1 User Guide...
- Page 2 Legal Notices The MultiTech products are not designed, manufactured or intended for use, and should not be used, or sold or re-sold for use, in connection with applications requiring fail-safe performance or in applications where the failure of the products would reasonably be expected to result in personal injury or death, significant property damage, or serious physical or environmental damage.
-
Page 3: Table Of Contents
CONTENTS Contents Chapter 1 – Product Overview ..........................6 Overview ..................................6 Documentation ................................6 MTD-MNA1 Specifications ............................6 Dimensions..................................7 LED Descriptions ................................8 Power Draw................................... 8 Chapter 2 – Safety Notices and Warnings ........................ 9 General Safety................................9 Power Supply Caution .............................. - Page 4 CONTENTS Using the Radio IP Stack to Make a Data Connection ....................19 Disconnecting a Data Connection Using an Internal IP Stack ..................19 Using the Host System IP Stack to Make a Data Connection ..................19 Disconnecting a Data Connection Using Host IP Stack ....................20 Using Command Mode and Online Data Mode......................
- Page 5 CONTENTS Troubleshooting ................................37 Serial COM port is not available in the Serial Modem Settings................37 Device is not detected ("No Device") ........................37 MultiConnect Cell USB Modem is not detected ....................... 38 Connection Manager is not working, and a device connected to the computer is not detected......38 Connection Manager displays "Device Error"...
-
Page 6: Chapter 1 - Product Overview
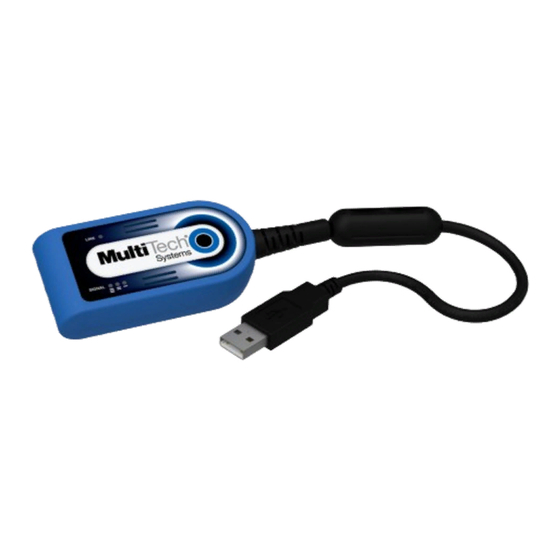
The QuickCarrier USB-D is an industrial-grade USB that plugs directly into devices to enable immediate communication with your carrier network. This device can be connected directly to any USB port on a laptop, desktop computer, and other mobile devices. Documentation The following documentation is available on the MultiTech website at http://www.multitech.com/brands/quickcarrier-usb-d. Document Description... -
Page 7: Dimensions
PRODUCT OVERVIEW Category MTD-MNA1 Operating Voltage 5 volts from USB port Input Power Via USB Bus Certifications and Compliance Radio and EMC Compliance FCC Part 15 Class B FCC Part 24E FCC Part 27 Safety Compliance UL 60950-1 2nd ED Carrier AT&T/PTCRB/Verizon Dimensions... -
Page 8: Led Descriptions
PRODUCT OVERVIEW LED Descriptions The top panel on the modem contains the following LEDs: Link LED - The Link LED indicates that power is present when continuously lit and the device is registered on the network when blinking. Signal LEDs - Signal strength LEDs are not pre-programmed. Use the AT#GPIO command to program these LEDs. -
Page 9: Chapter 2 - Safety Notices And Warnings
SAFETY NOTICES AND WARNINGS Chapter 2 – Safety Notices and Warnings General Safety The device is designed for and intended to be used in fixed and mobile applications. Fixed means the device is physically secured at one location and cannot be easily moved to another location. Mobile means the device is used in other than fixed locations. -
Page 10: Interference With Pacemakers And Other Medical Devices
SAFETY NOTICES AND WARNINGS Certains secteurs industriels et certaines entreprises limitent l'utilisation des appareils cellulaires. Respectez ces restrictions relatives aux équipements radio dans les dépôts de carburant, dans les usines de produits chimiques, ou dans les zones où des dynamitages sont en cours. Suivez les restrictions relatives à chaque type d'environnement où... -
Page 11: User Responsibility
Do not place the device alongside computer discs, credit or travel cards, or other magnetic media. The information contained on discs or cards may be affected by the device. Using accessories, such as antennas, that MultiTech has not authorized or that are not compliant with MultiTech's accessory specifications may invalidate the warranty. -
Page 12: Chapter 3 - Getting Started
GETTING STARTED Chapter 3 – Getting Started SIM Cards Before you can begin to use the modem, you need to set up a wireless account with your carrier. Follow these Contact your wireless provider/partner/reseller to obtain an account and a SIM card for their network. This device requires a mini SIM (2FF). -
Page 13: Downloading The Driver
If using Linux or if you need help installing drivers, refer to the USB Driver Installation Guide (S000616) for details. To download the required driver: Go to the device page: http://www.multitech.com/brands/quickcarrier-usb-d. Select your model and click on Downloads. Download the driver for your device by clicking on the link. Extract the driver to your computer. -
Page 14: Turning The Device On Or Off
GETTING STARTED To check that your device is configured for the desired network: AT#FWSWITCH? If response is: #FWSWITCH: 0 The device is configured for AT&T/other networks. If response is: #FWSWITCH: 1 The device is configured for Verizon. To switch carrier networks: From AT&T to Verizon: AT#FWSWITCH=1,1 From Verizon to AT&T:... -
Page 15: Removing A Sim Card
GETTING STARTED Removing a SIM Card To remove a SIM card: Warning: If the device is connected to a computer or power supply, disconnect it. Inserting or removing a SIM card with the device powered may harm the SIM card and the device. Remove the SIM cover from the back of the device. -
Page 16: Chapter 4 - Verizon Fota (Firmware Over The Air)
Verizon’s LTE requirements, you must implement FOTA. Failure to perform a critical update could result in losing access to the Verizon network. MultiTech has developed a script for customers to use in order to initiate a FOTA update from the (the customer’s) local host processor (pull FOTA). The script is available at: https://www.multitech.com/vzw-catm1... -
Page 17: Chapter 5 - Using Linux
USING LINUX Chapter 5 – Using Linux Shell Commands Related Documentation For additional information, refer to the USB Driver Installation Guide for your device. Testing TTY Ports To test the TTY ports created by the driver, type in a shell (x is the TTY port number assigned to the modem AT command interface): cat /dev/ttyUSBx &... - Page 18 USING LINUX Step 3. Use the following command line to start pppd: pppd debug call MNA1-peer This command line enables logging of debug information and tells pppd to use the peer file referenced by the call option. After 20-30 seconds, type ifconfig and check whether a ppp interface is listed. If it is not, then check syslog for pppd and chat events.
-
Page 19: Chapter 6 - Basic Operations
BASIC OPERATIONS Chapter 6 – Basic Operations Interacting with Your Device Overview This section describes how to use AT commands to interact with your device. Using terminal software such as Kermit, you can issue AT commands to communicate with and configure your modem. The AT commands let you establish, read and modify device parameters and help you control how the device operates. -
Page 20: Disconnecting A Data Connection Using Host Ip Stack
BASIC OPERATIONS Disconnecting a Data Connection Using Host IP Stack Issue the following command to disconnect: AT#SGACT-1,0. Using Command Mode and Online Data Mode Modems have two operation modes, command and online data. After power up, the modem is in command mode and ready to accept AT commands. -
Page 21: Example
BASIC OPERATIONS <ber> Bit error rate, in percent Less than 0.2% 0.2% to 0.4% 0.4% to 0.8% 0.8% to 1.6% 1.6% to 3.2% 3.2% to 6.4% 6.4% to 12.8% More than 12.8% Not known or not detectable Note: Signal strength of 10 or higher is needed for successful packet data sessions. Example A example response to AT+CSQ: +CSQ: 15,1... -
Page 22: When The Device Fails To Connect
BASIC OPERATIONS AT+CPIN? If the device returns: +CPIN: READY The device is registered. If your device does not reply with this response, verify that the SIM card is properly inserted. Note: Always insert or swap out a SIM card with the device powered off. Swapping the SIM card with the device on could lead to issues such as lack of SIM detection or interaction. -
Page 23: Reading Text Messages
BASIC OPERATIONS For example: AT+CMGF=1 AT+CMGS="0001112222" > How are you? <CTRL+Z to send> +CMGS: 255 Where 0001112222 is the phone number. Reading Text Messages To read a text message in text mode: Put the device in text mode. Enter: AT+CMGF=1 Read message. - Page 24 BASIC OPERATIONS Deletes all read and sent device-originated messages. Leaves unread messages and unsent device-originated messages. Deletes all read messages and sent and unsent device-originated messages. Leaves unread messages. Deletes all messages. For example: AT+CMGD=1 (delete message at index 1) AT+CMGD=2 (delete message at index 2) AT+CMGD=1,0 AT+CMGD=1,1...
-
Page 25: Chapter 7 - Regulatory Statements
REGULATORY STATEMENTS Chapter 7 – Regulatory Statements 47 CFR Part 15 Regulation Class B Devices This equipment has been tested and found to comply with the limits for a Class B digital device, pursuant to part 15 of the FCC Rules. These limits are designed to provide reasonable protection against harmful interference in a residential installation. -
Page 26: Other Countries
The above country-specific information does not cover all countries with specific regulations; they are included to show you how each country may differ. If you have trouble determining your own country's requirements, check with MultiTech’s Technical Support for assistance. ®... -
Page 27: Chapter 8 - Environmental Notices
Substances) complements the WEEE Directive by banning the presence of specific hazardous substances in the products at the design phase. The WEEE Directive covers all MultiTech products imported into the EU as of August 13, 2005. EU-based manufacturers, distributors, retailers and importers are obliged to finance the costs of recovery from municipal collection points, reuse, and recycling of specified percentages per the WEEE requirements. -
Page 28: Reach Statement
ENVIRONMENTAL NOTICES Bis(2-Ethylhexyl) phthalate (DEHP): < 1000 ppm Benzyl butyl phthalate (BBP): < 1000 ppm Dibutyl phthalate (DBP): < 1000 ppm Diisobutyl phthalate (DIBP): < 1000 ppm Environmental considerations: Moisture Sensitivity Level (MSL) =1 Maximum Soldering temperature = 260C (in SMT reflow oven) Lead usage in some components is exempted by the following RoHS annex, therefore higher lead concentration would be found in some modules (>1000 PPM);... -
Page 29: Information On Hs/Ts Substances According To Chinese Standards
ENVIRONMENTAL NOTICES Information on HS/TS Substances According to Chinese Standards In accordance with China's Administrative Measures on the Control of Pollution Caused by Electronic Information Products (EIP) # 39, also known as China RoHS, the following information is provided regarding the names and concentration levels of Toxic Substances (TS) or Hazardous Substances (HS) which may be contained in Multi-Tech Systems Inc. -
Page 30: Information On Hs/Ts Substances According To Chinese Standards (In Chinese)
ENVIRONMENTAL NOTICES Information on HS/TS Substances According to Chinese Standards (in Chinese) 依 依 照 照 中 中 国 国 标 标 准 准 的 的 有 有 毒 毒 有 有 害 害 物 物 质 质 信 信 息 息 根据中华人民共和国信息产业部... -
Page 31: Chapter 9 - Using Connection Manager
Click Connection Manager. Open or unzip the Connection Manager file and run the installer (.msi file). In the MultiTech Connection Manager Setup Wizard, read the end-user license agreement and check I accept the terms in the License Agreement. Click Next to have the installer automatically disable the native WWAN AutoConfig service in Windows. -
Page 32: Setting Up A Serial Device In Windows Device Manager
To specify a folder for Connection Manager, use the default folder or click Change to browse to the folder you want to use. Click Install. A separate wizard opens for installing Telit drivers. Some MultiTech devices use embedded modules from Telit Wireless Solutions to provide cellular connectivity; these devices require Telit drivers. Select Complete setup type. - Page 33 USING CONNECTION MANAGER In the Add Hardware Wizard: Click Next. Select Install the hardware that I manually select from a list, then click Next. Select Modems, then click Next. Check Don't detect my modem; I will select it from a list, then click Next. Select Standard Modem Types, then select Standard 33600 bps Modem on the right.
-
Page 34: Connecting A Device
USING CONNECTION MANAGER Connecting a Device Before You Begin Make sure that your device is connected to the computer where Connection Manager is installed. Set up the device in Device Manager. Refer to Setting Up a Serial Device in Windows Device Manager. -
Page 35: Uninstalling Connection Manager
The steps above describe how to uninstall Connection Manager using Control Panel. You can also uninstall the application by using the installer file (.msi). Double-click the file, in the MultiTech Connection Manager Setup Wizard, click Next, and then select Remove on the next two pages. -
Page 36: Main Tab
USING CONNECTION MANAGER Connection Details Terminal Charts Main tab The Main tab displays the following: Status of device connection: Searching, Connecting, Connected, Disconnecting, or Disconnected The action button, which changes according to the current device connection status: Detect, Connect, or Disconnect Signal strength bars and percentage indicator (only when connection to the carrier's network is established) Note:... -
Page 37: Settings Tab
USING CONNECTION MANAGER Settings tab Use the Settings tab to specify the type of device: USB Modem or Serial Modem. If USB Modem is selected, the tab displays USB settings. These settings cannot be edited. If Serial Modem is selected, the tab displays the serial settings that match the serial-port settings for the device. -
Page 38: Multiconnect Cell Usb Modem Is Not Detected
USING CONNECTION MANAGER Try the following steps: Click the Settings tab and make sure that the appropriate modem type is selected: USB or Serial. If you are connecting a serial device, make sure that all serial modem settings correspond to the serial modem and serial port configuration. -
Page 39: Index
INDEX Index activation...............31 FCC Notice AT Command documents..........6 Class B ..............25 Chinese hazardous substances general regulatory............26 Chinese version............30 English version ............29 Class B ................25 Industry Canada ............25 hazardous substances ...........27 command mode ............20 host IP stack ..............20 Connection Manager host system ip stack............19 Charts tab..............35 connecting device to carrier's network ....34 Connection tab............35... - Page 40 INDEX remove..............15 specifications..............6 online data mode ............20 speed................20 stop bits.................20 sécurité interférences RF............9 parity ................20 power ................14 draw ................8 product overview ............6 temperatures ..............6 troubleshooting Connection Manager ..........37 turn on/off ..............14 radio frequency interference..........9 radio IP stack..............19 reading text messages ..........22 remove user responsibility............11 SIM card ..............15...
Need help?
Do you have a question about the QuickCarrier USB-D MTD-MNA1 and is the answer not in the manual?
Questions and answers