Table of Contents
Advertisement
Quick Links
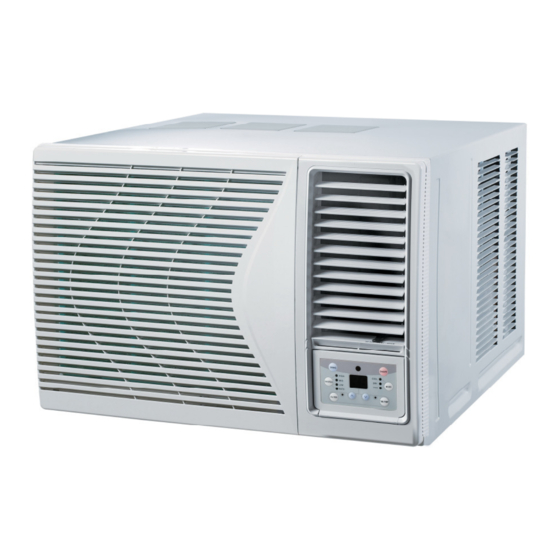
Room Air Conditioners
Window Type
Professional System
ECO933W
ECO1233W
ECO1833W
ECO2433W
Register your air conditioner
Model information can be found on the CE
label.
Please register your product online at
www.ecoair.org. For your future
convenience, record the model information
below.
____________________________________
MODEL NUMBER
____________________________________
SERIAL NUMBER
____________________________________
PURCHASE DATE
Advertisement
Table of Contents

Related Manuals for Ecoair ECO933W


Summary of Contents for Ecoair ECO933W
- Page 1 Room Air Conditioners Window Type Professional System ECO933W ECO1233W ECO1833W ECO2433W Register your air conditioner Model information can be found on the CE label. Please register your product online at www.ecoair.org. For your future convenience, record the model information below.
-
Page 2: Table Of Contents
____________________________________________________________________________________ Congratulations! You have purchased the very latest in room air conditioner technology. Your new EcoAir high efficiency room air conditioner will give you many years of dependable service. Many features have been built into your EcoAir air conditioner to assure quiet operation, the best circulation of cool, dry air, functional controls, and the most economical operation. -
Page 3: Before Operating Your Unit
Safety Precautions Input Rated Amp Model Power Supply Input Rated Amp (Switch/Fuse) ECO933W & ECO1233W 220-240V ~ 50Hz ECO1833W ECO2433W Note : The supply voltage can not be less than the rate voltage of the air conditioner. Warning Installations must comply with the national wiring standards and conform to local authority regulations. -
Page 4: Bs Plug Wiring
____________________________________________________________________________________ BS Plug Wiring (For models ECO933W and ECO1233W) Wiring Instructions: Should it be necessary to change the plug please note the wires in the mains lead are coloured in accordance with the following code: BLUE - NEUTRAL BROWN – LIVE... -
Page 5: Function
____________________________________________________________________________________ Function Introduction Window type room air conditioners of EcoAir can cool the room temperature down and dry the room. It is convenient for your work, study and life. It can be widely used in home, shop, hotel, office, library and laboratory, and so on. Cooling in summer Dehumidifying in rainy or humid season During summer, use your air conditioner to... -
Page 6: Operating Condition
____________________________________________________________________________________ Operating Condition Please operate air conditioner in the correct conditions as following. COOL mode operation DRY mode operation Outdoor temperature should be in range of Outdoor temperature should be in range of -- 18° C to 45° C. -7° C to 24° C. Room humidity should be lower than 90%. -
Page 7: Installation
____________________________________________________________________________________ Installation Installation precaution Note: This air conditioner is designed for permanent through-the-wall installation. Mounting the unit in a window will require a window mounting accessory kit which is not supplied with this unit. Incorrect installation can cause malfunction and damage. -
Page 8: How To Install
____________________________________________________________________________________ How to install • Choose a location where there are no obstacle surrounding the unit, and the plug is accessible. • Obstructions can prevent heat transfer from the condenser. Choose the installation space according to the diagram below. • The distance of obstruction o from the back of the exterior cabinet must be over 500mm o from sides and top of the exterior cabinet must be over 150mm o from the top of the interior cabinet must be over 150mm... -
Page 9: Installation Procedure
____________________________________________________________________________________ Installation Procedure 1. Remove the sticker form the front panel. 2. Prepare the installation hole (slightly bigger than unit size for ease of inserting unit). 3. Insert the air conditioner into the installation hole. Install at a slight outward down angle to allow condensate water to drain away (approximately 6 - 10mm, as figure on the right). -
Page 10: Drain Water
____________________________________________________________________________________ Drain Water To get the maximum cooling efficiency, the air conditioner is designed to splash the condensation water on the condenser coil. You can provide an outside drain by using the following procedure, which may however cause a small loss of performance. 1. -
Page 11: Part Identification
____________________________________________________________________________________ Part Identification Air direction adjustment Vertical airflow direction vane (Airflow direction adjustment up and down). The vertical airflow direction vane is controlled by positioning the vane to discharge the air upwards, downwards or straight out. Page 11... -
Page 12: Wireless Remote Control Operation
____________________________________________________________________________________ Wireless Remote Control Operation Note: Be sure that there are no obstructions between receiver and remote controller; Don't drop or throw the remote control; Don't let any liquid in the remote control and put the remote control directly under the sunlight or any place where is very hot. - Page 13 ____________________________________________________________________________________ Wireless Remote Control Operation ENERGY SAVER button SWING button Under the Cool and Dry mode, press this When it is pressed, the louvers start to button once, the unit will enter "energy rotate automatically and stop when saver” , mode. Repress this button, the repressed unit will exit "energy saver"...
-
Page 14: General Operation
____________________________________________________________________________________ Guide For Operation – General Operation 1. After powered on, press ON/OFF button, the unit will start to run.(Note: When it is powered off, the guide louver of main unit will close automatically.) 2. Press MODE button, select desired running mode, or press COOL or HEAT mode to enter into the corresponding operation directly. -
Page 15: About Swing Up And Down
____________________________________________________________________________________ About Swing Up and Down 1. Press swing up and down button continuously more than 2 seconds, the main unit will swing back and forth from up to down, and then loosen the button, the unit will stop swinging and present position of guide louver will be kept immediately. -
Page 16: Control Panel
____________________________________________________________________________________ Control Panel To operate manually without the wireless remote control, open the surface panel on the front. 1. Power Button Operation starts when pressing this button, and stops when pressing this button again. 2. Swing Button Activate the automatic air swing function. 3. -
Page 17: Operation Tips
____________________________________________________________________________________ Operation Tips Operation for comfort and economy Do not overcool the room Keep blind or curtains closed. Keep the room temperature temperature. This is not good Do not let sunshine enter the uniform. Adjust the vertical and for health and wastes electricity. room directly when the air horizontal airflow direction to condition is in operation. -
Page 18: Caution
____________________________________________________________________________________ Caution 1. The plug must be accessible after the appliance is positioned. 2. Do not dry cloths by placing it on the unit. 3. If the power cord is damaged, it must be replaced by the manufacture or its service agent in void of hazard. -
Page 19: Care And Maintenance
____________________________________________________________________________________ Care And Maintenance Always turn off the air conditioner and main power supply before cleaning to ensure safety. Clean Unit 1. Plug out first before cleaning. Air filter The air filter behind the intake grille should be washed at least every two weeks or as often as it needs cleaning. -
Page 20: Trouble Shooting Guide
____________________________________________________________________________________ Trouble Shooting Guide Please check the following items before asking for repair, it saves your time and money. Fault phenomenon Trouble-shooting Air conditioner dose not • Is there a power failure? operate at all. • Is the plug out? •... -
Page 21: Service & Warranty
____________________________________________________________________________________ Service & Warranty ONE (1) YEAR LIMITED WARRANTY SAVE THIS WARRANTY INFORMATION EcoAir guarantees this product free from manufacturing defects in materials and workmanship for a period of one (1) year from the date of purchase, limited to parts only.
Need help?
Do you have a question about the ECO933W and is the answer not in the manual?
Questions and answers