Table of Contents
Advertisement
Quick Links
Advertisement
Table of Contents

Related Manuals for ZeeVee ZyPerMX


Summary of Contents for ZeeVee ZyPerMX
- Page 1 ZyPerMX Video Encoder User Manual...
- Page 2 Safety Instructions INSTRUCTIONS PERTAINING TO A RISK OF FIRE, ELECTRIC SHOCK, OR INJURY TO PERSONS Important Safety Instructions. Save These Instructions. WARNING: When using electronic products, basic precautions should always be followed, including: Keep these instructions. Heed all warnings. Follow all instructions. Do not use this apparatus near water.
- Page 3 FCC Statement including interference that may cause undesired operation. This equipment has been tested and found to comply with the limits for a Class A digital device, pursuant to Part 15 of the FCC Rules. These limits are designed to provide reasonable protection against harmful interference in a commercial installation.
- Page 4 Maestro Web GUI browser management of unit. Custom, downloadable idle screen for active display when no input is present. Bonjour protocol supported for automatic discovery of ZyPerMX on network. appropriately capable switch or power injector. Rack-mountable 1U, half rack width metal enclosure input/output resolutions up to...
- Page 5 Features and Package Contents What’s In The Box • 1 x ZyPerMX • 1 x Power Adapter •...
-
Page 6: Table Of Contents
Getting Started Panel Descriptions ..............2 Front View ................2 Rear View ................3 Installation ................4 Basic Connections ..............4 Connecting to the ZyPerMX ..........4 Using Bonjour Discovery .............5 Sample Application Diagram ..........6 Basic Operation The Maestro Web Interface ............8 Logging In ................8 ............9 ............11... -
Page 7: Getting Started
Getting Started... -
Page 8: Panel Descriptions
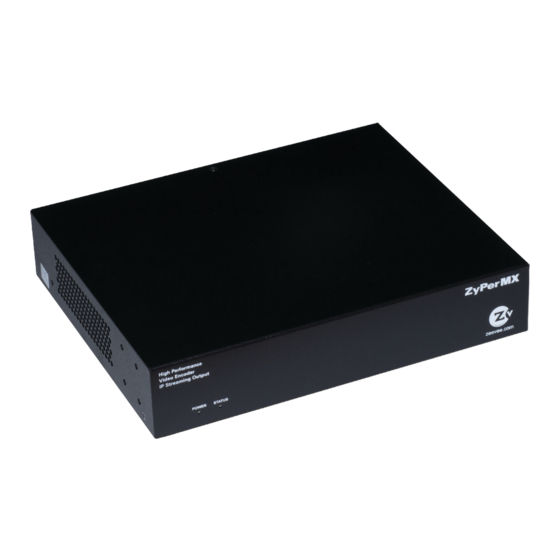
Video Encoder IP Streaming Output POWER STATUS Name Description POWER MEDIA INPUT TRANSPORT ZyPerMX HDMI In Ethernet (POE) +12VDC 1.0A up to 1080p 10/100/1000 High Performance the ZyPerMX is powered. Video Encoder IP Streaming Output ZyPerMX unit is functioning normally. -
Page 9: Rear View
Description Connect the included 12V DC power supply to this power receptacle. Reset Press and hold this button for approximately 5 seconds, then release, to reset the ZyPerMX encoder to Resetting the ZyPerMX (page 20 for more iniformation. HDMI In Connect an HDMI cable from this port to the HD video source. -
Page 10: Installation
Getting Started Installation Basic Connections Connect an HDMI cable from the HDMI In port on the ZyPerMX to an HD video source. ZyPerMX, to a LAN or directly to the PC. panel of the ZyPerMX. Connecting to the ZyPerMX By default, each ZyPerMX encoder uses a static IP address of 192.168.1.10. In order to connect to the unit, and depending upon your network setup, it may be necessary to adjust the IP settings of the computer so that it can connect to the ZyPerMX. -
Page 11: Using Bonjour Discovery
Click the Workgroup Manager section to expand it. Click the arrow next to the ZyPerMX unit to expand it and display the IP address. Launch a web browser, and enter the IP address of the ZyPerMX unit to display the ZyPerMX Maestro web interface. -
Page 12: Sample Application Diagram
Getting Started Sample Application Diagram Bluray Player ZyperMX Camera ZyperMX Set Top Box Computer HDMI Ethernet... -
Page 13: Basic Operation
Basic Operation... -
Page 14: The Maestro Web Interface
Make sure that the computer used to access Maestro and the ZyPerMX encoder are on the same network. If a network is not being used, the ZyPerMX can be directly con- nected to the computer. In both cases, the ZyPerMX and the computer must be on the same subnet. - Page 15 Click the drop-down list, under Addr Type, to select the desired network mode. The default setting for Addr Type is Static and uses an IP address of 192.168.1.10. lightbulb” icon, at any time, to physically identify the ZyPerMX on the network. This will cause the Status...
- Page 16 Basic Operation Locate the Addr Type DHCP, then all network parameters are assigned automatically, providing there is a DHCP server connected to the network. If the Addr Type is set to Static, then follow steps 6 - 9. Mask Gateway Click the Apply button to commit the changes.
- Page 17 Basic Operation IP Stream or RTP protocols. Logging In (page 8 for more information. Click the IP Channel Plan tab. To enable IP streaming, be sure that the Enabled drop-down box is set to Enable. This is the default setting. To disable IP streaming, select Disable from the drop- down list.
- Page 18 Basic Operation Dest. IP Address that multicast receives the stream. If you enter a valid IP unicast address, only that Dest. IP Port the port number. The supported port range is 1025 to 65534. Program Number The spinner controls may also be used to set the program number. UDP or RTP for the stream type from the TS Type drop-down list.
- Page 19 Basic Operation Short Name display the short channel name when tuning to different streams. The short name can- not exceed 60 characters in length. Letters, numbers, and spaces are permitted. Long Name exceed 60 characters in length. Letters, numbers, and spaces are permitted. 10.
- Page 20 Basic Operation 11. Click the Apply button to save the changes or click the Reset button to discard any changes.
-
Page 21: Adjusting Audio And Video Settings
Basic Operation Adjusting Audio and Video Settings Logging In (page 8 for more information. Click the AV Encode tab. Click the Video Mode drop-down list to select the video mode. Test can be used to evaluate different HDMI video sources. However, in production environments, make sure that the Video Mode is set to Normal. - Page 22 Basic Operation The Target Video Bitrate and use, as a relative average. handle anywhere from 2000 kilobits / second to a 10000 kilobits / second. It is recommended to set this value to 6000. The value can then be adjusted depending upon the capability of the endpoint.
- Page 23 Basic Operation Click the Apply button to save the changes or click the Reset button to discard any changes.
-
Page 24: Displaying Device Information
The Status tab will be selected automatically. • The System • lightbulb” icon to physically identify the ZyPerMX on the network. When this icon is clicked, the Status for about 10 seconds. • The Video above, the input is 1080p60 and the output is 1080p60. Video input and output resolution cannot be changed. -
Page 25: Changing The Device Name
• The Messages operation. Changing the Device Name By default, the ZyPerMX is automatically assigned a name by combining the string something more descriptive using the procedure below. The Maestro Web Interface (page 8 more information. Click the Device tab. -
Page 26: Resetting The Zypermx
Basic Operation Resetting the ZyPerMX The ZyPerMX can be reset to factory-default settings by clicking the Default button under the Device tab or by pressing the reset button on the rear panel of the unit. When the ZyPerMX is reset to factory-default settings, the IP address will be reset to 192.168.1.10 and will be set to Static mode. -
Page 27: Rebooting The Zypermx
Wait approximately 5-10 seconds, then release the button. After about 60 seconds, the unit will be ready for use. Rebooting the ZyPerMX The ZyPerMX can be rebooted using Maestro Rebooting the unit does not reset the ZyPerMX to factory-default settings. The Maestro Web Interface (page 8 more information. -
Page 28: Setting The Password
Basic Operation Setting the Password The default login password for the Maestro web interface is admin. This password can be changed using the following procedure. To recover a lost or forgotten password, see Recovering a Lost Password (page 23 The Maestro Web Interface (page 8 more information. -
Page 29: Recovering A Lost Password
The ZyPerMX does not provide any built-in safeguards for lost or forgotten passwords. The ZyPerMX must be reset to factory-default settings using the reset button on the rear panel. Use the admin passowrd to login and then change the password under the Device tab. -
Page 30: Updating The Firmware
Basic Operation Updating the Firmware information. The Maestro Web Interface (page 8 more information. Click the Device tab. Click the Update button, under Actions. The following dialog will be displayed. Click the Browse... -
Page 31: Using Custom Screens And Icons
Basic Operation Using Custom Screens and Icons When no video is being passed from the ZyPerMX to the decoder/display, a blank background will be displayed. This can be changed to display a custom graphic. Icons are designed for use with the ZyPerMXe and can be associated with the IP stream in the MXe interface. - Page 32 The following dialog will be displayed. Click the Browse button to select the desired .png format and have a resolution of 128 x 128 pixels. Click the Upload button to upload the image to the ZyPerMX. Once the upload has been completed, the following message will appear in the Icon dialog.
-
Page 33: The Support Page
Basic Operation The Support Page The Support ZyPerMX. The Maestro Web Interface (page 8 more information. Click the Support tab on the far-right of the screen. • The System Changing the Device Name (page 19 for more information. • this icon is clicked, the Status for about 10 seconds. - Page 34 Basic Operation • The Firmware • The Operating System sequences that have occurred on this unit.
-
Page 35: Appendix
Appendix... - Page 36 Appendix Video Input 1 x HDMI Type A, 19-pin, female 0.5 ~ 1.2 Vp-p Video Output Output Type Input / Output Resolutions 60 Hz 640 x 480 1440 x 900 800 x 600 1400 x 1050 1024 x 768 1600 x 1200 1280 x 768 1680 x 1050 1280 x 800...
- Page 37 Appendix Power Input 12 V DC / 1 A Power Consumption 4.25 in x 1.33 in x 4.5 in...
-
Page 38: Index
Appendix Index basic connections connecting to the ZyPerMX Audio using Bonjour IP address bit rate destination LPCM IP Channel Plan Auto resolution IP port destination lightbulb Bit rate icon 9, audio Login video password Bonjour Long name using Maestro login... - Page 39 Appendix storing password Program number Warranty Web browsers recommend Rebooting Resetting factory-defaults using Maestro using the reset button Resolution output output, auto adding custom Table of Contents Transport stream type Uptime Video bit rate recommended mode...
-
Page 40: Warranty
ZeeVee, Inc. January, 2016 LIMITED TWO YEAR WARRANTY of purchase. ZeeVee’s limited warranty extends only to the original end user purchaser or purchaser and to no other purchaser or transferee. All warranties implied by law, including on how long an implied warranty lasts, so the above limitation may not apply to you. - Page 41 LIMITATION OF LIABILITY In no event will ZeeVee be liable for any amount greater than the retail price of the ZeeVee damages, so the above limitation or exclusion may not apply to you. This warranty gives you...
- Page 42 North America: +1 (347) 851-7364 • sales@zeevee.com International: +1 (347) 851-7364 • sales@zeevee.com EMEA: +44 1494 956677 • EMEAsales@zeevee.com www.zeevee.com BOSTON | DENVER | LONDON...
Need help?
Do you have a question about the ZyPerMX and is the answer not in the manual?
Questions and answers