Table of Contents
Advertisement
Quick Links
Advertisement
Table of Contents

Related Manuals for Vent-Axia Eclipse Series


Summary of Contents for Vent-Axia Eclipse Series
- Page 1 Eclipse Installation and Wiring Instructions Models Ref No. Eclipse 100X 42 73 10A Eclipse 100XP 42 72 81A Eclipse 100XT 42 72 82A Eclipse 150X 42 72 83A Eclipse 150XP 42 73 13A 220-240V~50Hz PLEASE READ INSTRUCTIONS IN CONJUNCTION WITH ILLUSTRATIONS. PLEASE SAVE THESE INSTRUCTIONS.
- Page 2 Phase) complies with the rating label. D. The Fan should only be used in conjunction with the appropriate Vent-Axia products. E. The fan should only be used in conjunction with fixed wiring. F. When the Fan is used to remove air from a room containing a fuel-burning appliance, ensure that the air replacement is adequate for both the fan and the fuel-burning appliance.
- Page 3 K. Stationary appliances not fitted with means for disconnection from the supply mains having a contact separation in all poles that provide full disconnection under over voltage category III, the instructions state that means for disconnection must be incorporated in the fixed wiring in accordance with the wiring rules.
- Page 4 3. Remove the Inner Grille [A]. Insert a small bladed screwdriver between the bottom blade of the Inner Grille and the Outer Bezel [B]. Gently lever the bottom grille blade upwards and away from the Outer Bezel. 4. Remove the Outer Bezel. Remove the two screws retaining the Bezel to the Base Housing [D]. Note that the Outer Bezel is also secured into position via the central section and will require a small force to remove it.
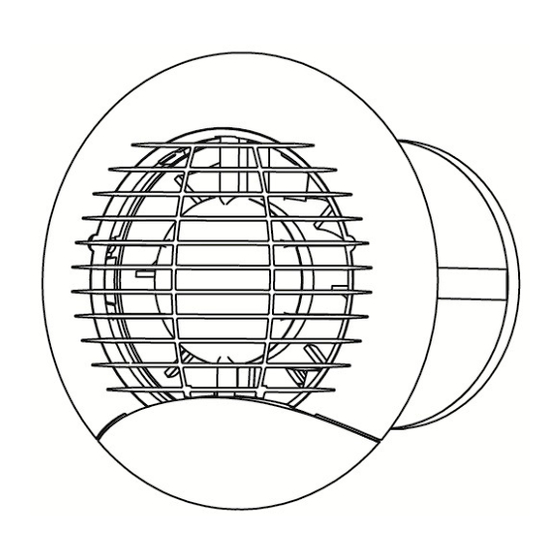
- Page 5 Fig. 1. Grille Outer Bezel Cable Grommet Base Housing Shutter Assembly Quick Clip Fig. 2. Fig. 3 Base Housing Quick Clip Wall Liner Wall Fig. 4. Eclipse 100/150 X/XP 1 Phase Supply (220-240 V 50 Hz) Switched Fused Spur Pull Cord (if applicable)
- Page 6 Fig. 5. Eclipse 100 XT 1 Phase Supply (220-240 V 50 Hz) L ~ N Ceiling Junction Fuse 3 Pole Isolator Switch...
- Page 8 Vent-Axia guarantees its products for two years from date of purchase against faulty material or workmanship. In the event of any part being found to be defective, the product will be repaired, or at the Company’s option replaced, without charge, provided that the product:- Has been installed and used in accordance with the instructions given with each unit.
Need help?
Do you have a question about the Eclipse Series and is the answer not in the manual?
Questions and answers