
Related Manuals for Leica Aperio LV1 IVD


Summary of Contents for Leica Aperio LV1 IVD
- Page 1 Aperio LV1 IVD Live View and Desktop Scanner User’s Guide MAN-0524, Revision B | March 2024...
- Page 2 Aperio LV1 IVD Live View and Desktop Scanner User’s Guide Copyright Notice Copyright © 2024 Leica Biosystems Imaging, Inc. All Rights Reserved. LEICA and the Leica logo are registered trademarks of Leica Microsystems IR GmbH. Aperio is a trademark of the Leica Biosystems group of companies in the USA and optionally in other countries.
-
Page 3: Table Of Contents
Instrument Position and Spacing ................20 Vibration ........................ 21 Dust and Pollution ....................21 Temperature ......................21 Power ........................21 Aperio LV1 IVD Live View and Desktop Scanner User’s Guide Revision B © Leica Biosystems Imaging, Inc. 2024 | Page 3... - Page 4 Contents Getting Started ....................22 Logging In ......................... 22 Switch on the Aperio LV1 IVD Live View and Desktop Scanner ........22 Turn Off the LV1 IVD ....................23 Slide and Tray Loading ....................23 Start Screen ....................... 24 Live View ......................25 Live Slide List ......................
- Page 5 Viewing and Navigating a Z-Stack Image ..............52 Image Analysis ......................53 Clinical Viewing Mode ....................53 Toolbar Quick Reference .................... 53 Keyboard Shortcuts ....................55 Aperio LV1 IVD Live View and Desktop Scanner User’s Guide Revision B © Leica Biosystems Imaging, Inc. 2024 | Page 5...
- Page 6 Scan Area – Fixed Scanning Area ................ 66 Scan Resolution and Z-planes ................66 Post Scanning Options ..................66 Aperio LV1 IVD Live View and Desktop Scanner User’s Guide Revision B © Leica Biosystems Imaging, Inc. 2024 | Page 6...
- Page 7 Cleaning the Scanner Interior ..................71 Removal of Broken Slides ..................72 Keyboard Shortcuts ................... 73 Symbols ........................75 Aperio LV1 IVD Live View and Desktop Scanner User’s Guide Revision B © Leica Biosystems Imaging, Inc. 2024 | Page 7...
-
Page 8: Introduction
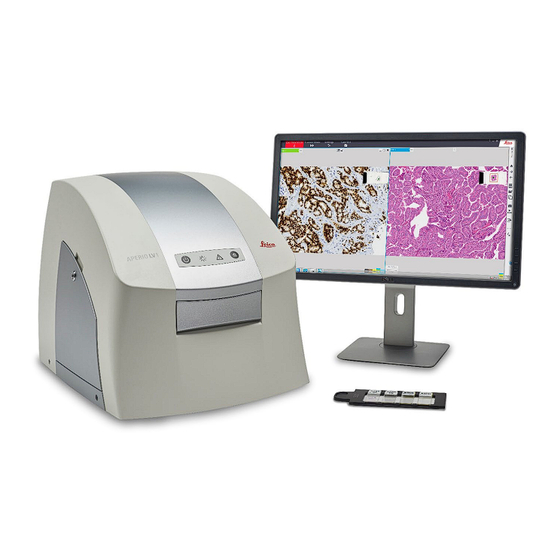
The Aperio LV1 IVD is intended to be used to remotely view glass slides and remotely and robotically control the LV1 IVD while viewing glass slides. The Aperio LV1 IVD can also be used to digitize traditional glass microscope slides through a scanning process and to compress and view the digital whole slide images. -
Page 9: Biological Safety
Set your Windows screensaver to time out when inactive and to require a login to re- activate the workstation. Contact your IT department if you need assistance with this. Aperio LV1 IVD Live View and Desktop Scanner User’s Guide Revision B © Leica Biosystems Imaging, Inc. 2024 | Page 9... -
Page 10: Barcode Reading
Use code types with error check or correction and use labels with good contrast and large, well defined print. Aperio LV1 IVD Live View and Desktop Scanner User’s Guide Revision B © Leica Biosystems Imaging, Inc. 2024 | Page 10... -
Page 11: Action In Case Of Malfunction
Read the manual to see if this kind of malfunction is known, described and can be solved by the user. See Troubleshooting Steps for information. Contact Leica Technical Services (see Customer Support at the beginning of this guide). General Description Delivery Contents ... - Page 12 Minimum label size shall be 12mm x 25mm (for detecting the presence of the slide). Labels shall not protrude beyond the edge of the slides or be lifted. Aperio LV1 IVD Live View and Desktop Scanner User’s Guide Revision B © Leica Biosystems Imaging, Inc. 2024 | Page 12...
- Page 13 Scan Speed 90 sec/slide, 15x15 mm, at 0.27 µm/pixel (20x) and 180 sec/slide, 15x15 mm, at 0.138 µm/pixel (40x) Aperio LV1 IVD Live View and Desktop Scanner User’s Guide Revision B © Leica Biosystems Imaging, Inc. 2024 | Page 13...
- Page 14 Transport -25 to +50°C, Max. 85% RH Conditions Shipment on pallet, tested according to ISTA 2B Degree of Pollution Aperio LV1 IVD Live View and Desktop Scanner User’s Guide Revision B © Leica Biosystems Imaging, Inc. 2024 | Page 14...
- Page 15 EMC requirements of FCC (47CFR Part 15) and IEC 61326-2- 6:2013 Environmental RoHS conform (Restriction of Hazardous Substances) according to EU Directive 2011/65/EC Aperio LV1 IVD Live View and Desktop Scanner User’s Guide Revision B © Leica Biosystems Imaging, Inc. 2024 | Page 15...
-
Page 16: Product Features
Software: Aperio LV1 IVD Application v 5.0.0 and later Intended Use Statement The Aperio LV1 IVD Live View and Desktop Scanner is a capture and viewing (local and remote) system of glass slides that are viewed by pathologists for their diagnostic opinion. It is intended as a primary in vitro diagnostic aid used by pathologists when providing a pathology opinion of submitted samples*, including for consultations. -
Page 17: Sample Specification
The specimen area of the slide can be imaged in high resolution, which is 50x22 mm adjacent to the label area. Aperio LV1 IVD Live View and Desktop Scanner User’s Guide Revision B © Leica Biosystems Imaging, Inc. 2024 | Page 17... -
Page 18: Side Access Door
A side access door has been provided to allow you to clean the instrument objectives or to recover slides if needed. Aperio LV1 IVD Live View and Desktop Scanner User’s Guide Revision B © Leica Biosystems Imaging, Inc. 2024 | Page 18... -
Page 19: Cleaning
Avoid getting fluids into the instrument. The instrument interior must be cleaned only if necessary. Cleaning the Scanner Interior. Aperio LV1 IVD Live View and Desktop Scanner User’s Guide Revision B © Leica Biosystems Imaging, Inc. 2024 | Page 19... -
Page 20: Preparing For Installation
Live View Hover the cursor over the Aperio LV1 IVD logo to see a small window with version information. The instrument number is also indicated on the label on the rear of the LV1 IVD. Installation Site Instrument Position and Spacing This instrument is for indoor use only. -
Page 21: Vibration
Connect the instrument power cord to a surge-protected 4-6 outlet power strip placed in close proximity to the work surface and easily accessible. To protect the scanner, Leica Biosystems recommends using a UPS (uninterruptible power supply) rated at 2200VA with power conditioning that protects connected loads from electrical surges and spikes, lightning and other power disturbances. -
Page 22: Getting Started
Getting Started This section is intended to assist you in starting to work with the Aperio LV1 IVD Live View and Desktop Scanner once it is installed. It guides you through the first steps, up to live imaging. For details about Scanner Mode, Settings and the Slide List please refer to the appropriate sections. -
Page 23: Turn Off The Lv1 Ivd
The labels must be to the left. Keep the slides clean to achieve the highest possible image quality. As soon as the Aperio LV1 IVD application is started, the Eject button on the LV1 IVD front panel is disabled to prevent accidental tray ejection. -
Page 24: Start Screen
Chapter 3: Getting Started Start Screen When you start the Aperio LV1 IVD application, the main screen gives links to the areas you will use the most often: Live View and Slide List. At the top of the window, you can choose between several modes or start the Settings dialog. -
Page 25: Live View
Live Slide List Live Slide List Upon insertion of the tray or clicking on the Live View icon, the Aperio LV1 IVD Live View and Desktop Scanner generates overview images of all slides and displays them on the screen in the Live Slide List. -
Page 26: Tips On Using The Live Slide List
Live View Main Window. Click the down-arrow beneath the Case ID/Slide ID boxes to enter more information on the slide. Aperio LV1 IVD Live View and Desktop Scanner User’s Guide Revision B © Leica Biosystems Imaging, Inc. 2024 | Page 26... -
Page 27: Live View Main Window
Basic controls to minimize, maximize or close a slide view (2) Aperio LV1 IVD Live View and Desktop Scanner User’s Guide Revision B © Leica Biosystems Imaging, Inc. 2024 | Page 27... - Page 28 Live Slide List, add views of scanned slides saved as digital images, and draw annotations and measurements on the slide views. Aperio LV1 IVD Live View and Desktop Scanner User’s Guide Revision B © Leica Biosystems Imaging, Inc. 2024 | Page 28...
-
Page 29: Navigating The Slide
Focus Adjustment Mouse wheel: Adjust image focus in live images. (Focusing is not available in the Overview magnification.) Aperio LV1 IVD Live View and Desktop Scanner User’s Guide Revision B © Leica Biosystems Imaging, Inc. 2024 | Page 29... -
Page 30: Navigation
By pressing the mouse-wheel-button, the cursor turns into a 4-arrow symbol. In this mode the image position follows the mouse movements. Deactivate this mode by pressing the mouse-wheel-button again. Aperio LV1 IVD Live View and Desktop Scanner User’s Guide Revision B © Leica Biosystems Imaging, Inc. 2024 | Page 30... -
Page 31: Live View Side Menu
As with live slides, previously scanned digital slides can be added to the main view. Please refer to for details. Slide List Aperio LV1 IVD Live View and Desktop Scanner User’s Guide Revision B © Leica Biosystems Imaging, Inc. 2024 | Page 31... -
Page 32: Interactive Scan
“sharpen” box to have the filter affect the live image. The circle in the upper right corner resets all image adjustments to the default values. Aperio LV1 IVD Live View and Desktop Scanner User’s Guide Revision B © Leica Biosystems Imaging, Inc. 2024 | Page 32... -
Page 33: Additional Side Menu Tools
Working with Annotations and Measurements. For information on performing an interactive scan, see Scanning from the Live View Main Window. Aperio LV1 IVD Live View and Desktop Scanner User’s Guide Revision B © Leica Biosystems Imaging, Inc. 2024 | Page 33... -
Page 34: Slide Tray
Slide Tray to symbolize the selected scene. An additional left click on the thumbnail image will replace the overview image with the meta-information available for this live or digital slide. Aperio LV1 IVD Live View and Desktop Scanner User’s Guide Revision B © Leica Biosystems Imaging, Inc. 2024 | Page 34... -
Page 35: Expanding The Slide Tray
You entered this information when you selected the slide in the Live Slide List before you displayed it in the Live View Main Window. Aperio LV1 IVD Live View and Desktop Scanner User’s Guide Revision B © Leica Biosystems Imaging, Inc. 2024 | Page 35... -
Page 36: Working With Annotations And Measurements
A red outline for a text icon in the Slide Tray area denotes that the text is currently hidden in the main Live View Main Window. Aperio LV1 IVD Live View and Desktop Scanner User’s Guide Revision B © Leica Biosystems Imaging, Inc. 2024 | Page 36... -
Page 37: Scanning From The Live View Main Window
Note: Running additional software can slow down scanning performance. It is advised to shut down all unnecessary programs. With Aperio LV1 IVD Live View and Desktop Scanner you can interactively define parts of the slide or the sample to be digitized directly in the Live View Main Window. (There is a separate Scanning for automated Slide Scans.) -
Page 38: Scanning
You may define which elements are contained in that snapshot. Allow/disable Slide Map, label or annotations. Choose between exporting the currently active view or all visible views (Multiview) to export. Aperio LV1 IVD Live View and Desktop Scanner User’s Guide Revision B © Leica Biosystems Imaging, Inc. 2024 | Page 38... -
Page 39: Export Tool
Note: Use of this function can result in export of very large files. For example, 40x images of the entire slide area can be easily larger than 20GB. A dialog guides you through multiple steps. Aperio LV1 IVD Live View and Desktop Scanner User’s Guide Revision B © Leica Biosystems Imaging, Inc. 2024 | Page 39... -
Page 40: Annotation And Measurement
Annotation Clicking the Annotation icon shows annotation tools for drawing lines and areas or adding text on the images. Aperio LV1 IVD Live View and Desktop Scanner User’s Guide Revision B © Leica Biosystems Imaging, Inc. 2024 | Page 40... -
Page 41: Measurements
Each drawing, measurement, or text object is added to the Slide Tray. It can be selected and relocated using the Slide Tray (see Slide Tray). Aperio LV1 IVD Live View and Desktop Scanner User’s Guide Revision B © Leica Biosystems Imaging, Inc. 2024 | Page 41... -
Page 42: Slide List
“+”to find the slides of interest. Slide Information Field (2) The slide information field shows the metadata belonging to the selected slide. Aperio LV1 IVD Live View and Desktop Scanner User’s Guide Revision B © Leica Biosystems Imaging, Inc. 2024 | Page 42... -
Page 43: Scan Gallery (3)
This field shows information pertaining to the active scan in detail. Annotations, measurements or text added to the selected scan are listed. Aperio LV1 IVD Live View and Desktop Scanner User’s Guide Revision B © Leica Biosystems Imaging, Inc. 2024 | Page 43... -
Page 44: Case List
You can review the scans you have made on this page. Click a Case ID to see information on that slide at the bottom of the page. Aperio LV1 IVD Live View and Desktop Scanner User’s Guide Revision B © Leica Biosystems Imaging, Inc. 2024 | Page 44... -
Page 45: Uploading Cases To Aperio Eslide Manager
Chapter 5: Case List Uploading Cases to Aperio eSlide Manager If the Aperio LV1 IVD has been configured to connect to eSlide Manager, you will see an additional Upload column on this page: To upload a case to eSlide Manager, select the Upload check box for that case, click the Upload button, and the upload begins. -
Page 46: Scanning Mode
RAM failure. The scanning mode offers the ability to scan many slides without interruption as quickly as possible. By clicking on Scanner Mode in the Aperio LV1 IVD application top menu you change to the scanning mode menu. Scan Slides Start detection and scan of all slides present in the slide tray. -
Page 47: Automatic Scanning
Subsequently, the instrument starts scanning all available slides automatically, using the profile selected in the scanning mode main menu. Aperio LV1 IVD Live View and Desktop Scanner User’s Guide Revision B © Leica Biosystems Imaging, Inc. 2024 | Page 47... -
Page 48: Imagescope Quick Reference
CD, or may reside on your network; contact your network administrator for help if you have trouble finding it.) Aperio LV1 IVD Live View and Desktop Scanner User’s Guide Revision B © Leica Biosystems Imaging, Inc. 2024 | Page 48... -
Page 49: Starting Aperio Imagescope Viewer
Use the eSlide Manager List commands to see the eSlides on your site. After you open an eSlide, it appears in the Aperio ImageScope main window. Aperio LV1 IVD Live View and Desktop Scanner User’s Guide Revision B © Leica Biosystems Imaging, Inc. 2024 | Page 49... -
Page 50: Aperio Imagescope Main Window
in the Label window. To show or hide the label, go to the View menu and select Label. Aperio LV1 IVD Live View and Desktop Scanner User’s Guide Revision B © Leica Biosystems Imaging, Inc. 2024 | Page 50... -
Page 51: Moving The Viewing Area
Double-clicking on the image in the main window immediately zooms that image to the maximum magnification. Double-click again to return to the most recently used magnification that was not the maximum magnification. Aperio LV1 IVD Live View and Desktop Scanner User’s Guide Revision B © Leica Biosystems Imaging, Inc. 2024 | Page 51... -
Page 52: Annotating
Annotations you draw on the z-stack image are stored on the current z-stack layer. Results for analysis performed on the z-stack image are stored in the corresponding z- stack layer. Aperio LV1 IVD Live View and Desktop Scanner User’s Guide Revision B © Leica Biosystems Imaging, Inc. 2024 | Page 52... -
Page 53: Image Analysis
Save an Image View as a .sis file; an Image View includes the entire set of eSlides currently open in ImageScope. Aperio LV1 IVD Live View and Desktop Scanner User’s Guide Revision B © Leica Biosystems Imaging, Inc. 2024 | Page 53... - Page 54 Move the eSlide by panning different directions. Zoom the selected area of the eSlide. *Extract a region of an eSlide. Aperio LV1 IVD Live View and Desktop Scanner User’s Guide Revision B © Leica Biosystems Imaging, Inc. 2024 | Page 54...
-
Page 55: Keyboard Shortcuts
None Zoom out Ctrl None None Press while drawing an annotation to draw the annotation in a predefined size. Aperio LV1 IVD Live View and Desktop Scanner User’s Guide Revision B © Leica Biosystems Imaging, Inc. 2024 | Page 55... - Page 56 View > Annotations Opens the Annotations window where you Window can work with annotation layers for the current image. Aperio LV1 IVD Live View and Desktop Scanner User’s Guide Revision B © Leica Biosystems Imaging, Inc. 2024 | Page 56...
- Page 57 Press while drawing annotations: ellipse becomes a circle; rectangle becomes a square. None Shift+Arrow None Moves one screen at a time. Aperio LV1 IVD Live View and Desktop Scanner User’s Guide Revision B © Leica Biosystems Imaging, Inc. 2024 | Page 57...
- Page 58 If annotation links have been set using the Annotation Annotation Link Manager, this moves to the Link next annotation in the viewing sequence. Aperio LV1 IVD Live View and Desktop Scanner User’s Guide Revision B © Leica Biosystems Imaging, Inc. 2024 | Page 58...
-
Page 59: Settings
Settings This section contains information on all of the selections available in the Settings mode. General Aperio LV1 IVD Live View and Desktop Scanner User’s Guide Revision B © Leica Biosystems Imaging, Inc. 2024 | Page 59... -
Page 60: Language
Chapter 8: Settings Language You can choose from a number of supported languages for the Aperio LV1 IVD application. Changes take effect after restarting the Aperio LV1 IVD application. Export Path This parameter defines the default path used in the List. -
Page 61: Display
Display – Slide Label Size The label image can be displayed in the Live View Main Window in two sizes. Aperio LV1 IVD Live View and Desktop Scanner User’s Guide Revision B © Leica Biosystems Imaging, Inc. 2024 | Page 61... -
Page 62: Display - Cursor Key Overlap
Here you can invert this behavior. Screenshot – Default Screenshot Image Format This defines the format in which screenshots are saved. Aperio LV1 IVD Live View and Desktop Scanner User’s Guide Revision B © Leica Biosystems Imaging, Inc. 2024 | Page 62... -
Page 63: Screenshot - Screenshot Mode
Here, default properties for annotations can be set Line width Font style Font size Font family Aperio LV1 IVD Live View and Desktop Scanner User’s Guide Revision B © Leica Biosystems Imaging, Inc. 2024 | Page 63... -
Page 64: Microscope
Microscope – Starting Resolution Definition of the initial resolution used in the main view when a new slide is opened. Aperio LV1 IVD Live View and Desktop Scanner User’s Guide Revision B © Leica Biosystems Imaging, Inc. 2024 | Page 64... -
Page 65: Scanner
Auto Scan In this section the profiles are defined which can be used in scanning mode. See Scanning Mode. Aperio LV1 IVD Live View and Desktop Scanner User’s Guide Revision B © Leica Biosystems Imaging, Inc. 2024 | Page 65... -
Page 66: Auto Scan - General
Barcode profiles can be defined to establishes the information fields and content of the barcode. Barcode Label Recognition Editor There are a number of different barcode formats available. The Aperio LV1 IVD Live View and Desktop Scanner interprets them and flexibly uses parts of the barcode information. Profiles are used to define the barcode interpretation. - Page 67 Label Recognition Editor (shown above). Click New Profile and enter a descriptive name. Click Select Label to review the last 10 labels read in by the Aperio LV1 IVD. Choose a label that contains a barcode by clicking on it.
- Page 68 Fixed text can be added to the information read from the barcode. Multiple parts of the barcode and fixed text can be combined using the “Combine Fields” feature. Aperio LV1 IVD Live View and Desktop Scanner User’s Guide Revision B © Leica Biosystems Imaging, Inc. 2024 | Page 68...
-
Page 69: Troubleshooting
Check that there is a label on the left side of the slide; labels on tray are not detected the right side of the slide are not read. Aperio LV1 IVD Live View and Desktop Scanner User’s Guide Revision B © Leica Biosystems Imaging, Inc. 2024 | Page 69... -
Page 70: Opening The Access Door
In case of emergency, you may need to access the inside of the instrument by opening the access door. Please call Leica Technical Services first for assistance and instructions. If instructed to open the access door, first turn off the instrument and unplug the power cord. To open the access door, use the hex key attached to the rear of the instrument to unlock the door, then pull the door off. -
Page 71: Manually Ejecting The Slide Tray
Cleaning the Scanner Interior Before cleaning the LV1 IVD interior, call Leica Technical Services (see Customer Support) for assistance and instructions. If significant cleaning needs to be done, do not attempt it yourself, but call Leica Technical Services to arrange service. -
Page 72: Removal Of Broken Slides
Use a dry, lint free cloth to take up small glass debris from the instrument XY stage and baseplate. Remove all major glass pieces from the XY stage. Aperio LV1 IVD Live View and Desktop Scanner User’s Guide Revision B © Leica Biosystems Imaging, Inc. 2024 | Page 72... -
Page 73: Keyboard Shortcuts
Activate an annotation or measurement Shift+Right+Click Annotation/measurement property menu Ctrl+Left+Click Toggle to full screen for current scene Alt-F4 Exit the application Aperio LV1 IVD Live View and Desktop Scanner User’s Guide Revision B © Leica Biosystems Imaging, Inc. 2024 | Page 73... - Page 74 Aperio LV1 IVD Live View and Desktop Scanner User’s Guide Revision B © Leica Biosystems Imaging, Inc. 2024 | Page 74...
-
Page 75: Symbols
ISO 7010 – W001 General warning ISO 7010-W012 Warning: Electricity ISO 7010-W017 Warning: Hot surface ISO 60417-6040 Ultraviolet radiation, instructional safeguard Aperio LV1 IVD Live View and Desktop Scanner User’s Guide Revision B © Leica Biosystems Imaging, Inc. 2024 | Page 75... - Page 76 www.LeicaBiosystems.com/Aperio...
Need help?
Do you have a question about the Aperio LV1 IVD and is the answer not in the manual?
Questions and answers