Advertisement
Quick Links
Remote control SIPROTEC 4 with EN100 over ISDN-Modem-Router
Data transmission takes place via an RDT connection of an ISDN modem with an ISDN router
Operation concept SIPROTEC 4 with Ethernet module EN100
The figure below displays a typical hardware structure for V4-protection devices with Ethernet-
interface in the installation. The protection devices with electrical EN100-interface are connected to
the switches via patch cables. The devices with optical EN100 module are looped into the optical
double ring in the form of a ring together with the switches.
The switches together with the protection devices constitute a local subnet (LAN) with its own
address range.
The ISDN modem router which enables the remote connection via an ISDN dial-up line to the control
centre, is also connected to the LAN with a patch cable. As a rule, the router is assigned the first IP
address, which is then the standard gateway for all users.
The connection is established by the control centre with an RDT connection in Windows XP with an
ISDN modem. The DIGSI 4 protection devices can then be operated. To connect various substations,
an RDT dial-up connection is required for each substation.
Remote control SIPROTEC 4 Devices with EN100 Ethernet-Module with DIGSI 4
over INSYS Pocket ISDN Modem to INSYS ISDN-Router with Switch
and external optical / electrical Switch
Private or public
Substation-ISDN-Router/ Switch
7XV5820-8AA00 (digital ISDN)
and Wide range power supply
7XV5810-0BA00
Power
7XV
Res et
Power
5810
COM
Data
Status
MoRoS
All patch-cable
7KG6000-8Gxx
D IG S I 4
Notebook or PC
Central control
with DIGSI 4
For testing and diagnostic services, or on-site operation of the protection devices, a laptop PC can
additionally be connected to the subnet, using a patch cable. Detailed application examples
regarding the construction of a local subnet can be found in the EN100 manual under
www.SIPROTEC.com
HELP_DIG48_SIP4_INSYS_MOROS_ISDN_EN100_EN1.DOC
and SIPROTEC 4 devices with EN100-interface.
digital network
Office-modem INSYS Pocket
7XV5820-2AA00 (digital ISDN)
2 x opt. / electr. Switch
RUGGETCOM
RS 8000 T
PORT 1
PORT 2
PORT 3
PORT 4
PORT 5
RESET
SIEMENS
SIPROTEC
SIEMENS
RUN
ERROR
L1 402,1A
Max450.1A
L1 402,1A
L2 402,1A
Max450.1A
L2 402,1A
L3 402,1A
Max450.1A
L3 402,1A
E
00.0A
E
Anr. L1
Anr. L1
Anr. L2
Anr. L2
Anr. L3
Anr. L3
Anr. Erde
Anr. Erde
Automat
Automat
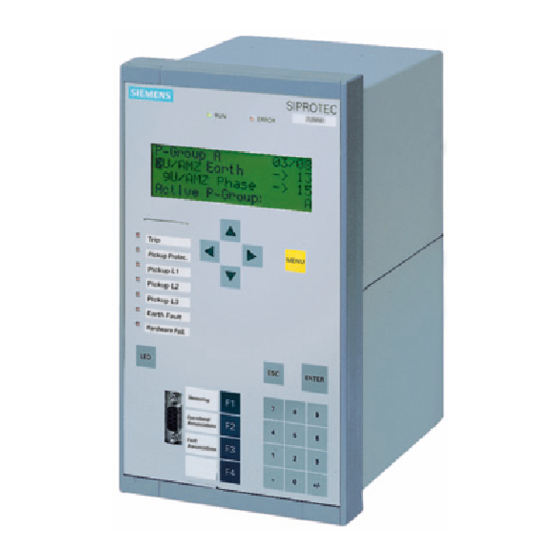
SIPROTEC 4 Devices
with electrical EN100-Interface
/ Prot. Devices / General Information / Communication.
Modem-cable
Pocket Modem
RUGGETCOM
RS 8000 T
PORT 6
PORT 7
PORT 8
PORT 1
PORT 2
POWER
RESET
All patch-cable
7KG6000-8Gxx
SIPROTEC
SIEMENS
SIPROTEC
RUN
ERROR
RUN
ERROR
Max450.1A
L1 402,1A
Max450.1A
Max450.1A
L2 402,1A
Max450.1A
Max450.1A
L3 402,1A
Max450.1A
00.0A
E
00.0A
Anr. L1
Anr. L2
Anr. L3
Anr. Erde
Automat
SIPROTEC 4 Devices
with electrical EN100-Interface
Seite 1 von 25
Power Transmission and Distribution
Energy Automation
Remote control
DIGSI 4
with DIGSI 4
Office PC
Optical Ring
PORT 3
PORT 4
PORT 5
PORT 6
PORT 7
PORT 8
POWER
All FO-cable
6XV8100-0xx
SIEMENS
SIPROTEC
SIEMENS
SIPROTEC
RUN
ERROR
RUN
ERROR
L1 402,1A
Max450.1A
L1 402,1A
Max450.1A
L2 402,1A
Max450.1A
L2 402,1A
Max450.1A
L3 402,1A
Max450.1A
L3 402,1A
Max450.1A
E
00.0A
E
00.0A
Anr. L1
Anr. L1
Anr. L2
Anr. L2
Anr. L3
Anr. L3
Anr. Erde
Anr. Erde
Automat
Automat
SIPROTEC 4 Devices
with optical EN100-Interface
SIEMENS
SIPROTEC
RUN
ERROR
L1 402,1A
Max450.1A
L2 402,1A
Max450.1A
L3 402,1A
Max450.1A
E
00.0A
Anr. L1
Anr. L2
Anr. L3
Anr. Erde
Automat
27.08.2008
Advertisement

Related Manuals for Siemens SIPROTEC 4


Summary of Contents for Siemens SIPROTEC 4
- Page 1 ISDN modem. The DIGSI 4 protection devices can then be operated. To connect various substations, an RDT dial-up connection is required for each substation. Remote control SIPROTEC 4 Devices with EN100 Ethernet-Module with DIGSI 4 over INSYS Pocket ISDN Modem to INSYS ISDN-Router with Switch...
- Page 2 / Applications / Remote control This document describes the procedure for secure remote control of SIPROTEC 4 devices with DIGSI 4 via the modems INSYS Pocket Profi ISDN (table-top device in the office) and INSYS ISDN- router (rail mounted ISDN-Router in the substation) in detail.
- Page 3 Power Transmission and Distribution Energy Automation Creating a project and substation in DIGSI 4 The new project in DIGSI 4 with substation files, feeder files and protection devices may be de- archived from an archived substation or be newly created. The procedure is described in the „SIPROTEC System Manual“.
- Page 4 Power Transmission and Distribution Energy Automation Setting the protection devices The Ethernet-system interfaces of the SIPROTEC-protection devices must all be assigned with different IP-addresses. The IP-addresses of the PC’s, the routers and other devices in the network may not be assigned again.
- Page 5 INSYS-driver-CD must be inserted into the CD/DVD-drive of the computer, alternatively the driver must be available from the hard-drive or another storage medium. The driver, unzipped to C:\Siemens\... is then installed from the SIPROTEC-Download-Area. In the „Control Panel“ the „Phone and Modem Options“...
- Page 6 „Don’t detect my modem; I will select it from a list.“ „Next >“ Install the new modem from „Have Disk…“ „Next >“ With „Browse…“ search the relevant drive for the driver (e.g. C:\Siemens\INSYS-ISDN ). Seite 6 von 25 27.08.2008 HELP_DIG48_SIP4_INSYS_MOROS_ISDN_EN100_EN1.DOC...
- Page 7 Power Transmission and Distribution Energy Automation The modem driver is located in the following path e.g. C:\Siemens\INSYS-ISDN. Mark the driver file mdmstpox.inf „Open“ Continue with „OK“ Check the modem driver TA+POX (PPP,V.120,X.25,V.110) and „Next >“ Seite 7 von 25 27.08.2008...
- Page 8 Power Transmission and Distribution Energy Automation Select the serial port e.g., „COM1“ which will later be connected with the modem. „Next >“ This Windows XP warning may be ignored. The driver was tested with Windows XP. Continue with „Continue Anyway“ The installation is completed with „Finish“...
- Page 9 Power Transmission and Distribution Energy Automation Setting the modem driver These settings of the system modem driver are used during each dial-up procedure for initialisation of the modem driver and must be done exactly as described. In the overview of the installed modem drives, the presently installed modem driver is shown.
- Page 10 Power Transmission and Distribution Energy Automation Settings in the pull-down menu „General“: The “Call preferences“ do not have to be changed. Do not change the „Data Connection Preferences“ Port speed 115200 Data Protocol PPP (64K) Compression Flow control Hardware Settings in the window „Advanced“: Do not change the „Hardware Settings“...
- Page 11 Power Transmission and Distribution Energy Automation Setting the Ethernet-interface of the PC To set the ISDN router via it’s LAN interface, a PC/Notebook with Ethernet interface must be connected. Prior to this, the interface must be configured accordingly. Connect the PC with a patch-cable to the ISDN router and open the window „Local Area Connection Status“...
- Page 12 Power Transmission and Distribution Energy Automation Setting the ISDN-Router with the Default-IP-address The ISDN-router is set with an HTML-menu, which is opened by entering the default IP-address 192.168.1.1 in the Internet-Explorer or another Browser. During the first log-in, the user name „insys“...
- Page 13 Power Transmission and Distribution Energy Automation Basic Settings Under „Authentication“ the user name and password for log-in purposes can be altered and saved. Without valid log-in, no security relevant settings can be changed, which increases protection against unauthorised access. Save with „OK“. Under „Ethernet Addresses“...
- Page 14 Power Transmission and Distribution Energy Automation Setting the ISDN-router with user IP-address The ISDN-router can now again be set in the HTML menu, which is opened after entry of the new user IP address 192.168.20.1, in the Internet-Explorer or other browser. During log-in new altered user name and the corresponding password must be entered.
- Page 15 „Yes“. Under „Authentication for Dial-In“ various rights of access for different users may be assigned, e.g. „Username:“ siemens and the „Password:“ geheim for the first user. NOTE! Mind higher and lower case writing! These access data will later be used for connection of the office modem.
- Page 16 Power Transmission and Distribution Energy Automation The „Local IP-Address of PPP- Connection“ and the „Remote IP- Address“ are used for the temporary connection. They can, do however not need to be changed. A „Gateway for Dial-In-Connections“ can, does however not need to be entered Confirm all settings with „OK“.
- Page 17 Power Transmission and Distribution Energy Automation Setting up a Dial-up connection The ISDN-connection between the office modem INSYS Pocket ISDN, and the ISDN-modem router MoRoS in the substation is established via a Dial-up connection. Besides the telephone number, the user name and password are also defined here. In the Windows „Control Panel“...
- Page 18 Power Transmission and Distribution Energy Automation In this window the „Network Connenction Type“ is defined. A „Connect to the network at my workplace“ is selected. „Next >“ In this window the „Network connection“ is defined. A „Dial-up connection“ is selected. „Next >“...
- Page 19 Power Transmission and Distribution Energy Automation Under „Company Name“ an available and distinct Connection name is entered. As this name is also allocated to the Shortcut on the Desktop , the corresponding Substation name can be entered, e.g. „Substation West“. „Next >“...
- Page 20 Power Transmission and Distribution Energy Automation Setting the Dial-up connection After the set-up of the Dial-up connection has been finalised, the window for the connection is immediately opened. However, before the Dial-up connection can be started, a few settings must be done.
- Page 21 Power Transmission and Distribution Energy Automation Under „Options“ the pre-settings can be retained. To prevent a connection inadvertently remaining un- terminated, a sensible value (eg. 5-10 minutes) can be entered into the pull-down window „Idle time before hanging up“ Note: This value should not be too small, as the connection could later be automatically terminated, during a change from one protection device to another.
- Page 22 Power Transmission and Distribution Energy Automation Under „Networking“ the „Type of dial-up server I am calling“ is set to PPP: Windows 95/98/NT4/2000, Internet. The selection under „This connection uses the following items:“ can remain as pre-set (see Figure). If the element „Internet Protocol (TCP/IP)“ is selected, the following settings must be made under „Properties“...
- Page 23 Power Transmission and Distribution Energy Automation In the window „Advanced“ settings regarding security and common use of an Internet connection can be made again. The settings were not changed. Close all windows with „OK“. Once all setting windows have been closed with „OK“...
- Page 24 Power Transmission and Distribution Energy Automation Establishing a Dial-up connection to the ISDN-router Before remote operation to the protection device can be established, the corresponding Dial-up connection to the ISDN router must be set up. For a better overview, all Dial-up connections can be linked to the desktop (see Figure).
- Page 25 Power Transmission and Distribution Energy Automation Establishing a connection to the protection device After all devices have been set correctly, and the Dial-up connection in the substation is active, a connection to the protection device can be established. In the window „Open device““Ethernet“ is selected under „Connection type“ and confirmed with „OK“.
Need help?
Do you have a question about the SIPROTEC 4 and is the answer not in the manual?
Questions and answers