Advertisement
Quick Links
Advertisement

Summary of Contents for Össur PROPRIO FOOT
- Page 1 Instructions for use / Patient...
-
Page 2: Table Of Contents
..............Safety Precautions..........Introduction............Technical Specifications......... Basic Operation............Functions..............Maintentance............Warranty.............. - Page 3 Function Function Hold Hold Press Press Function Hold Press Function Hold Press Warning Indicates Power Power ON/OFF ON/OFF Function Hold Press Function Hold Press Power NO/OFF Power ON/OFF 2x BEEP Approx 120 min left Power ON/OFF Power ON/OFF Function Hold Press Function Hold...
-
Page 4: Safety Precautions
SAFETY PRECAUTIONS ® • When the battery charge is low, PROPRIO FOOT will return to the last preset heel height position. A warning signal will occur (Figure B). ® • When making adjustments to PROPRIO FOOT ensure the user is seated or in a stable standing position. • The user should stop walking immediately if alarm signals are felt or heard. Proceed to walk with caution. ® • Do not use PROPRIO FOOT while the battery is charging. - Page 5 EN - Caution: Össur products and components are designed and tested to ISO 10328. Compatibility and compli- ance with this standard is achieved only when Össur products and components are used with other recommend- ed Össur or authorized components. If un-usual movement or product wear is detected in a structural part of a prosthesis at any time, the patient should be instructed to immediately discontinue use of the device and consult his/her clinical specialist.
-
Page 6: Introduction
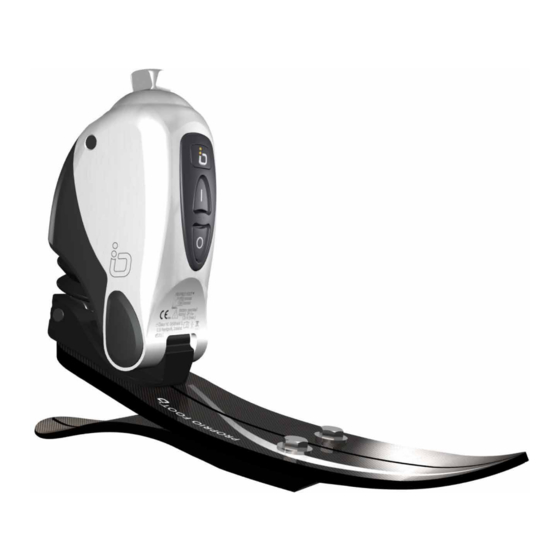
PROPRIO FOOT ® is also designed to dorsi-flex during swing phase of level-ground walking to improve toe ® clearance for less stressful and more secure walking. When seated, PROPRIO FOOT will plantarflex for a more ® natural appearance of the artificial leg. PROPRIO FOOT is adjustable to a variety of heel heights to fit different types of shoes (i.e. -
Page 7: Technical Specifications
IEC/EN60601-1, standard of electrical safety of medical devices and IEC/EN60601-1-2, electromagnetic compatibility for medical electrical devices and ISO 10328. The company fulfills the requirements of ISO13485, MDD 93/42/EEC, and the PROPRIO FOOT ®... -
Page 8: Basic Operation
NOTE: The keypad will be disabled after 60 sec from use. To enable the keypad, hold and press at least ® one second. When the PROPRIO FOOT is activated for the first time, the default manufacturer settings will be enabled. Your prosthetist may alter the settings to adjust the response. -
Page 9: Functions
* The system beeps and vibrates a second time. • The actuator will move the prosthesis into a vertical position. * The system confirms with a beep and vibration. * The LED blinks green yellow. • Heel height adjustment is complete. NOTE: If the heel height exceeds 50 mm (2“) a signal will be heard and the unit will not adjust to the heel height. Change shoes for lower heel height and repeat the adjustment. - Page 10 • Leading with the prosthetic side upstairs and leading with the prosthetic side when going down will provide stair adaptation after the second prosthetic step on the stairs. ® • When finishing the stair ascent and stepping onto level ground, it will take one stride for PROPRIO FOOT to adapt to the level ground position. You may also shift weight from sound limb to prosthetic limb to have the foot return to neutral. • If you feel undue socket pressure with the stair response please consult your prosthetist, who may alter the stair response to decrease this socket pressure.
- Page 11 – the LED will blink red; the system returns to neutral position and acts like a standard prosthesis without ankle motion. To activate the system again proceed as indicated in chapter Maintenance. CHARgINg ANd POWER • Only use the power source, supplied for the PROPRIO FOOT ® • Connect the power supply cable to DC. • Connect the power source to the battery pack. Allow 3-4 hours to ensure a full charge. Battery Charge – The LED lights indicate the charge state of PROPRIO FOOT ®...
-
Page 12: Maintentance
WARNINg SIgNALS FOR POWER LOSS: (Figure B) ® Vibratory and/or auditory warning systems are provided by PROPRIO FOOT to indicate to the user that power loss is forthcoming. The warning signals are provided in a series of intermittent pulses. Ensure that the user recognizes the warnings. - Page 13 Össur Americas Össur Europe BV Össur UK 27051 Towne Centre Drive Kundenservice Deutschland Building 3000 Foothill Ranch, CA 92610 Augustinusstrasse 11A Manchester Business Park 50226 Frechen Aviator Way Tel: +1 (949) 382 3883 Deutschland Manchester M22 5TG, UK Tel: +1 800 233 6263 Tel: +49 (0) 2234 6039 102 Tel: +44 161 490 8500 Fax: +1 800 831 3160...


Need help?
Do you have a question about the PROPRIO FOOT and is the answer not in the manual?
Questions and answers