Table of Contents
Advertisement
Advertisement
Table of Contents

Related Manuals for Avtech YGN2003


Summary of Contents for Avtech YGN2003
- Page 1 User Manual Panoramic Navigation 1080P Wi-Fi IP Camera y2003_manual_beta...
- Page 2 IMPORTANT SAFEGUARD All lead-free products offered by the company comply with the requirements of the European law on the Restriction of Hazardous Substances (RoHS) directive, which means our manufacture processes and products are strictly “lead-free” and without the hazardous substances cited in the directive. The crossed-out wheeled bin mark symbolizes that within the European Union the product must be collected separately at the product end-of-life.
- Page 3 DGT Warning Statement Article 12 Without permission, any company, firm or user shall not alter the frequency, increase the power, or change the characteristics and functions of the original design of the certified lower power frequency electric machinery. Article 14 The application of low power frequency electric machineries shall not affect the navigation safety nor interfere a legal communication, if an interference is found, the service will be suspended until improvement is made and the interference no longer exists.
- Page 4 Federal Communications Commission Interference Statement This equipment has been tested and found to comply with the limits for a Class B digital service, pursuant to Part 15 of the FCC rules. These limits are designed to provide reasonable protection against harmful interference in a residential installation.
- Page 5 MPEG4 Licensing THIS PRODUCT IS LICENSED UNDER THE MPEG4 VISUAL PATENT PORTFOLIO LICENSE FOR THE PERSONAL AND NON-COMMERCIAL USE OF A CONSUMER FOR (i) ENCODING VIDEO IN COMPLIANCE WITH THE MPEG4 VISUAL STANDARD (“MPEG-4 VIDEO”) AND/OR (ii) DECODING MPEG4 VIDEO THAT WAS ENCODED BY A CONSUMER ENGAGED IN A PERSONAL AND NON-COMMERCIAL ACTIVITY AND/OR WAS OBTAINED FROM A VIDEO PROVIDER LICENSED BY MPEG LA TO PROVIDE MPEG4 VIDEO.
-
Page 6: Table Of Contents
TABLE OF CONTENT CAMERA OVERVIEW ......................1 Hardware ..........................1 Package content ........................2 Status indicator ......................... 2 Default values ........................... 3 GETTING STARTED ........................ 4 Getting camera ready ....................... 4 Connecting camera to internet ....................6 ADDRESS BOOK ........................7 LIVE VIEW .......................... - Page 7 VIDEO SEARCH & BACKUP ....................12 Search by calendar ........................13 Search by event ........................14 Video backup .......................... 15 PUSH VIDEO ........................16 How to enable Push Video...................... 16 How to check Push Video ....................... 17 ADVANCED CONFIGURATIONS ................... 19 Menu ............................
- Page 8 APPENDIX ..........................32 Account user levels ......................... 32 Playing video footage saved in microSD card on PC ............... 33 MicroSD card compatible list ....................35 Specifications .......................... 36...
-
Page 9: Camera Overview
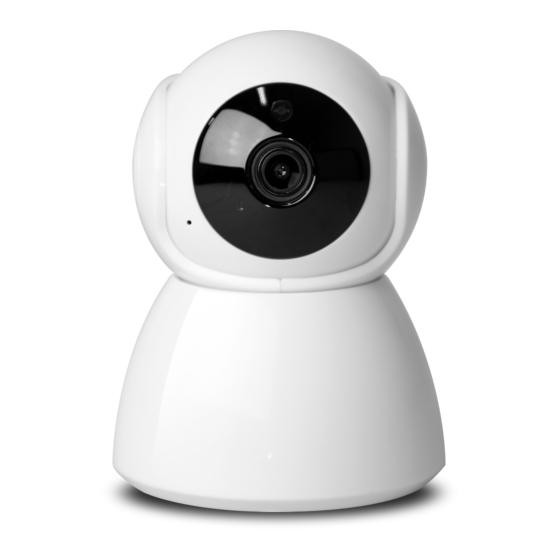
CAMERA OVERVIEW Hardware... -
Page 10: Package Content
Package content Status indicator Color Status Meaning During network setup Blue Flashing Setting camera… Flashing Internet connection failed Camera Wall mount accessories Purple Flashing Wrong Wi-Fi password… Blue Flashing Connecting to Wi-Fi network slowly Wi-Fi signal strength* Blue Stable Strong Purple... -
Page 11: Default Values
Default values Wired Wireless IP address 192.168.1.10 192.168.2.10 Port number User name admin Admin Password Admin admin SSID IPCAM-mac_address SSID password CAMERA OVERVIEW... -
Page 12: Getting Started
GETTING STARTED Getting camera ready Insert a microSD card (up to 256GB) and connect your camera to power. NOTE This camera doesn’t support plug and play. Please make sure the power is off before inserting or removing the microSD card. NOTE If you want to mount this camera to a wall or ceiling, please check the next section, “Wall-mount installation”, to know how to mount the camera with the supplied accessories. - Page 13 Wall-mount installation 1. 1. Fasten wall-mount adapter to wall. 3. 3. Power on & configure camera. Find the wall-mount accessories Follow the instructions in in the sales package, and fasten “Quick Start” to power on the the black wall-mount adapter to camera and configure it via where you want to install the your smart phone / tablet.
-
Page 14: Connecting Camera To Internet
Connecting camera to internet By EaZy Networking (P2P cloud service) Please check Quick Start video demo to know more details. Quick Start Video Demo By configuring your router Please check the advanced network setup to know more details. GETTING STARTED... -
Page 15: Address Book
ADDRESS BOOK For details about each element on this page: Click on (Information), or Scan the QR code below. ADDRESS BOOK... -
Page 16: Live View
LIVE VIEW The functions available depend on the user level of your account. There are four user levels: SUPERVISOR, POWER USER, NORMAL and GUEST. Please check “Account user levels” at page 32 to know details. LIVE VIEW... -
Page 17: Snapshot
Snapshot Click on to take a snapshot of the current live image. The image will be saved to (Media), accessible from the address book. NOTE The resolution of the snapshot depends on the video profile you chose for live display. For details, please check “Video resolution change”... -
Page 18: Video Resolution Change
Video resolution change Click on to show more operations for the camera, and choose to change the resolution of the live feed. There are four default video profiles: Profile1(H.265 / 1920 x 1080), Profile2 (H.265 / 704 x 480), Profile3 (H.265 / 352 x 240) and Profile4 (JPEG / 352 x 240). - Page 19 Vertical / horizontal movement automatically Auto pan Click on to start panning 350° only once based on the current position. Preset point You can configure up to six preset points to move the camera view to the angles you specified. How to set a preset point Step1: Click on to move the camera view to the area you want.
-
Page 20: Video Search & Backup
VIDEO SEARCH & BACKUP NOTE This function is available only for SUPERVISOR and POWER USER accounts. For details, please check “Account user levels” at page 32. NOTE Before using this function, make sure you’ve enabled the recording function to get video footage. For details, please check “Record Configuration”... -
Page 21: Search By Calendar
Search by calendar In the calendar view ( 1. Choose the date within which includes the video footage you need. The date with video footage will be circled. 2. Tap and hold on the time bar to slide to the time you want. 3. -
Page 22: Search By Event
Search by event In the list view ( 1. Choose from the two event types: Type Description All events List of all alarm and motion events Event Record Record triggered by alarm detection Motion Trigger Record triggered by motion detection To narrow down the list, select on the top right corner to specify the time and to specify the time. -
Page 23: Video Backup
Video backup When you find the video footage you need, you can easily crop the specific segment and save it. 1. Tap to enter the edit mode. 2. Slide the time bar to specify the footage segment you want 3. tap to select the video resolution and where to save the footage: Android... -
Page 24: Push Video
PUSH VIDEO Push Video is used to help you get notified quickly when an event occurs. For this camera, you can configure the camera to send you Push Video when there’s any motion event. You’ll get notified via your smart phone / tablet as soon as possible when a motion event is detected. -
Page 25: How To Check Push Video
How to check Push Video There are two ways to check Push Video events: 1. Directly open the push message you received. (Push Log) to see the log list about Push Video. 2. In the address book, choose Check from push message When you receive the push message, open the message, and EagleEyes will be opened automatically to play the event footage that... - Page 26 Check from Push Log (Push Log) at the bottom to enter the Push Video log list. In the list, choose the log that In the address book, click on includes the footage you want to check to start video playback. The footage will start 3 seconds prior to the time that actually triggers Push Video (pre-alarm recording).
-
Page 27: Advanced Configurations
ADVANCED CONFIGURATIONS In the advanced setting page, you can choose to change the default record resolution, enable motion detection, adjust audio volume, create an account and so on. For details, please check the following sections. To access the advanced setting page, click on (Setting) on the top toolbar in ... -
Page 28: Menu
Menu Normal Setup Camera Exposure Control Auto (default) / Flicker-free 50Hz / Flicker-free 60Hz Configuration Exposure Value 0 / 1 / 2 (default) / 3 / 4 Mirror OFF (default) / ON Flip OFF (default) / ON Denoise 0 / 1 / 2 (default) / 3 / 4 / 5 Day and Night Sensor (default) / Day / Night Defog... - Page 29 Normal Setup Time Enable (default) / Disable Configuration Date Hour Min. Sec. NTP Server Sync. Period None (default) / Daily Advanced Wireless Configuration Configuration Account Configuration Edit Remove ADVANCED CONFIGURATIONS...
-
Page 30: Camera Configuration
Camera Configuration Exposure Control This function is used to synchronize the shutter speed to the light frequency to suppress image flickering. Choose Auto to allow the system to detect automatically; otherwise choose Flicker-free 50Hz or Flicker-free 60Hz to manually change it when needed. - Page 31 Denoise Click and drag the slider to adjust the level to decrease the noise shown in the dark environment. The higher the value, the higher the denoise level. 0 means off. Day and Night This function is used to configure the day and night mode: ...
-
Page 32: Record Configuration
Record Configuration Profile Choose the record format and resolution from the default four profiles: Profile1: H.265 / 1920 x 1080 Profile2: H.265 / 704 x 480 Profile3: H.265 / 352 x 240 Profile4 JPEG / 352 x 240 Motion Choose ON to enable video recording for motion events. -
Page 33: Trigger
Trigger Motion Choose ON to enable motion detection. The detection area is as follows: If you want to record motion events, please go to Record Configuration to set Motion to ON. Duration Choose the duration between two motion events: 1 Sec. / 5 Sec. / 10 Sec. -
Page 34: Audio Configuration
Audio Configuration Microphone Choose the volume of the built-in microphone from 1 ~ 10. Mute (Microphone) Check to mute the microphone even when the audio function is enabled. Speaker Choose the volume of the built-in speaker from 1 ~ 10. Mute (Speaker) Check to mute the speaker even when the audio function is enabled. -
Page 35: Time Configuration
Time Configuration Choose to display the time stamp on live view or not. Date / Hour / Min. / Sec. Manually change the date and time to the current time when needed. Otherwise, when the time zone is chosen correctly, the camera will adjust the local area time of the system automatically. -
Page 36: Wireless Configuration
Wireless Configuration Here shows the available Wi-Fi networks around you and the one this camera is currently connected to, and you can change the network when necessary. When the Wi-Fi network is changed, you’ll need to reconfigure the network of the camera since the router used for internet access has changed. Please check “Connecting camera to internet”... -
Page 37: Account Configuration
Account Configuration NOTE When the camera is connected to the internet by EaZy Networking, you’re unable to add, edit or remove any account from here. Please go to EaZy ) Buddy instead to share the access right with other EaZy cloud account(s). To know how to use Buddy , please go to... - Page 38 Modify account Choose the account you’d like to modify first and click on . Change the password, user level or life time of the selected account, and click on to save and return to the account page. NOTE When there’s only one account, the user level of this account cannot be changed and must be SUPERVISOR.
- Page 39 Delete account Choose the account you’d like to modify first and click on . You’ll be prompted to confirm the account deletion again. NOTE When there’s only one account, the account can’t be deleted. ADVANCED CONFIGURATIONS...
-
Page 40: Appendix
APPENDIX Account user levels The account which has the highest user level, SUPERVISOR, has the permission to assign the user level for each account. SUPERVISOR POWER USER NORMAL GUEST ADDRESS BOOK Guard (Push Video) on / off Playback LIVE Playback Information Setting (Advanced Configurations) -
Page 41: Playing Video Footage Saved In Microsd Card On Pc
Playing video footage saved in microSD card on PC In addition to searching and playing video footage saved in the microSD card on EagleEyes, you can also do this on your laptop / PC as long as a microSD card is inserted to the camera for video recording. NOTE This operation is only available on the Windows operating system. - Page 42 Step4: You’ll see the event list including the event logs saved in the microSD card. Find the log you want and double click it to play. APPENDIX...
-
Page 43: Microsd Card Compatible List
MicroSD card compatible list Brand Capacity Class SanDisk 32GB Class 4 128GB Class 10 Samsung 128GB Class 10 Silicon Power 64GB Kingmax 64GB Transcend 128GB Class 10 Kingston 32GB Class 4 64GB Class 10 128GB Class 10 TOSHIBA 128GB Class 10 TOPRAM 32GB Class 10... -
Page 44: Specifications
Specifications Wireless Wireless & Frequency IEEE802.11b/g/n, 2.4GHz Wireless LAN Security 64/128-bit WEP / WPA-PSK / WPA2-PSK data encryption Video Video Compression H.265 Resolution 1920*1080 @ 30FPS Audio Audio Compression G.711 Two-way Intercom Software Mobile APP EagleEyes on iOS & android devices Alarm Notification Push Video / Push Status Alarm Mode... - Page 45 General Image Sensor 1/2.9" SONY CMOS Lens f3.6mm / F1.8 Angle 89° (Horizontal) / 46° (Vertical) / 108° (Diagonal) Night Vision IR-Cut, 6PCS IR LEDs Pan / Tilt Pan: 0° ~ 350°; Tilt: 0° ~ 45° Socket MicroSD Card Slot * 1 (up to 256GB microSD card) Temperature: 0°C ~ 40°C, Working Condition Humidity: 90 or less relative humidity...
Need help?
Do you have a question about the YGN2003 and is the answer not in the manual?
Questions and answers