Table of Contents
Advertisement
Quick Links
Advertisement
Table of Contents

Related Manuals for Elba STELLA 90-IS BGX


Summary of Contents for Elba STELLA 90-IS BGX
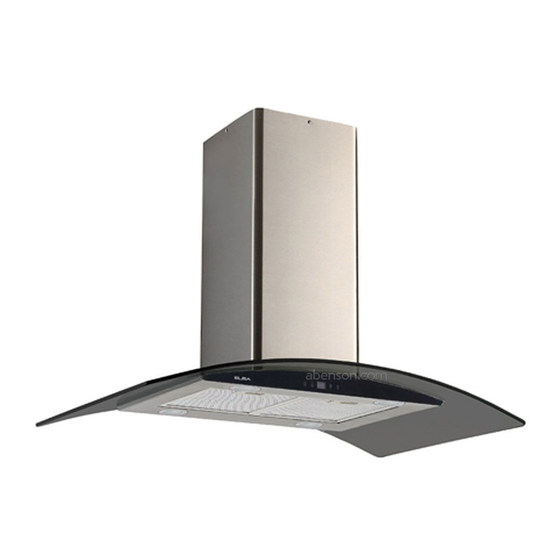
- Page 1 STELLA 90-IS BGX Range Hood Installation Guide Operation Manual...
-
Page 2: Important Reminders
The manufacturer will not be held liable for any damages resulting from improper installation and/or misuse of the product. Installation must be carried out by a qualified and authorized ELBA Service Technician. Failure to do so can void the warranty of this product. -
Page 3: Installation
INSTALLATION Important Notes: The hood should be placed at a distance of 65-75cm from the cooking surface for maximum performance. The exhaust pipe should have a minimum diameter of 150 millimeters (mm) Install the bracket on a hard and sturdy surface (with bracing if possible). - Page 4 2. According to the hanging board, drill 12 pcs of ST6 * 40mm flat screws that will be used to fix the hanging board onto the ceiling as seen in pic 2. 3. Then, 8 pcs of M4*10 screws and M4 nuts with gaskets will be used to connect the angular bar into the hanging board mounted on the ceiling as seen in pic 2.
- Page 5 10. Hold up the hood and insert it in between the angular bars. Align it properly and use 16 pcs M4*10 flat screws to mount the body of the hood to the angular bars, as seen in pic 7. 11. Lower the exhaust pipe onto the duct / outlet of the hood and fasten properly to make sure that exhaust air does not leak through the sides.
-
Page 6: Operation
OPERATION LCD Display Symbols: - Speed setting 1 - Speed setting 2 - Speed setting 3 - Light setting indicator Touch Pad Operation: “ + ” – Press to turn on and activate motor. Press again to increase speed setting. -
Page 7: Cleaning And Maintenance
CLEANING AND MAINTENANCE Aluminium Filters This unit comes equipped with removable aluminium filters that are to be cleaned on a regular basis in order to maintain the performance and longevity of the hood. Instruction: To remove the filters, press the clip located at the front, pull down the filters, and release the clip. -
Page 8: Led Lights
LED Lights This unit comes equipped with energy efficient LED bulbs. Instruction: Please call the service centre for the replacement of the LED bulb modules. It is suggested that you do not try to replace this yourself, as it might cause electrical shock. - Page 9 Technical Diagram...
Need help?
Do you have a question about the STELLA 90-IS BGX and is the answer not in the manual?
Questions and answers