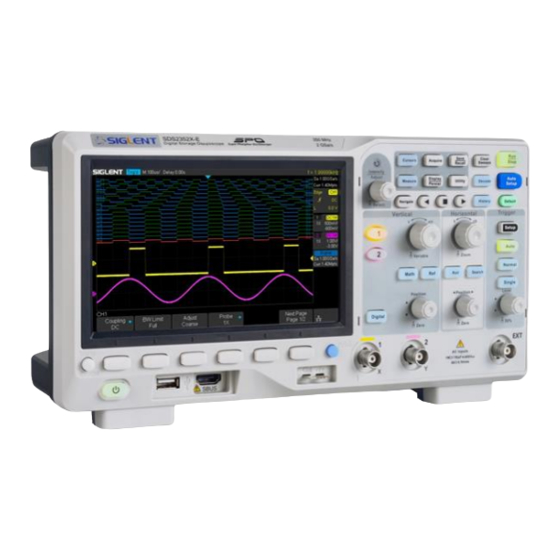
SIGLENT SDS2000X-E Series Quick Start Manual
Super phosphor oscilloscope
Hide thumbs
Also See for SDS2000X-E Series:
- User manual (222 pages) ,
- User manual (247 pages) ,
- Service manual (56 pages)
Table of Contents
Advertisement
Quick Links
Download this manual
See also:
User Manual
Advertisement
Table of Contents

Subscribe to Our Youtube Channel
Related Manuals for SIGLENT SDS2000X-E Series


Summary of Contents for SIGLENT SDS2000X-E Series
- Page 1 SDS2000X-E Series Super Phosphor Oscilloscope Quick Start...
-
Page 2: Copyright Information
SIGLENT products are protected by patent law in and outside of P.R.C. SIGLENT reserves the right to modify or change parts of or all the specifications or pricing policies at company’s sole decision. Information in this publication replaces all previously corresponding material. -
Page 3: General Safety Summary
Use Only the Specified Fuse of the instrument. Before connecting the instrument, please read the manual carefully to gain more information about the ratings. Do Not Operate Without Covers Do not operate the instrument with covers or panels removed. II- SDS2000X-E Series Digital Oscilloscope... - Page 4 To avoid damages to the surface of the instrument and probe, please do not use any corrosive liquid or chemical cleanser. Make sure that the instrument is completely dry before restarting it to avoid short circuits or personal injuries. SDS2000X-E Series Digital Oscilloscope -III...
-
Page 5: Table Of Contents
Contents Copyright Information............................General Safety Summary............................Quick start................................The Front Panel ..............................The Rear Panel..............................Front Panel Overview............................. User Interface............................... Using Security Lock..............................Troubleshooting..............................Contact SIGLENT..............................1- SDS2000X-E Series Digital Oscilloscope... -
Page 6: Quick Start
SIGLENT. Scope Top View 3. Check the accessories Please check the accessories according to the packing list. If the accessories are incomplete or damaged, please contact your SIGLENT sales representative. SDS2000X-E Series Digital Oscilloscope -2... - Page 7 To Connect to Power Supply Note: If at any time the fuse requires replacement, please replace only with a fuse of the same rating as the original. If there are questions, please contact Siglent directly. 3- SDS2000X-E Series Digital Oscilloscope...
-
Page 8: The Front Panel
After the self-test completed, the User Interface displays immediately. Connect the Probe SIGLENT provides passive probe for the SDS2000X-E series oscilloscope. Please refer to corresponding Probe User Manual for detailed technical information. Connect the probe: 1.Connect the BNC terminal of the probe to one of the channel BNC connector of the front panel. - Page 9 2. Check the displayed waveforms and compare them with the following figure. Under Compensated Over Compensated Correctly Compensated 3. Use a nonmetallic driver to adjust the low-frequency compensation adjustment hole on the probe until the waveform changes to be correct as the figure above. 5- SDS2000X-E Series Digital Oscilloscope...
- Page 10 6. Decode 13. Trigger Control 20. SBUS Digital Inputs ① 7. Auto Setup 14. Menu on/off 21. Probe Compensation/ Ground Terminal ① WARNING: Non-standard HDMI interface, Siglent device ONLY, or you will damage your devices. SDS2000X-E Series Digital Oscilloscope -6...
- Page 11 AC power. 7.Pass/Fail or Trigger Out The BNC port can output a signal that reflects the current waveform capture rate of the oscilloscope at each trigger or a pass/fail test pulse. 7- SDS2000X-E Series Digital Oscilloscope...
-
Page 12: Front Panel Overview
The wave will be signal trigger. In video trigger, you can select custom to set any line and expanded or compressed when the timebase changes. Press down the knob field to enter into the Zoom. SDS2000X-E Series Digital Oscilloscope -8... - Page 13 In the figure below, the time interval between two continuous rising edge and Positive runt pulse the currently set time satisfy the limit range ([ --.--]) High Level Low Level Negative runt pulse In the figure below, the trigger signal is positive runt pulse. 9- SDS2000X-E Series Digital Oscilloscope...
- Page 14 In the figure below,the trigger condition is set to “Start”, channel 1 is set as In the figure below, the selected logic is “NAND”, channel 1 is set to Clock signal, channel 2 is set as Data signal “Low”,channel 2 is set to “High”. SDS2000X-E Series Digital Oscilloscope -10...
- Page 15 Set the trigger level. Turn it clockwise or anticlockwise to make the level move up or down. In the meanwhile, the level value displayed at the upper right of the screen will increase or decrease. Press it down to quickly reset the trigger level to the 50% of waveforms. 11- SDS2000X-E Series Digital Oscilloscope...
- Page 16 Press down the knob to quickly switch the vertical scale adjustment modes decide circuit failures. SDS2000X-E supports 2 reference waveforms between “Coarse” and “Fine”. saving Press the button to open the digital channel function menu (Optional function). The SDS2000X-E supports 16 digital channels. SDS2000X-E Series Digital Oscilloscope -12...
- Page 17 Press the button to set the state of the instrument to “RUN” or “STOP”. In the “RUN” state, the button glows yellow; In “STOP” state, the button glows red. 13- SDS2000X-E Series Digital Oscilloscope...
- Page 18 In menu operation, when the light below the knob is lit, you could turn the knob to select between submenus under the current menu and press it down to select the current submenu. In addition, it can also be used to modify parameters and input the filename. SDS2000X-E Series Digital Oscilloscope -14...
- Page 19 Press it to open decode menu. Decode is a optional function.SDS2000X-E supports two serial buses including 1 and 2 for analog signal decoding. The protocols includes IIC, SPI, UART/RS232, CAN and LIN. Press the button to turn off or turn on the navigate function. SDS2000X-E supports three navigate types: time, search event, history frame. 15- SDS2000X-E Series Digital Oscilloscope...
-
Page 20: User Interface
User Interface 1. Product Logo SIGLENT is the registered trademark of our company. 2. Channel Label/Waveform Different channels are marked by different colors and the color of the waveform complies with the color of the channel. 3. Working state Available states include Arm, Ready, Trig’d, Stop, Auto. - Page 21 Indicate that the WLAN port is disconnected. Indicates the Lan port is connected. Indicates the Lan port is not connected. 13. Menu Display menus of the currently selected function module. Press any menu softkey to perform corresponding setting 17- SDS2000X-E Series Digital Oscilloscope...
-
Page 22: Using Security Lock
If needed, you could use the security lock (please buy it yourself) to lock the instrument in a fixed location. The method: align the clock with the clock hole and plug it into the lock hole vertically, turn the key clockwise to lock the instrument and then pull the key out. Security lock hole SDS2000X-E Series Digital Oscilloscope -18... -
Page 23: Troubleshooting
(2) Check if the power switch is faulted. (3) Check whether the fuse is burned out. If the fuse needs to be changed, please contact SIGLENT as soon as possible and return the instrument to the factory to have it repaired by service personnel authorized by SIGLENT. - Page 24 (3) Make sure the USB disk being used is of flash type, the instrument does not support USB of hardware type. (4) Restart the instrument and then insert the USB to check it. (5) If it is still in abnormal use, please contact with SIGLENT. SDS2000X-E Series Digital Oscilloscope -20...
-
Page 25: Contact Siglent
Blog No.4 & No.5, Antongda Industrial Zone, 3rd Liuxian Road, Bao’an District, Shenzhen, 518101, China. Tel:+ 86 755 3661 5186 Fax:+ 86 755 3359 1582 sales@siglent.com www.siglent.com/ens Europe SIGLENT TECHNOLOGIES EUROPE GmbH Liebigstrasse 2-20, Gebaeude 14, 22113 Hamburg Germany Tel: +49(0)40-819-95946 Fax: +49(0)40-819-95947 info-eu@siglent.com www.siglenteu.com 21- SDS2000X-E Series Digital Oscilloscope... - Page 26 www.siglent.com...
Need help?
Do you have a question about the SDS2000X-E Series and is the answer not in the manual?
Questions and answers