Advertisement
Quick Links
Dear Customer!
We thank you for purchasing Neoline G-Tech X27. Please read this manual
carefully and thoroughly to use the device properly and extend its life. Keep
the manual to refer to it in case it becomes necessary in future.
[ Contents ]
Terms of use . . . . . . . . . . . . . . . . . . . . . . . . . . . . . . . . . . . . . . . . . . . . . . . . . . . . . . . . . . . . . .2
Specifications . . . . . . . . . . . . . . . . . . . . . . . . . . . . . . . . . . . . . . . . . . . . . . . . . . . . . . . . . . . . .4
Package Contents. . . . . . . . . . . . . . . . . . . . . . . . . . . . . . . . . . . . . . . . . . . . . . . . . . . . . . . . .5
Device and buttons description . . . . . . . . . . . . . . . . . . . . . . . . . . . . . . . . . . . . . . . . . . .6
Installation. . . . . . . . . . . . . . . . . . . . . . . . . . . . . . . . . . . . . . . . . . . . . . . . . . . . . . . . . . . . . . 10
Operation . . . . . . . . . . . . . . . . . . . . . . . . . . . . . . . . . . . . . . . . . . . . . . . . . . . . . . . . . . . . . . 15
Menu . . . . . . . . . . . . . . . . . . . . . . . . . . . . . . . . . . . . . . . . . . . . . . . . . . . . . . . . . . . . . . . . . . . 25
Troubleshooting . . . . . . . . . . . . . . . . . . . . . . . . . . . . . . . . . . . . . . . . . . . . . . . . . . . . . . . . 27
1
Advertisement

Related Manuals for Neoline G-Tech X27


Summary of Contents for Neoline G-Tech X27
-
Page 1: Table Of Contents
Dear Customer! We thank you for purchasing Neoline G-Tech X27. Please read this manual carefully and thoroughly to use the device properly and extend its life. Keep the manual to refer to it in case it becomes necessary in future. -
Page 2: Terms Of Use
• Do not disassemble or modify the device. • Neoline is not responsible for any data loss and / or damage (direct or indirect) incurred to the user or third party by misusing the device or software, incorrect installation, use of accessories not included in the package. - Page 3 • DO NOT install the DVR on spot where the device can interfere the view and reduce the safety of driving. Neoline, or authorized partners of the company, are NOT responsible for any damage or data loss due to inappropriate installation.
-
Page 4: Specifications
This user manual is valid at the time of printing. The latest information can be found on the www.neoline.ru website in the corresponding product tab in the Download section. [ Specifications ] • Resolution: - front camera Full HD 1920 * 1080 (30 fps) - rear camera HD 1280 * 720 (30 fps) •... -
Page 5: Package Contents
• Input voltage of recorder: DC 12-24 V • Dimensions: 284 x 99 x 16 mm • Weight: 328 g [ Package Contents ] • Neoline G-Tech X27 DVR • Rear camera • GPS-module • USB cable • Car charging device •... -
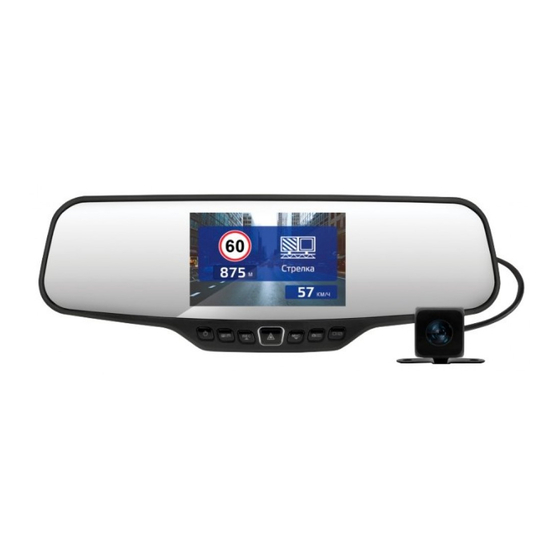
Page 6: Device And Buttons Description
[ Device and buttons description ] 1. Mini USB connector 8. OK / Record lock button 2. Rear camera connector GPS connector 9. Down / Microphone button (DOWN 3. GPS connector / MIC) 4. Memory card slot 10. Mode button (MODE) 5. - Page 7 [ Buttons ] 1. POWER Short press turns on the device. Long press – turns off the device. Short press in the operation mode turns the screen backlight on / off. 2. MENU Pause the video recording by pressing the UP / REC button. In Standby mode, a short press opens the settings menu, a second press switches the settings section.
- Page 8 5. DOWN/MIC Short press in Video mode turns the microphone on / off. In the Settings menu the button is used to move through the menu items (down). In Play mode pressing the button allows you to select a video or photo for playing / viewing. While a video is being played, pressing the button starts to fast forward.
- Page 9 CAUTION: Attempting to insert a memory card with the wrong side may damage the device and the memory card itself. Make sure that the memory card is in the correct position. Warning: do not use excessive force when inserting a memory card to avoid damaging the device.
-
Page 10: Installation
[ Installation ] Installation on the standard rear-view mirror The DVR is equipped with sliding clamps for installation on the standard rear-view mirror. ATTENTION! Make sure that the length of the sliding clamps is wider than the width of the standard rear-view mirror. 8сm... - Page 11 Fix the DVR to the rear-view mirror using the supplied ties. Lens adjusting Adjust the view angle by tuning the lens to the intended side (left to right or up to down). Set the lens so that the camera captures the image in the proportion of «30% sky / 70% road»...
- Page 12 nstalling and using the rear-view camera Install the rear-view camera according to Fig. 1 Fix the camera on the rear bumper with self-tapping screws or inside the car on 3M scotch tape (included) according to Fig. 2 Parking camera installation: 1.
- Page 13 4. Connect the power cable to the reversing light wiring so that the video from the rear-view camera is displayed in full screen mode when you switch the gearbox to the reverse mode. If you do not connect the power to the reverse light wiring, the rear-view camera will record the video, but will not automatically switch to full screen mode.
- Page 14 Power connection Use only the supplied power adapter to power the device and charge the battery. Connect one end of the power adapter to the mini USB connector on the device. Connect the other end of the adapter to the car cigarette lighter socket.
-
Page 15: Operation
[ Operation ] Turning the device on and off Press the POWER button to turn the DVR on. After the Neoline logo appears on the screen, the device turns on. Press and hold the POWER button to turn the DVR off. The video recording will stop and the last video file will be saved. - Page 16 Such files are stored in the Event folder. Firmware Upgrade - Download the file with the firmware from the official website www. neoline.com, extract the file from the archive. - Format the memory card and transfer the unzipped file to the micro SD card.
- Page 17 - The status of the firmware update will be displayed on the screen. - After the process is completed, the device will automatically reboot. - Check if the correct firmware version is displayed in the Settings menu. - Format the memory card using the DVR menu. Attention! Do not turn the DVR power off...
- Page 18 Deleting files Enter the Play menu using the MODE button. Use the Up / Down buttons to select the file you need. Press the MENU button to open a file deleting menu. Choose the necessary function using Up / Down buttons. Menu line Description Delete one...
- Page 19 Speed limit Distance to safety Type of safety camera camera point warning or radar Intelligent processing of average speed control cameras The average speed control system consists of 2 cameras installed on a road section within 500 – 10 000 m from each other. When driving through the 1st camera, the travel time is fixed.
- Page 20 - When passing the 2nd camera, there will be a notification of video control ending - When you leave the road between two cameras Neoline G-Tech X27 will reset the alert according to its algorithm within 10 minutes - When the car stops on a road section between two cameras, the average speed will continue to be displayed on the display Types of police radars and traffic control cameras...
- Page 21 Radar Type Image Radar Type Image Strelka Backside radar Roadside Strelka video unit control Public Speed control transport lane control Traffic control Crossroads post Pedestrian Radar imitation crossing Average speed video control Note: after police radar notification, the speed limit on the current section of the road is announced.
- Page 22 2. Download the active version of the GPS database from the following website: http://neoline.com/products/videoregistrators/Neoline+G-Tech+X27. Choose the «download» section on the G-Tech X27 page. The file name will look like this: Radars database, 45 countries, from xx. xx.2018. 3. Extract the * .exe file from the downloaded «GPS G-Tech X27 Database from xx.xx.20xx.exe»...
- Page 23 5. Connect the GPS module through the micro USB cable from the kit to the PC. If the connection is correct, the software will display «Connected» status...
- Page 24 6. Click the Update button and wait for the update to be finished. 7. When the update is complete, click the «Exit» button. The GPS database is updated. The version of the current database will be displayed on the bottom line of the DB VER software:...
-
Page 25: Menu
- Date / Time: use the Up / Down / Confirm buttons to set the date and time. - Date format: Year-Month-Date / Month-Date-Year / Date-Month-Year - Data fixed on the screen: Date + NEOLINE logo / Date / NEOLINE Logo / Off... - Page 26 - Language: Russian / English - State number fixed on the screen: enter state number of the car, using numbers and letters of the Latin alphabet. - Network power frequency: 50 Hz / 60 Hz - Auto display off: Off / 5 sec / 10 sec / 30 sec / 1 minute / 3 minutes - G-sensor sensitivity: Off...
-
Page 27: Troubleshooting
Example B: - speed limit: 60 km/h - additional excess: 10 km/h In this case, the device will alert when the speed exceeds 71 km/h. - Alert: Voice + Display / Display [ Troubleshooting ] Refer to this section in case there are any troubles with the device, considering that the device is used properly. - Page 28 An image is dark when photographing the sky or water If there is a large contrast in the scene, this will affect the exposure. Change the exposure setting in the menu. The device freezes (there is no image on the display, does not respond to button presses) Press the RESET button to force the device to reboot.
Need help?
Do you have a question about the G-Tech X27 and is the answer not in the manual?
Questions and answers