
Related Manuals for PowerWalker VFI 10K-80K CPG 3


Summary of Contents for PowerWalker VFI 10K-80K CPG 3
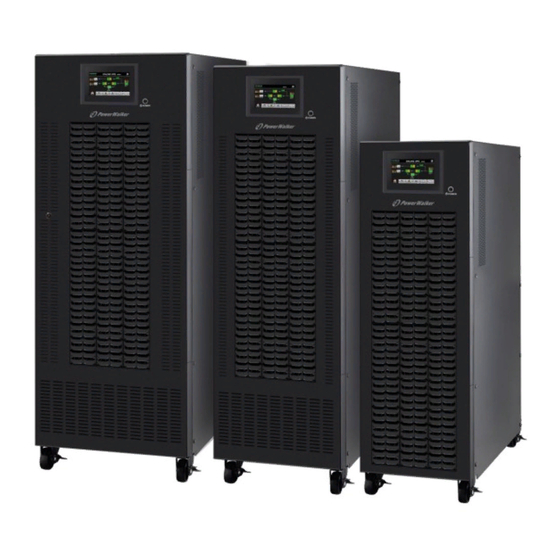
- Page 1 PowerWalker VFI 10K-80K CPG 3/3 PF1 User Manual Uninterruptible Power Supply System Version: 2.0...
- Page 2 Please comply with all warnings and operating instructions in this manual. This equipment should only installed, serviced, maintained by qualified personnel. Do not operate this unit before reading through all safety information and operating instructions carefully. Disclaimer We assume no responsibility or liability for loss or damages, whether direct, indirect, consequential or incidental, which might arise out of the use of such information.
-
Page 3: Table Of Contents
Table of Contents 1. SAFETY AND EMC INSTRUCTIONS ........................... 1 1-1. T ..........................1 RANSPORTATION AND TORAGE 1-2. P ................................1 REPARATION 1-3. I ................................1 NSTALLATION 1-4............................ 2 ONNECTION ARNINGS 1-5. O ................................... 3 PERATION 1-6. S .................................. 3 TANDARDS 2. -
Page 4: Safety And Emc Instructions
1. Safety and EMC instructions All safety instructions in this document must be read, understood and followed. 1-1. Transportation and Storage Please transport the UPS system only in the original packaging to protect against shock and damage. The UPS must be stored in the room where the temperature is well regulated. Ambient temperature should not exceed 40°C. -
Page 5: Connection Warnings
1-4. Connection Warnings • There is no standard backfeed protection inside of the UPS. However, there are relays on the Input to cut off line voltage and while the neutral is still connect to UPS. Input Rly Main Input Rly Input Main Input... -
Page 6: Operation
1-5. Operation Do not disconnect the grounding/earthing conductor cable on the UPS or the building wiring terminals under any circumstance. The UPS system features its own, internal current source (batteries). The UPS output sockets or output terminal blocks may be electrically live even if the UPS system is not connected to the building mains/live wires. -
Page 7: Installation And Operation
2. Installation and Operation These series came in several versions related to power capacity: 10kW, 15kW, 20kW, 30kW, 40kW, 60kW and 80kW. We also offer version with and without batteries, marked as below: BI – “Battery Internal” – units with internal batteries BX –... -
Page 8: Wiring Terminal View
2-2. Wiring Terminal View Diagram 1: 10K/15K/20K Diagram 2: 10K/15K/20K Rear Panel Input/Output Terminal... - Page 9 Diagram 3: 30K Rear Panel Diagram 4: 40K Rear Panel Diagram 5: 30K/40K Input/Output Terminal...
- Page 10 Diagram 6: 60K front view Diagram 7: 80K front view with door open with door open Diagram 8: 60K/80K Input/Output Terminal...
-
Page 11: Single Ups Installation
1. RS-232 communication port 2. USB communication port 3. Emergency power off function connector (EPO connector) 4. Share current port (only available for parallel model) 5. Parallel port (only available for parallel model) 6. Intelligent slot 7. External battery connector/terminal (Only available for long-run model) 8. - Page 12 Terminal block wiring diagram for 10K/15K/20K Terminal block wiring diagram for 30K /40K...
- Page 13 Terminal block wiring diagram for HV 60K/80K Terminal block wiring diagram for 60K/80K TO UPS BAT+ PBAT TO UPS BAT N NBAT TO UPS BAT- Battery wire connect schematic NOTE 1: Make sure that the wires are connected tightly with the terminals. NOTE 2: Please install the output breaker between the output terminal and the load, and the breaker should be qualified with leakage current protective function if necessary.
-
Page 14: Ups Installation For Parallel System
the standard internal battery to the external battery. The battery type and voltage may be different, if you connect them together, it maybe cause the hazard of electric shock or fire! Warning: (Only for long-run model) ● Make sure a DC breaker or other protective device between UPS and the external battery pack is installed. - Page 15 Wiring diagram of parallel system for 30K / 40K Wiring diagram of parallel system for HV 60K/80K...
-
Page 16: Software Installation
Wiring diagram of parallel system for 60K/80K 2-5. Software Installation For optimal computer system protection, install UPS monitoring software to configure UPS shutdown operation. -
Page 17: Operations
3. Operations 3-1. Initial Operation 1) Before operation, make sure that the two strings of batteries are connected correctly in order of ”+,GND,-” terminals and the breaker of the battery pack is at “ON” position (only for long-run model). 2) Press the “ ”... - Page 18 96 72.07 After initialization, the main screen will display as shown below. On the bottom, there are five icons to represent five sub-menus: CONTROL, MEASURE, SETTING, INFO, DATALOG. 3-2-2 Control screen Touch the icon to enter control sub-menu. 20KVA 19:52:36 Bypass M ode 2018-11-07 O N / O FF U PS...
- Page 19 Enter No Or Back Confirm YES Turn ON /OFF UPS ON/OFF UPS Enter No Or Back Confirm YES Do Battery Test HOME CONTROL BATTERY TEST Enter No Or Back Confirm YES Do MUTE ALL MUTE ALL Enter No Or Back Confirm YES Turn ON/OFF CHARGER ON/OFF CHARGER Screen 1.0 «Control»...
- Page 20 Audio mute It will show “Mute all” if the audio is active. Touch “Yes” to activate mute. If “Mute all” is active, I will show icon on the top left corner of the main screen. Touch “Back” to return to CONTROL screen immediately or “No”...
- Page 21 Measure screen page 1 LINE VOL: The real time value of R, S and T phase voltage, RS, ST, TR voltage and input frequency. INVERTER VOL: The real time value of R, S and T inverter voltage, RS, ST and TR voltage and frequency.
- Page 22 Measure screen page 3 INPUT W: R, S and T input power in watt. INPUT VA: R, S and T input power in VA. INPUT W (%): R, S and T input power watt in percentage. INPUT VA (%): R, S and T input power VA in percentage. ...
- Page 23 General screen page 1 Date/Time: Set the date and time. The format is YYYY-MM-DD HH:MM:SS. The calendar day will be automatically changed when the year, month and date are set. Language: Set the LCD language. Input Source: Select the input source. There are two options: Line (utility) and generator. Line is default ...
- Page 24 on the top right corner of the main screen. ADVANCE Advance Password Page It’s required to enter password (4 digits) to access to the “ADVANCE” page. ADVANCE User To access to the “AdvanceUser” Setting menu page, the default password is “0000”. If entered password is right, the page will jump to setting screen.
- Page 25 ELECTRICAL Electrical Setting Page 1 Output Voltage: Select the output rated voltage. 208V , 220V ,230V and 240V. Output Frequency: Select output rated frequency. 50Hz: The output frequency is setting for 50Hz. 60Hz: The output frequency is setting for 60Hz. ...
- Page 26 when UPS is 60Hz system. ECO mode: Enable/Disable ECO mode. Default setting is “Disable”. ECO Voltage Range: Set the ECO voltage range. L: Low voltage point for ECO mode. The setting range is from “Rated output voltage – 5V” to “Rated output voltage - 11V”.
- Page 27 MISCELLANEOUS 20KVA 19:52:36 Bypass M ode 2018-11-07 Aut o R est ar t Enabl e Shut dow n D el ay 0m i n ELEC TR O N I C R est or e D el ay 0m i n BATTER Y N ew Passw or d * * * *...
- Page 28 20KVA 19:52:36 Bypass M ode 2018-11-07 ELEC TR O N I C BATT M I SC ELLAN EO U S U PS SELFTEST H O M E C O N TR O L M EASU R E SETTI N G I N FO D ATALO G Advance: Maintainer Setting Menu Page2...
- Page 29 20KVA 19:52:36 StanbyMode 2018-11-07 Float VOL 13.6V SYS PARAMETER UPS Type INSTALL INFO VOL CALI CURR CALI INITIAL HOME CONTROL MEASURE SETTING INFO DATALOG SYS PARAMETER Page 2 INSTALL INFO 20KVA 19:52:36 StanbyMode 2018-11-07 SYS Install Date 2018 SYS PARAMETER BAT Install Date 2018 INSTALL INFO...
- Page 30 VOL CALI Page2 Line VOL: Line voltage calibration. Each click is 0.1% no matter it’s pressing up or down key . Press “up” key to increase 0.1% and press “down” key to decrease 0.1%. Press “OK” key to confirm the modification. ...
- Page 31 CURR CALI 20KVA 19:52:36 StanbyMode 2018-11-07 Output CURR SYS PARAMETER 0.0% 0.0A INSTALL INFO 0.0A 0.0% VOL CALI 0.0A 0.0% CURR CALI INITIAL HOME CONTROL MEASURE SETTING INFO DATALOG CURR CALI Page Output CURR: Output current calibration. Each click is 0.1% no matter it’s pressing up or down key .
- Page 32 20KVA 19:52:36 StanbyMode 2018-11-07 DATA LOG SYS PARAMETER PARAMETERS INSTALL INFO CALI Initial the Parameters? VOL CALI EEPROM CURR CALI TOUCH CALI INITIAL HOME CONTROL MEASURE SETTING INFO DATALOG INITIAL PARAMETERS Page “YES” to restore default value. Touch “Back” or “No” to cancel this operation and back to INITIAL menu PARAMETERS: After pressing the confirmation window, it will pop up as shown in above screen.
- Page 33 INITIAL TOUCH Page TOUCH CALI: After pressing the confirmation window, it will pop up as shown in above screen. Touch screen to recalibrate. Then, the blue screen appears and please click on the place of the cross with your mouse. ELECTRICAL Electrical Setting Page 1 Output Voltage: Select the output rated voltage.
- Page 34 Electrical Setting Page 2 Bypass at UPS off: Select the bypass status when manually turning off the UPS. This setting is only available when “Bypass forbid” is set to “Disable”. Enable: Bypass enabled. When selected, bypass mode is activated. ...
- Page 35 Battery Parameter: Battery AH: setting battery capacity. MISCELLANEOUS 20KVA 19:52:36 Bypass M ode 2018-11-07 Aut o R est ar t Enabl e Shut dow n D el ay 0m i n ELEC TR O N I C R est or e D el ay 0m i n BATTER Y N ew Passw or d...
- Page 36 After changing UPS type to “HV”, you have to restart the UPS. After the UPS is restarted, please enter Advance screen and enter Maintainer password. It will show “UPS SELFTEST” selection in the screen. In the screen, all tested items are shown “unknown”. Simply click “UPS SELFTEST” button, the UPS will start self-test. If the UPS is normal, it will show “Normal”...
- Page 37 Input Source: The information of input source. All Mute: Enable/disable all mute function. Mode Mute: Enable/disable mode mute function. Rated Information Page Rated Information Output Voltage: It shows output rated voltage. Output FRE: It shows output rated frequency. ...
- Page 38 Parameter Information Page 2 BATT Mode Work Time: The maximum discharge time in battery mode. BATT Warning Voltage: HIGH: High battery warning voltage. LOW: Low battery warning voltage. Shutdown Voltage: If battery voltage is lower this point, UPS will automatically shut down. ...
-
Page 39: Audible Alarm
3-2-6. Data Log screen Touch the icon to enter date log page. Data log is used to record the warning and fault information of the UPS. The record contains date & time, code, type and description. Touch the icon to page up or down if there are more than one page in the date log. -
Page 40: Single Ups Operation
3-4. Single UPS Operation 1. Turn on the UPS with utility power (in AC mode) 1) After power supply is connected correctly, set the breaker of the battery pack at “ON” position (this step only necessary for long-run model). Then set the line input breaker at “ON” position. At this time the fan is running and the UPS enter to power on mode for initialization, several seconds later, UPS operates in Bypass mode and supplies power to the load via the bypass. - Page 41 more load to be switched off at that time, you have to shut down all loads as soon as possible to protect the devices or save data. Otherwise, there is a risk of data loss or load failure. 2) In Battery mode, users can touch “SETTING” “Basic” Audio Mute to enable “Mode Mute” to disable the buzzer.
-
Page 42: Parallel Operation
12. Operation in maintaining bypass mode This operation is only available for professional or qualified technicians. When the UPS needs to repair or service and then the load can’t be shut off, the UPS needs to turn to maintenance mode. 1) First, turn off the UPS. - Page 43 3. Remove units from the parallel system There are two methods to remove units from the parallel system: First method: Touch “CONTROL” “Turn off UPS” and select “Yes” to turn of the UPS. Then, the UPS will enter into Bypass mode or No Output mode without output. 2) Turn off the output breaker of this unit, and then turn off the input breaker of this unit.
-
Page 44: Fault Code
3-6. Fault Code Fault code Fault event Icon Fault code Fault event Icon Bus start failure None DSP communication failure None Bus over None Overload None Bus under None Incorrect UPS setting None Bus unbalance None MCU communication failure None Converter over current None Two DSP firmware versions... -
Page 45: 3-7.Warning Code
3-7.Warning Code Warning code Warning event Warning code Warning event Line situations are different in parallel Battery unconnected system Bypass situations are different in IP Neutral loss parallel system Locked in bypass after overload 3 IP phase abnormal times in 30 minutes Bypass phase abnormal Converter current unbalanced Over charge... -
Page 46: Trouble Shooting
4. Trouble Shooting If the UPS system does not operate correctly, please solve the problem by using the table below. Symptom Possible cause Remedy No indication and alarm in the front The AC input power is not Check if input cable firmly display panel even though the mains is connected well. - Page 47 Symptom Possible cause Remedy Check and correct the input neutral connection. connection is ok and the warning still displaying, please refer to the LCD setting section, to enter the neutral loss check menu, to see if the The input neutral wire is parameter3 is “CHE”.
-
Page 48: Storage And Maintenance
5. Storage and Maintenance 5-1. Storage Before storing, charge the UPS at least 7 hours. Store the UPS covered and upright in a cool, dry location. During storage, recharge the battery in accordance with the following table: Storage Temperature Recharge Frequency Charging Duration -25°C - 40°C Every 3 months... -
Page 49: Specifications
6. Specifications 400V VFI 15-20K MODEL VFI 10K CPG VFI 30K CPG VFI 40K CPG VFI 60K CPG VFI 80K CPG 15KVA / 15KW CAPACITY* 10KVA / 10KW 30KVA / 30KW 40KVA / 40KW 60KVA / 60KW 80KVA / 80KW 20KVA / 20KW INPUT 110 VAC(Ph-N) ±...
Need help?
Do you have a question about the VFI 10K-80K CPG 3 and is the answer not in the manual?
Questions and answers