Advertisement
Advertisement
Table of Contents

Related Manuals for Flycam Vista-II Stabilizing Arm & Vest


Summary of Contents for Flycam Vista-II Stabilizing Arm & Vest
- Page 1 Vista-II Stabilizing Arm & Vest (VSTA-II-AV) Instruction Manual...
-
Page 2: Table Of Contents
At Flycam, our goal is to ensure 100% Customer Satisfaction in all that we do. We back our sales with a 1 year warranty from the date of purchase and work hard to resolve any problems in the unlikely event one should arise. -
Page 3: Foreword
Flycam family. By purchasing your Flycam Vista-II Stabilizing Arm & Vest, you have just joined a host of designers, engineers, machinists, assembly, customer service and office staff that take great pride in all that they do. -
Page 4: Introduction
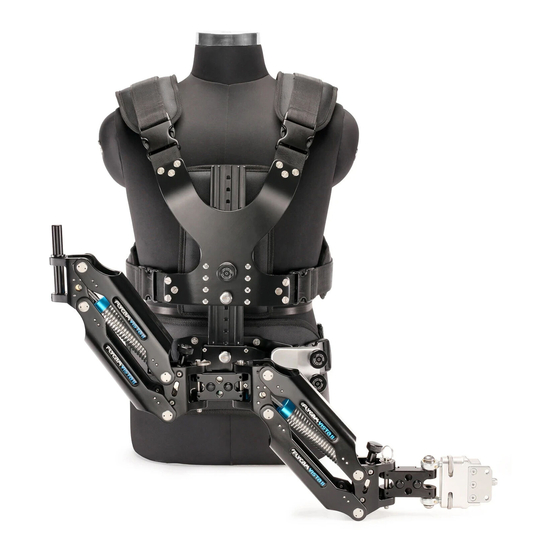
Introduction Flycam unveils its new powerful combination of Vista-II Stabilizing Arm & Vest support to achieve superfine smooth moves in action. The dynamic Double section - vista arm design allows even beginners to learn its operation with ease. The arm... -
Page 5: Safety Hints
2 x Heavy Tension Springs Storage Bag Safety Hints ATTENTION: PLEASE READ THIS BEFORE USING TO PREVENT SERIOUS DAMAGE TO THE GEAR! IT IS RECOMMENDED TO APTLY CONNECT ARM & VEST Always attach iso-elastic arms appropriately with the vest for smooth performance. BE HIGHLY VIGILANT OF FINGERS Do not place your fingers inside the arm as they can get caught and injure you. -
Page 6: Assembling
NEVER LEAVE THE BUCKLES LOOSE Always fasten the buckles properly both on chest and waist for safe & comfortable fitting of the vest. FOLLOWING THESE GUIDELINES WILL PROVIDE BETTER SHOTS AND TROUBLE-FREE OPERATION. SHOULD YOU NEED ADDITIONAL INFORMATION, TECHNICAL ASSISTANCE IS AVAILABLE ‘ONLINE’... - Page 7 Straps are made of nylon with strong Velcro, and can be easily replaced or adjusted to suit Individual needs. Our Flycam Galaxy Vest can be used with all professional Arms like Steadicam, Tiffin, Glide cam and Sachtler. Attaching the Arm NOTE: It can be operated efficiently either right or left handed.
- Page 8 Insert pin of Vista-II Arm into the handle of your Stabilizer. NOTE: For attaching the stabilizer to Arm, keep the handle of stabilizer straight in accordance to the pin of Arm . Once vertical and horizontal balance is achieved, mount the Stabilizer (Not Included) gimbal connector of Arm.
- Page 9 Rinse well. Storage: If you are going to store Flycam Vista-II Arm & Vest for a long period of time, then we recommend storing it up-right in a dry or low-to-normal humidity area. If you are unable to find an environment like this, then we suggest you store the unit in an airtight plastic container or bag.
-
Page 10: Warranty
WARRANTY We offer a one year warranty for our products from the date of purchase. We will repair or replace your product, free of charge, in the event of a defect in materials or craftsmanship obtained during normal use or handling based on the user manual. Please note that we will not cover any shipping costs for returning the product to us.
Need help?
Do you have a question about the Vista-II Stabilizing Arm & Vest and is the answer not in the manual?
Questions and answers