Carestream DENTAL CS 1200 Quick Start Manual
Hide thumbs
Also See for CS 1200:
- User and installation manual (40 pages) ,
- Safety & regulatory manual (28 pages) ,
- Safety & regulatory manual (29 pages)
Advertisement
Quick Links
Camera & Software Installation
To connect the camera to a computer, follow these steps:
1.
Connect the camera to the computer.
USB
2.
Insert the CS Imaging Software DVD in the DVD drive
and install the software. See the CS Imaging Software
documentation: CS Imaging Installation and Configuration
Guide (SM998), for details of the installation procedure.
To install the imaging software using a TWAIN interface,
see your imaging software user guide.
Insert the CS Intraoral Cameras Installation Wizard DVD in
3.
the DVD drive. If the DVD does not run automatically, navigate
to your DVD drive in Windows Explorer and double-click the
Launcher.exe file.
4.
Follow the on-screen instructions to install the Acquisition
interface and set up the camera.
Refer to the User Guide on the CS Intraoral Cameras Installation Wizard DVD for more detailed information on camera and software functions and features.
A prompt asking you if you want to install the software
might display.
Check Always trust software from "Carestream
Health" and click Install.
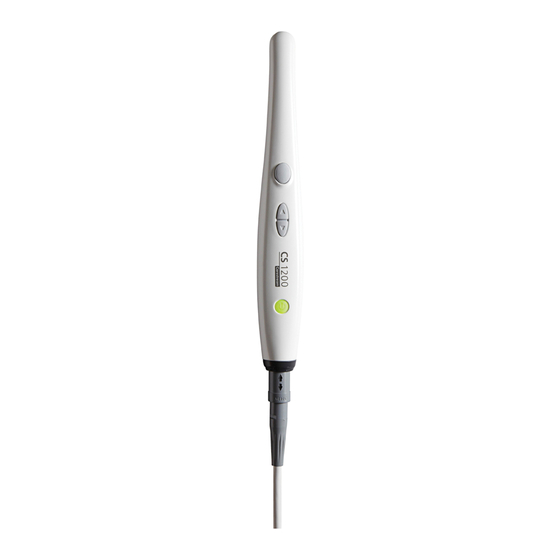
Camera Overview
6
7
1
2
3
4
5
1.
Capture button
6.
Camera Lens
2.
Review button (backward)
7.
Push-pull connector
3.
Review button (forward)
8.
USB connector
4.
Power button (LED indicator)
9.
Camera holder
5.
Cable connection
Preference Settings
On the Acquisition interface, click
and software options.
8
9
to set the camera
• Click
to enable/disable audio
notifications.
• Click
to adjust brightness
and contrast settings.
• Click
to create a log file for
faster service response.
www.carestreamdental.com/documentation
Advertisement

Subscribe to Our Youtube Channel
Related Manuals for Carestream DENTAL CS 1200


Summary of Contents for Carestream DENTAL CS 1200
- Page 1 A prompt asking you if you want to install the software Camera & Software Installation Preference Settings might display. To connect the camera to a computer, follow these steps: Connect the camera to the computer. On the Acquisition interface, click to set the camera and software options.
- Page 2 AC/DC 4. Start the CS Imaging Software. If using imaging software via a TWAIN interface, see the CS 1200 User and Installation Guide. AV Connection 5. Create or open a patient record, if applicable. 6. In the CS Imaging Software, click select your camera.
Need help?
Do you have a question about the CS 1200 and is the answer not in the manual?
Questions and answers