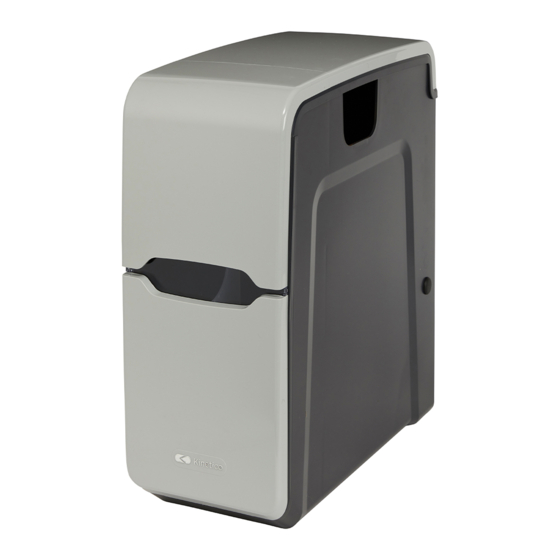
Kinetico Premier Compact User Manual
Hide thumbs
Also See for Premier Compact:
- User manual ,
- Installation and user manual (60 pages) ,
- Installation and user manual (20 pages)
Advertisement
Table of Contents
- 1 Kinetico Premier Compact Water Softener Installation Instructions
- 2 Table of Contents
- 3 Safety Information
- 4 Contents of Box
- 5 Specifications
- 6 Getting to Know the Softener
- 7 Pre-Installation Check List
- 8 Installation Instructions
- 9 Installation Review
- 10 Commissioning Instructions
- 11 Useful Information
- Download this manual
Advertisement
Table of Contents

Summary of Contents for Kinetico Premier Compact
- Page 1 Water Softener Installation and User Manual visit www.kinetico.co.uk...
-
Page 2: Kinetico Premier Compact Water Softener Installation Instructions
For more information about Kinetico: visit www.kinetico.co.uk Kinetico UK Ltd Bridge House, Park Gate Business Centre, Hants SO31 1FQ Kinetico Premier Compact Water Softener Installation Instructions... -
Page 3: Table Of Contents
Contents Safety information Contents of box Specifications Getting to know the softener Pre-installation check list Installation instructions Installation review Commissioning instructions Useful information www.kinetico.co.uk... -
Page 4: Safety Information
35°C or cause the unit will flow away using gravity. to freeze. Freezing temperatures will damage the system. Kinetico Premier Compact Water Softener Installation Instructions... - Page 5 WRAS Approval Plumbing Schematic WRAS approval for the Kinetico Premier Please refer to the plumbing schematic Compact Water Softener applies to cold on page 8 before commencing an water (below 23°c) installations only.
-
Page 6: Contents Of Box
Flow rate @ 15 psi drop 16.6 L/m 33.3 L/m Pipe connections - in/out ¾” BSP ¾” BSP Min/max operating pressure 1.8 - 6 bar 1.8 - 6 bar Min/max operating temperature 2 - 23˚C 2 - 23˚C Kinetico Premier Compact Water Softener Installation Instructions... -
Page 7: Getting To Know The Softener
PERMISSION OF AN AUTHORIZED EMPLOYEE OF KINETICO INCORPORATED. ADDITIONALLY, THE PROCESS, METHOD, DESIGN AND DATA CONTAINED HEREIN, ARE CONSIDERED TO BE THE PROPERTY OF KINETICO INCORPORATED AND MAY NOT BE DIVULGED TO ANY OTHER PERSON OR COMPANY NOR USED TO... -
Page 8: Pre-Installation Check List
Drain line to air gap with internal trap Mains water (see WRAS guidance note 09-07-01) By-pass assembly Overflow to outside/visable location Dimensions - h 498mm x w 219mm x d 468mm Kinetico Premier Compact Water Softener Installation Instructions... - Page 9 A pressure regulating valve on the water supply to the softener where the incoming pressure exceeds 6 bar. A non-return valve on the water main supply to the softener. If using a Kinetico supplied installation kit, a non-return valve is built into the Inlet Tee.
-
Page 10: Installation Instructions
Ensure all cardboard is removed from the inside of the softener. Remove top lid and support bar (see page 7). Carefully remove the two pieces of cardboard, then replace the support bar and lid. Kinetico Premier Compact Water Softener Installation Instructions... - Page 11 Attach the retaining bracket and Flush: pin to the control valve. After all the plumbing has been completed, but before connecting to the water softener, flush both inlet and outlet lines allowing water to rinse out any debris. www.kinetico.co.uk...
-
Page 12: Installation Review
Please note: Drain lines must not run more than 2.4m up or exceed a total of 9m. The drain line must not be restricted or kinked. Kinetico Premier Compact Water Softener Installation Instructions... -
Page 13: Commissioning Instructions
When the cycle has finished “Useful Information” section (approx 4 mins), repeat the (page 16). procedure, turn the indicator dot to the next backwash cycle and allow to finish (approx 4 mins). Water level Actuator Indicator Grid plate www.kinetico.co.uk... - Page 14 ADDITIONALLY, THE PROCESS, METHOD, DESIGN AND DATA CONTAINED HEREIN, ARE CONSIDERED TO BE THE PROPERTY OF KINETICO INCORPORATED AND MAY NOT BE DIVULGED TO ANY OTHER PERSON OR COMPANY NOR USED TO KINETICO'S DISADVANTAGE Add salt: For convenience, the water softener has been designed to accommodate both block and tablet/pellet salt.
- Page 15 The installation is now complete. pressurised, open the outlet valve and ensure by-pass valve is closed. Open a tap in the house to release trapped air from the lines rinse out any debris. www.kinetico.co.uk...
-
Page 16: Useful Information
When the vessel has finished its cycle (approx 12 mins), repeat the procedure, advance the indicator dot to the word “BRINE” in the next cycle and allow to finish (approx 12 mins). Actuator Indicator Kinetico Premier Compact Water Softener Installation Instructions... - Page 17 How do I correct the water level if it sits higher than the recommended 25mm above the salt grid? Check that the brine valve is correctly held in place by the support bar and is seated firmly on the base of the cabinet. www.kinetico.co.uk...
- Page 18 If you have any questions about your Kinetico Premier Compact Water Softener, or you suspect that your system isn’t working properly, please contact Kinetico. Kinetico Premier Compact Water Softener Installation Instructions...
- Page 19 Notes www.kinetico.co.uk...
- Page 20 Kinetico UK Ltd, Bridge House, Park Gate Business Centre, Park Gate, Hants SO31 1FQ www.kinetico.co.uk © Kinetico 2016. 1.6/6 #16240...


Need help?
Do you have a question about the Premier Compact and is the answer not in the manual?
Questions and answers
Where is the serial number on premier compact softener