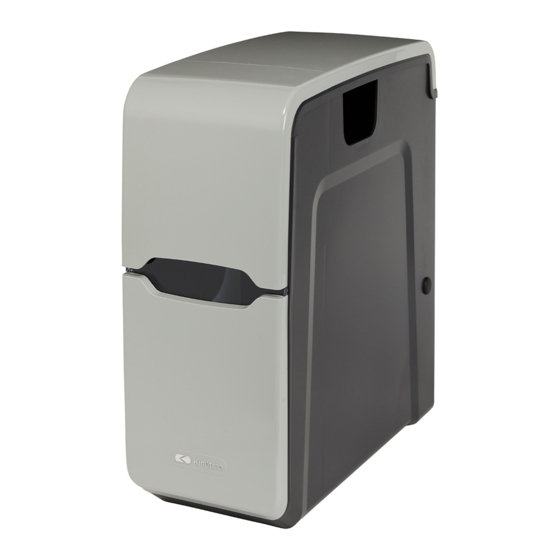
Kinetico premier COMPACT Installation And User Manual
Hide thumbs
Also See for premier COMPACT:
- User manual ,
- Installation and user manual (60 pages) ,
- Installation and user manual (58 pages)
Table of Contents
Advertisement
Quick Links
Advertisement
Table of Contents

Summary of Contents for Kinetico premier COMPACT
- Page 1 Water Softener Installation and User Manual visit www.kinetico.co.uk...
- Page 2 The Premier Compact Water Softener has been Tested and Certified by WQA under NSF/ANSI 61 for Materials Safety Requirements Only. Not Certified for Contaminant Reductions or Structural Integrity by WQA. For more information about Kinetico visit www.kinetico.co.uk Kinetico Premier Compact Water Softener Installation and User Manual...
-
Page 3: Table Of Contents
Contents Safety information Contents of box Specifications How to set the XP Getting to know the softener Pre-installation check list Installation instructions Review Commissioning instructions Useful information Original Version www.kinetico.co.uk... -
Page 4: Safety Information
24°C or cause the unit will flow away using gravity. to freeze. Freezing temperatures will damage the system. Kinetico Premier Compact Water Softener Installation and User Manual... - Page 5 Copper/Plastic Pipework Intended Use Where copper/plastic pipework is Not intended to be used for treating used, Kinetico advises adherence to water that is micro-biologically unsafe the regulatory requirements to ensure or water that has an unknown quality, adequate earth bonding is provided.
-
Page 6: Contents Of Box
Regeneration time 11 minutes Flow rate @ 1 bar pressure drop 22.7 l/min Pipe connections - in/out ¾” BSP Min/max operating pressure 1.8 - 6 bar Min/max operating temperature 2 - 24˚C Kinetico Premier Compact Water Softener Installation and User Manual... -
Page 7: How To Set The Xp
Set the XP meter: Not Correct Not Correct Incorrect Adjust the XP meter setting by using an appropriately sized flat-headed screwdriver to push down and rotate the hardness adjustment knob. Not Correct Correct Original Version www.kinetico.co.uk... - Page 8 Set to K in this example Please note: NEVER set XP with the arrow aligned anywhere in the black section of the meter disc. The softener will not meter properly. Kinetico Premier Compact Water Softener Installation and User Manual...
-
Page 9: Getting To Know The Softener
Getting to know the softener Top lid Front lid Drain connection Overflow Outlet Inlet Support Blanking plate Salt compartment Original Version www.kinetico.co.uk... -
Page 10: Pre-Installation Check List
Drain line to air gap with internal trap Mains water (see WRAS guidance note 09-07-01) By-pass assembly Overflow to outside/visable location Dimensions - h 498mm x w 219mm x d 468mm Kinetico Premier Compact Water Softener Installation and User Manual... - Page 11 A pressure regulating valve on the water supply to the softener where the incoming pressure exceeds 6 bar. A non-return valve on the mains water supply to the softener. If using a Kinetico supplied installation kit, a non-return valve is built into the inlet tee.
-
Page 12: Installation Instructions
A pressure regulating valve connections on the left or right side of the will be required if the pressure cabinet by reversing the components. is above 6 bar. Kinetico Premier Compact Water Softener Installation and User Manual... - Page 13 Install: Fit inlet/outlet connection: Plumb pipework as necessary to accommodate a by-pass assembly. When using the Kinetico blending by-pass valve, consult separate installation instructions. Please note, the orientation of the valve will determine which connection is used as the inlet. Or, follow the...
-
Page 14: Review
Please note: Drain lines must not run more than 2.4m up or exceed a total of 9m. The drain line must not be restricted or kinked. Kinetico Premier Compact Water Softener Installation and User Manual... -
Page 15: Commissioning Instructions
(approx 9 mins), repeat the If the water stops short, fill until procedure, to initiate the next the water is approximately 25mm cycle and allow to finish. above the white grid plate. Water level Actuator Grid plate Original Version www.kinetico.co.uk... - Page 16 Fit the lid: Replace the lids and check plumbing for any leaks. The installation is now complete. Tablet and Pellet Salt: Simply pour into the salt compartment. Kinetico Premier Compact Water Softener Installation and User Manual...
-
Page 17: Useful Information
You will hear a rush of water and air going to the drain. When the vessel has finished its cycle (approx 12 mins), repeat the procedure, advance the indicator dot to the word “BRINE” in the next section and allow to finish (approx 12 mins). Actuator Indicator Original Version www.kinetico.co.uk... - Page 18 25mm above the salt grid? Check that the brine valve is correctly held in place by the support bar and is seated firmly on the base of the cabinet. Kinetico Premier Compact Water Softener Installation and User Manual...
- Page 19 Depending on your water system and water usage, this may take a few weeks to clear. It is also advisable to check that the by-pass valve is closed, when not using the Kinetico blending by-pass valve. Original Version www.kinetico.co.uk...
- Page 20 Kinetico UK Ltd, Bridge House, Park Gate Business Centre, Park Gate, Hants SO31 1FQ www.kinetico.co.uk © Kinetico 2021. 2.1/10 #17597...


Need help?
Do you have a question about the premier COMPACT and is the answer not in the manual?
Questions and answers