Table of Contents
Advertisement
Advertisement
Table of Contents

Subscribe to Our Youtube Channel
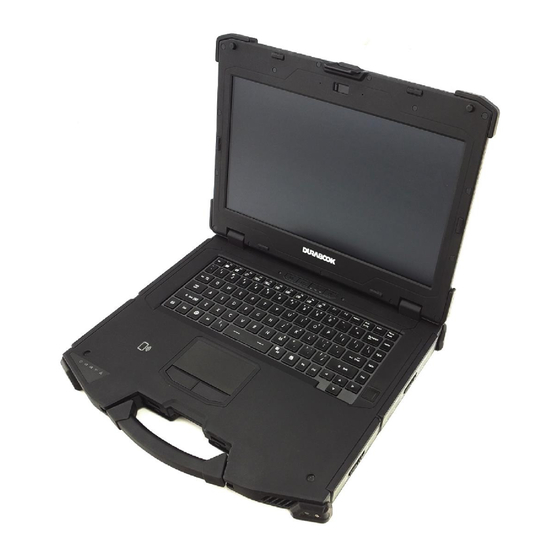
Related Manuals for Durabook Z14I


Summary of Contents for Durabook Z14I
- Page 1 © 2019 Twinhead International Corp and/or its affiliates. All rights reserved.
-
Page 2: Table Of Contents
Table of Contents ..................5 EFORE TART ..................5 ACKAGE ONTENTS ..................6 RODUCT VERVIEW Front View ....................... 6 Back View ........................ 7 Right View ....................... 8 Left View ........................9 Rear View ........................ 9 ..................11 TATUS NDICATORS GETTING STARTED ..............12 ................ - Page 3 Viewing the Version Information ................36 Viewing the Battery Charge Cycles ................36 Configuring the Programmable Button (P1) ............... 36 Configuring the Programmable Button (P2) ............... 37 Assigning an Application to the P1/P2 Button ............. 37 Accessing the Mobility Center ................... 38 Configuring the Touchscreen Settings ...............
- Page 4 TROUBLESHOOTING .............. 81 ................81 RELIMINARY HECKLIST ................. 81 OLVING OMMON ROBLEMS ..................83 ISPLAY ROBLEMS ................. 84 ROBLEMS ..................88 THER ROBLEMS APPENDIX ................89 ....................89 OPYRIGHT ..................89 PECIFICATIONS ................92 EGULATORY TATEMENT Federal Communications Commission Statement ............92 Declaration of Conformity ..................
-
Page 5: Before You Start
Before You Start Before You Start Congratulations on your purchase of this notebook. This fully-rugged notebook is portable and provides users with maximum mobile computing experience in a wide range of working environments. Before you begin using your notebook, read this chapter to familiarize yourself with the main components installed in the system. -
Page 6: Product Overview
Before You Start Product Overview Front View Item Description Front camera Use to take pictures, record videos, or video conference. Camera cover Protects the camera. Microphones Records the surrounding sound. Display screen Optional capacitive touch panel. Programmable Press to enter the chosen program (user buttons (P1/P2) definition). -
Page 7: Back View
Before You Start Item Description Waterproof keyboard Press the keys to input information. Fingerprint scanner Scans fingerprints for biometric identification. (optional) Touch pad Use to point, select, drag, or scroll objects on the screen. Touch pad button Press to select objects or display a shortcut menu. -
Page 8: Right View
Before You Start Item Description Battery latch release Press and hold the button to disengage the button battery connector. Speakers Emits sound. Media bay latch release Press and hold the button to disengage the button ODD/SSD/secondary battery connector. Stylus holder Stores the stylus. -
Page 9: Left View
Before You Start Left View Item Description SIM card slot Use to insert a SIM card. Card reader Use to insert memory cards to transfer pictures, music, and data between your notebook and flash compatible devices. The card reader supports SD (Secure Digital), SDXC, Mini-SD (with adapter). - Page 10 Before You Start Item Description DC-in jack Connects to the power adapter. DP port Connects to an external display. VGA port Connects to peripheral devices, such as an external monitor/projector. RS-232 ports Connects to serial peripheral devices. RJ-45 ports Connects to a local area network (LAN) using an Ethernet cable.
-
Page 11: Status Indicators
Before You Start Status Indicators The status indicators light up when a particular function of the notebook is active. Each indicator is marked with a symbol. Icon Item Description Lights up (green) when the HDD/SSD/ODD is accessing Storage data. Num Lock Lights up (green) when Num Lock is activated. -
Page 12: Getting Started
Getting Started Getting Started This chapter will help you get started using the device. CAUTION! Before any internal installation procedures are carried out on the system, make sure the system is turned off and cooled down for 5 minutes. Failing to turn off the system before opening it can cause permanent damage to the system and serious or fatal injury to the user. - Page 13 Getting Started 3. Insert the battery into the battery compartment, as shown in the image below. 4. Push completely until the battery locks into place. 5. Close the battery compartment cover. 6. Slide the battery compartment cover latch to the lock position to secure the battery compartment cover in place.
-
Page 14: Charging The Battery
Getting Started Charging the Battery The Li-Ion battery is not fully-charged upon purchase. To charge the battery, follow the steps below: 1. Install the battery into your notebook. See procedures above. 2. Connect the AC adapter to the DC-in jack on your notebook. 3. -
Page 15: When To Replace The Battery Pack
Getting Started When to replace the Battery Pack The battery performance gradually decreases over time and usage. We recommend you replace your battery pack after 18 to 24 months of usage. Removing the Battery To remove the battery, follow the steps below: 1. -
Page 16: Using The Secondary Battery
Getting Started Using the Secondary Battery Installing the Secondary Battery To install the secondary battery, follow the steps below: 1. Slide the I/O device cover latch to the unlock position to release the I/O device cover. 2. Open the I/O device cover . EN-16... - Page 17 Getting Started 3. Insert the secondary battery into the media bay compartment. Then push completely until the secondary battery locks into place. 4. Close the I/O device cover. 5. Slide the I/O device cover latch to the lock position to secure the I/O device cover in place.
-
Page 18: Removing The Secondary Battery
Getting Started Removing the Secondary Battery To remove the secondary battery, follow the steps below: 1. Slide the I/O device cover latch to the unlock position to release the I/O device cover. Then open the I/O device cover. 2. Press and hold the media bay latch release button. Then pull the secondary battery out to disengage it from its compartment. -
Page 19: Using The Secondary Storage
Getting Started Using the Secondary Storage Installing the Secondary Storage To install the secondary storage, follow the steps below: 1. Slide the I/O device cover latch to the unlock position to release the I/O device cover. 2. Open the I/O device cover . ©... - Page 20 Getting Started 3. Insert the secondary storage into the media bay compartment. Then push completely until the secondary storage locks into place. 4. Close the I/O device cover. 5. Slide the I/O device cover latch to the lock position to secure the I/O device cover in place.
-
Page 21: Removing The Secondary Storage
Getting Started Removing the Secondary Storage To remove the secondary storage, follow the steps below: 1. Slide the I/O device cover latch to the unlock position to release the I/O device cover. Then open the I/O device cover. 2. Press and hold the media bay latch release button. Then pull the secondary storage out to disengage it from its compartment. -
Page 22: Using The Optical Disc Drive (Odd)
Getting Started Using the Optical Disc Drive (ODD) Installing the Optical Disc Drive (ODD) To install the ODD, follow the steps below: 1. Slide the I/O device cover latch to the unlock position to release the I/O device cover. 2. Open the I/O device cover . EN-22... - Page 23 Getting Started 3. Insert the ODD into the media bay compartment. Then push completely until the ODD locks into place. 4. Close the I/O device cover. 5. Slide the I/O device cover latch to the lock position to secure the I/O device cover in place.
-
Page 24: Removing The Optical Disc Drive (Odd)
Getting Started Removing the Optical Disc Drive (ODD) To remove the ODD, follow the steps below: 1. Slide the I/O device cover latch to the unlock position to release the I/O device cover. Then open the I/O device cover. 2. Press and hold the media bay latch release button. Then pull the ODD out to disengage it from its compartment. -
Page 25: Using The Storage Drive
Getting Started Using the Storage Drive Installing the Storage Drive To install the storage drive, follow the steps below: 1. Slide the Storage Drive compartment cover latch to the unlock position to release the Storage Drive compartment cover. 2. Open the Storage Drive compartment cover . ©... - Page 26 Getting Started 3. Insert the storage drive into its compartment. Then push completely until the storage drive is fully seated. 4. Close the Storage Drive compartment cover. 5. Slide the Storage Drive compartment cover latch to the lock position to secure the Storage Drive compartment cover in place.
-
Page 27: Removing The Storage Drive
Getting Started Removing the Storage Drive To remove the storage drive, follow the steps below: 1. Slide the Storage Drive compartment cover latch to the unlock position to release the Storage Drive compartment cover. Then open the Storage Drive compartment cover. 2. -
Page 28: Connecting The Power
Getting Started Connecting the Power Your notebook can be powered up using the AC adapter or the Lithium-ion battery. Connecting the AC Adapter The AC adapter powers up your notebook and charges the battery. 1. Connect the AC adapter to the DC-in jack on your notebook. 2. -
Page 29: Configuring The Power Settings
Getting Started Configuring the Power Settings 1. Right-click the battery icon ( ) on the system tray. Then select Power Options. 2. Select Change plan settings to customize a power plan. 3. Change the desired sleep and display settings. Then select Save changes. ©... -
Page 30: Starting Your Notebook
Getting Started Starting Your Notebook Turning On Your Device 1. To open the display panel, unlock the chassis latch to open the notebook chassis. 2. Lift the cover lid to upright position. 3. Press the button until the Power LED lights up. Besides using the keyboard or touch pad for operations on your notebook, you can also use a mouse. - Page 31 Getting Started NOTE When closing the cover lid, make sure to press the chassis latch firmly until it locks into place. © 2019 Twinhead International Corp and/or its affiliates. All rights reserved.
-
Page 32: Using The Keyboard
Getting Started Using the Keyboard No. Keys Description These function keys are used to perform designated Function keys tasks. The tasks for each key may vary from one application to another. Press the [Fn] key in combination with other keys to [Fn] execute a command. -
Page 33: Using The Touch Pad
Getting Started NOTE This option is not available if the BIOS keyboard backlit timer setting is set to Off. [Fn] + Right Alt Toggles the touchpad on/off. Press to display the Start menu. This action is the same Windows key as tapping the Start icon. - Page 34 Getting Started touch pad twice or press the left button twice. Drag To drag an item or object, press and hold the left button then slide your finger on the touch pad to move the item or object. Scroll To scroll a page, press and hold the left button then slide your finger on the touch pad to scroll.
-
Page 35: Operating Your Notebook
Operating Your Notebook Operating Your Notebook This chapter will guide you through how to use your notebook. Using the Quick Menu To enter the Quick menu, tap the Quick Menu icon ( ) on the task bar. You can also access the Quick menu in the All apps list. Quick Menu Overview NOTE ... -
Page 36: Viewing The Version Information
Operating Your Notebook Viewing the Version Information In the Version section, you can view the Bios version, EC version, and Quick Menu version. Viewing the Battery Charge Cycles In the Battery Charge Cycles section, you can view the battery charge cycle and battery status. -
Page 37: Configuring The Programmable Button (P2)
Operating Your Notebook Configuring the Programmable Button (P2) On the P2 Button Setting section, you can assign the function for the P2 button. There are four available options: Touch Screen Mode: Toggles the touch screen mode. Launch Application: Shortcut key for launching the specific application. To assign the application, refer to the “Assigning an Application to the P1/P2 Button”... -
Page 38: Accessing The Mobility Center
Operating Your Notebook Accessing the Mobility Center Tap the Mobility Center tab to adjust or configure the brightness, volume level, mute function, battery status, screen orientation, external display, sync, and presentation settings. EN-38... -
Page 39: Configuring The Touchscreen Settings
Operating Your Notebook Configuring the Touchscreen Settings Your notebook is equipped with a touchscreen. Using the touchscreen, you can navigate the screen by using touch gestures (any input from your finger, a glove, or a stylus). CAUTION! Do not use any sharp objects, such as a pen or pencil, on the touchscreen to prevent scratches. -
Page 40: Configuring External Antenna Switching Mode
Operating Your Notebook Configuring External Antenna Switching Mode Select the respective external antenna tab to configure the setting. Tap the WIFI Antenna tab to enable/disable the device to automatically switch to the external WLAN antenna when it is affixed on a docking station. ... -
Page 41: Using The Camera
Operating Your Notebook Using the Camera Using the Camera application, you can use this notebook to take photos, videos, or panorama shots. Opening Camera App To access the Camera application, do one the following: a. Tap > Camera. b. In the Cortana search box, enter ‘camera’. -
Page 42: Taking Photos
Operating Your Notebook Taking Photos to capture a photo. Recording Videos to switch to Video mode. EN-42... - Page 43 Operating Your Notebook NOTE You can also toggle to switch to Video mode. to start recording a video. The recording time appears on the bottom of the screen. During the video recording, you can do the following: Tap to pause the recording.
-
Page 44: Shooting Panorama Photos
Operating Your Notebook Shooting Panorama Photos to switch to Panorama mode. NOTE You can also toggle to switch to Panorama mode. to start shooting the panoramic photo. Slowly move the device toward the direction as shown on the screen. EN-44... -
Page 45: Adjusting Brightness
Operating Your Notebook The shooting automatically ends when you reach the end of the shooting point as shown on the screen. To manually stop the shooting, tap Adjusting Brightness to display the brightness control slider. NOTE If the icon is not appear on the left panel, tap and set the Pro mode to On. -
Page 46: Setting Photo Timer
Operating Your Notebook Setting Photo Timer to toggle the desired time delay. : Self-timer is off : 2-second self-timer : 5-second self-timer : 10-second self-timer Configuring Camera Settings to enter the Settings menu. Select the desired menu option and setting. Menu Option Description Pro mode... -
Page 47: Viewing Photos/Videos
Operating Your Notebook Menu Option Description Photo quality Set the photo resolution. When the setting is set to On, the system will keep taking Time lapse photos until the Camera button is pressed. Video quality Set the video quality. Select 50 Hz or 60 Hz to reduce the flickering that may Flicker reduction occur when recording video under fluorescent light. -
Page 48: Making Connections
Making Connections Making Connections This chapter will guide you through installing peripheral devices to maximize the use of your notebook. Installing the Memory Card Your notebook supports different types of memory cards to provide faster data transfer. Supported types: Micro SDHC, Micro SDXC 1. -
Page 49: Installing Asim Card
Making Connections Installing a SIM Card You can use a SIM card for wireless internet access. NOTE Check the availability of service and data plan rates with your network service provider. Make sure to turn off the notebook before inserting the SIM card. 1. -
Page 50: Installing A Smart Card
Making Connections Installing a Smart Card Your notebook is equipped with a built-in smart card reader that allows you to make secure purchases, store security information, and provide identification and information using a smart card. 1. Slide the I/O device cover latch to the unlock position to release the I/O device cover. -
Page 51: Nstalling The Pc Cards
Making Connections Installing the PC Cards Your notebook supports PCMCIA Type II card or Express Card 54 , which can perform a variety of functions. NOTE Refer to the PC Card manual for specific instructions on the card installation. 1. -
Page 52: Connecting The Microphone/Headset
Making Connections 3. Close the I/O port cover. Then slide the I/O port cover latch to the lock position to secure the I/O port cover in place. Connecting the Microphone/Headset Your notebook is equipped with an audio combo jack that enables you to use the headset or microphone. -
Page 53: Connecting Usb Devices
Making Connections Connecting USB Devices You can connect your notebook to other USB devices, such as a mouse, keyboard, digital camera, printer, or an external storage drive. 1. Slide the I/O port cover latch to the unlock position to release the I/O port cover. -
Page 54: Connecting To External Displays
Making Connections NOTE A USB cable is not included in the package. It is sold separately or it may come with your USB device. Connecting to External Displays You can connect an additional display to your notebook by using the HDMI, DisplayPort, or VGA cable. - Page 55 Making Connections 3. Connect the other end of the cable to the external display. NOTE The HDMI cable, DisplayPort, or VGA cable is not included in the package. It is sold separately. © 2019 Twinhead International Corp and/or its affiliates. All rights reserved.
-
Page 56: Connecting To A Local Area Network (Lan)
Making Connections Connecting to a Local Area Network (LAN) You can connect your notebook to a local area network (LAN) using the Ethernet cable. 1. Slide the I/O port cover latch to the unlock position to release the I/O port cover. -
Page 57: Connecting To Wireless Connections
Making Connections Connecting to Wireless Connections You can connect your notebook to a Bluetooth, wireless local area network (WLAN), or WWAN. NOTE Do not disassemble the bumper. Otherwise, the antenna may be damaged, resulting in poor reception. Make sure to slide the RF Signal switch to enable the RF functions. Connecting to a Bluetooth Device Your notebook can connect and communicate with other Bluetooth-enabled devices. - Page 58 Making Connections 2. Tap the Bluetooth icon ( ) and select Add a Bluetooth Device. 3. Tap + and select the kind of device you want to add. EN-58...
- Page 59 Making Connections 4. Select the device you want to connect. Verify the pairing code on the screen of your device and pairing device match, then tap Connect to start pairing. NOTE If the device that you want to add does not appear on the screen, please check if the device is turned on and discoverable.
- Page 60 Making Connections NOTE Most Bluetooth-enabled devices need to be paired with your notebook. The PIN you enter on the notebook must be the same PIN to be entered on the other Bluetooth device. Once a partnership has been created, connecting to that device again will no longer require entering the PIN.
- Page 61 Making Connections Connecting to a Wireless Local Area Network Your notebook comes with a WLAN module. A wireless network can be added either when the network is detected or by manually entering the settings information. To connect, follow the steps below: 1.
- Page 62 Making Connections 3. Tap Connect. Some networks require a network security key or a password. Check the Connect automatically box to automatically connect to this network when it is available. 4. Enter the network security key. 5. Tap Next. After the connection is established, you can see the wireless network icon ( ) in the Notification area.
- Page 63 Making Connections Connecting to a Wireless Wide Area Network (WWAN) The WWAN function allows your notebook to connect to the Internet using mobile or cellular data networks. To connect, follow the steps below: 1. Insert a valid SIM card into the SIM card slot (refer to page 49). 2.
- Page 64 Making Connections 3. After the connection is established, you can see the cellular network icon ( in the Notification area. EN-64...
-
Page 65: Using The Bios Setup Utility
Del button on the keyboard to enter the setup utility. Selecting the Boot Device Restart your notebook and press the F12 button on the keyboard when the DURABOOK logo appears. Then select the boot device. © 2019 Twinhead International Corp and/or its affiliates. All rights reserved. - Page 66 Using the BIOS Setup Utility Navigating and Entering Information in BIOS Use the following keys to move between fields and to enter information: Keyboard Description Select screen Select item Enter Select + / - Change Opt. General Help Previous Values Optimized Defaults Save &...
-
Page 67: Main Menu
Using the BIOS Setup Utility Main Menu The Main menu displays the device’s system overview information, including the system date and time. Item Description BIOS Information Displays the BIOS version detected during boot up. Displays the CPU type and speed, total memory, mainboard version, UEFI Firmware version, processor type, System Information ME FW version, ME Firmware SKU, serial number, and... -
Page 68: Advanced Menu
Using the BIOS Setup Utility Advanced Menu The Advanced menu allows you to configure specific system settings. Item Description Configures the CPU parameters. For details, refer to CPU Configurations CPU Configurations on page 69. Assigns the function for the P1 button. - Stealth mode button (by default). - Page 69 Using the BIOS Setup Utility Item Description LAN from S3/S4, wake on wireless LAN from S3/S4, and USB3.0 power share. For details, refer to Power Configurations on page 72. TPM Configurations Configures Trusted Computing settings. Battery Calibration Performs the battery calibration. Touch Screen Mode Selects the touchscreen mode.
- Page 70 Using the BIOS Setup Utility Device Configurations Select this option to configure the device settings. Item State Description Enabled Turns on the function. USB PORT 1 Disabled Turns off the function. Enabled Turns on the function. USB PORT 2 Disabled Turns off the function.
- Page 71 Using the BIOS Setup Utility Item State Description reader Disabled Turns off the function. Enabled Turns on the function. RFID reader Disabled Turns off the function. Enabled Turns on the function. Front Camera Disabled Turns off the function. Enabled Turns on the function. Wireless LAN Disabled Turns off the function.
- Page 72 Using the BIOS Setup Utility Antenna Switching Configurations Select this option to configure the external WLAN, GPS, or WWAN antenna settings. Item State Description Switches to the external WLAN antenna when it Switch to Enabled is affixed on a docking station. external WLAN antenna Disabled...
- Page 73 Using the BIOS Setup Utility Touch Screen Mode Selection Select this option to configure the touchscreen mode. Item Description Select this for fingertip operation. When raindrops are falling on Finger/Water the screen should be rejected as input. This mode is set as the mode default operation mode.
-
Page 74: Boot Menu
Using the BIOS Setup Utility Boot Menu The Boot menu allows you to configure the boot settings and boot sequence. Item Description Bootup NumLock Selects the keyboard NumLock state. State Launch CSM Enables/Disables CSM support. Launch Network PXE Selects the LAN PXE boot mode. OpRom Option ROM Sets the display mode for Option ROM messages. -
Page 75: Security Menu
Using the BIOS Setup Utility Security Menu The Security menu allows you to set the Administrator password and configure the Secure Boot settings. Item Description Administrator Sets the administrator password. Password Secure Boot Configures the Secure Boot settings. © 2019 Twinhead International Corp and/or its affiliates. All rights reserved. -
Page 76: Save & Exit Menu
Using the BIOS Setup Utility Save & Exit Menu The Save & Exit menu allows you to save/discard the changes and restore the default values for all setup options before leaving the BIOS Setup Menu. Item Description Save Changes and Resets the system after saving any changes. -
Page 77: Maintaining And Caring For Your Notebook
Maintaining and Caring for Your Notebook Maintaining and Caring for Your Notebook Taking care of your notebook will reduce the risk of damage to your device and ensure that it operates properly. To help you maintain the quality and function of your notebook, this chapter provides guidelines on how to protect, store, clean, and travel with your device. - Page 78 Maintaining and Caring for Your Notebook Do not cover or block any ventilation openings on the notebook. For example, do not place the notebook on a bed, sofa, rug, or other similar surface. Overheating may occur, which could result in damage to your notebook.
-
Page 79: Cleaning Your Notebook
Maintaining and Caring for Your Notebook Battery Pack Guidelines Do not expose the battery to temperatures below 0°C (32°F) or above 46°C (115°F). This may adversely affect the battery pack. While the battery may not provide 100% capacity at temperature extremes, its capacity is restored when the battery temperature returns to a normal range, around 20°°C (68°F). -
Page 80: Traveling With Your Notebook
Maintaining and Caring for Your Notebook recommendations please contact your support representative. Cleaning the Display Use a soft, dry cloth. In some cases, you can use a small amount of water to remove streaks or smears. For difficult display cleaning tasks, use a 50/50 mixture of isopropyl alcohol and water. -
Page 81: Troubleshooting
Troubleshooting Troubleshooting This chapter advises you on what actions to take when solving common computer problems that may be caused by issues with hardware or software. Preliminary Checklist Here are the initial steps you should follow before taking further action when encountering any problem: 1. - Page 82 Troubleshooting Allow the system to remain idle for one hour with the AC adapter connected to the device. The Battery Power LED lights up when the battery starts charging. If the battery still fails to start charging after an hour, remove the battery, wait several seconds, and then install it again.
-
Page 83: Display Problems
Troubleshooting Bluetooth Wireless Transmission Problems I cannot connect to another device with Bluetooth wireless technology. Ensure that you have activated the Bluetooth feature on both devices. Make sure that the distance between the two devices is within the acceptable limit and that there are no walls or other obstructions between the devices. -
Page 84: Hard Disk Problems
Troubleshooting Hard Disk Problems The hard disk will not spin up so the device can’t boot up. This occurs if the unit is exposed to extremely low temperatures. This is not a hardware failure associated with the hard disk. The integrated hard disk drive heater will warm the drive to a safe operating temperature. - Page 85 Troubleshooting 3. Under Reset this PC, tap Get started. 4. Select one of the two options depending on your needs. - Keep my files (requires around 3 to 4hr) - Remove everything (requires around 5 to 6hr) © 2019 Twinhead International Corp and/or its affiliates. All rights reserved.
- Page 86 Troubleshooting 5. You are informed of the programs that will be removed. Tap Next to proceed. 6. Tap Reset to start resetting. NOTE If you see a message as shown below that means WinRE (Windows Reset) is disabled. EN-86...
- Page 87 Troubleshooting 7. To enable resetting Windows, follow the steps below: a. Hover mouse over Start menu. b. Right click and select Command Prompt (Admin) from the pop-up menu. c. Enter the following command: Reagentc /enable d. Press Enter. Wait until you see the “Operation Successful” status on the screen.
-
Page 88: Other Problems
Troubleshooting Other Problems The device won’t turn on. Make sure a fully charged battery is properly installed. Connect external power to charge the battery if it is not charged. If you are using the AC adapter, check the electrical outlet you are using to ... -
Page 89: Appendix
Information is subject to change without prior notice. Specifications Z14I Model Name MIL-STD 810G certified (Drop, Shock, Vibration, Rain,... - Page 90 Appendix ® GRAPHICS Intel UHD Graphics 620 2 slots 8GB up to 32GB (2400MHz DDR4) MEMORY 500GB HDD Optional 1TB HDD Optional 256GB/512GB/1TB SSD STORAGE Optional OPAL 2.0 SSD or FIPS 140-2 Optional 2nd storage (SSD) 14.0”...
- Page 91 Appendix USB 3.1 (type A) x 2 USB 3.1 (type C) x 1 USB 2.0 (type A) x 1 Audio in/out (combo jack) x 1 microSD card (microSDXC) x 1 10/100/1000 Ethernet (RJ-45) x 2 ...
-
Page 92: Regulatory Statement
Appendix Regulatory Statement Federal Communications Commission Statement This equipment has been tested and found to comply with the limits for a Class B digital device, pursuant to Part 15 of the FCC Rules. These limits are designed to provide reasonable protection against harmful interference in a residential installation. -
Page 93: Battery Disposal
Appendix Battery Disposal THIS PRODUCT CONTAINS A LITHIUM-ION OR NICKEL-METAL HYDRIDE BATTERY. IT MUST BE DISPOSED OF PROPERLY. CONTACT LOCAL ENVIRONMENTAL AGENCIES FOR INFORMATION ON RECYCLING AND DISPOSAL PLANS IN YOUR AREA. WARNING EXPLOSION HAZARD Class I, Division 2, Groups A, B, C, D, T Code T5 Class I, Zone 2, Groups IIC, T5 WARNING - EXPLOSION HAZARD - SUBSTITUTION OF COMPONENTS MAY IMPAIR SUITABILITY FOR CLASS I, DIVISION 2. - Page 94 Appendix CAUTION THIS APPLIANCE CONTAINS A LASER SYSTEM AND IS CLASSIFIED AS A "CLASS 1 LASER PRODUCT.” TO USE THIS MODEL PROPERLY, READ THE INSTRUCTION MANUAL CAREFULLY AND KEEP THIS MANUAL FOR FUTURE REFERENCE. IN CASE OF ANY TROUBLE WITH THIS MODEL, PLEASE CONTACT YOUR NEAREST "AUTHORIZED SERVICE STATION.”...
- Page 95 Appendix To reduce potential safety issues, only the AC adapter provided with the product, a replacement AC adapter provided by Twinhead, or an AC adapter purchased as an accessory from Twinhead should be used with the product. AVERTISSEMENT CONCERNANT L’ADAPTATEUR LE ORDINATEUR PORTABLE DOIT Ê...
-
Page 96: Safety Instructions
Appendix – L’exposition de la pile à une pression atmosphérique extrêmement basse qui peut provoquer une explosion ou la fuite d’un liquide ou d’un gaz inflammable. CAUTION FOR RJ-45 The RJ-45 jack is not used for telephone line connections. AVERTISSEMENT POUR RJ-45 N’utilisez pas la prise RJ-45 pour une connexion à... - Page 97 Appendix Do not attempt to disassemble or repair this device. Doing so will void the warranty. Instructions de sé curité Ces instructions de sécurité doivent toujours être suivies pour assurer le fonctionnement sûr de l’appareil lors de sa manipulation. ...
- Page 98 Appendix Twinhead International Corp. 11F, No.550, Ruiguang Rd., Neihu, Taipei 11492, Taiwan, R.O.C. EN-98...
Need help?
Do you have a question about the Z14I and is the answer not in the manual?
Questions and answers