Table of Contents
Advertisement
Quick Links
Advertisement
Table of Contents

Subscribe to Our Youtube Channel
Related Manuals for Durabook SA14S


Summary of Contents for Durabook SA14S
- Page 2 Table of Contents ....................4 OPYRIGHT ................4 EGULATORY TATEMENT ¡ ¢ ¡ £ ¤ ¥ ¦ § ¨ ¨ © ¤ § ¦ § ¨ ¨ § ¤ ¡ ¨ ¡ ¡ ¥ ¤ £ ¤ § § ¦ §...
- Page 3 PC C ................. 29 SING THE ARDS ¡ £ ¤ ¦ ¦ ¤ £ ¢ ..............30 SING THE PTICAL RIVE ¥ ¤ ¤ ..............31 SING THE INGERPRINT CANNER CONNECTING TO WIRELESS CONNECTIONS ......37 ..........37 ONNECTING TO A IRELESS OCAL ETWORK...
- Page 4 Copyright © Copyright 2016. All rights reserved. No part of this user manual may be transmitted, stored in a retrieval system, or translated into any language or computer language, in any form or by any means, without the prior written permission of the manufacturer. Information is subject to change without prior notice.
- Page 5 RF exposure warning This equipment must be installed and operated in accordance with provided instructions and must not be co-located or operating in conjunction with any other antenna or transmitter. End-users and installers must be provided with antenna installation instructions and transmitter operating conditions for satisfying RF exposure compliance.
- Page 6 Ce périphérique a été évalué et démontré conforme aux limites SAR (Specific Absorption Rate – Taux d'absorption spécifique) d'IC lorsqu'il est installé dans des produits hôtes particuliers qui fonctionnent dans des conditions d'exposition à des appareils portables. Battery Disposal THIS PRODUCT CONTAINS A LITHIUM-ION OR NICKEL-METAL HYDRIDE BATTERY.
- Page 7 CAUTION FOR ADAPTER THE SA14ST RUGGED NOTEBOOK IS FOR USE WITH DEDICATED AC ADAPTER (DC +19V, 65W for the unit without MXM / DC +19V, 90W for the unit with MXM). BATTERY SAFETY DANGER OF EXPLOSION IF BATTERY IS INCORRECTLY REPLACED. REPLACE ONLY WITH THE SAME OR EQUIVALENT TYPE RECOMMENDED BY THE MANUFACTURER.
-
Page 8: Before You Start
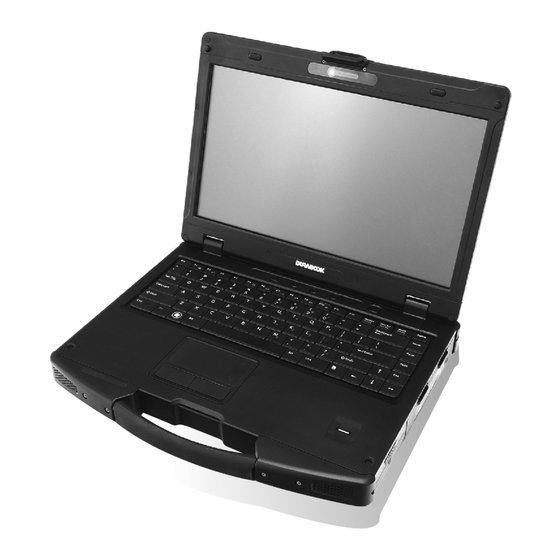
Before You Start Congratulations on your purchase of this notebook. This rugged notebook is portable and provides users with maximum mobile computing experience in a wide range of working environments. Before you begin using your notebook, read this chapter to familiarize yourself with the main components installed in the system. - Page 9 Features • Supports Intel 6 generation Skylake-U i-Core processor ® • Operating system supports Microsoft Windows 7 64-bit (Driver and APP ready) and Windows 10 64-bit • 14” TFT LCD Display (Maximum resolution is 1366 x 768) 14” TFT LCD (1366 x 768) with anti-glare coating glass 14”...
- Page 10 Components Front View Item Description LCD cover latch Lock the notebook chassis. 2.0M CCD camera Use to take picture, record videos, or video conference. Display screen Allow users to use the Resistive Single Touch. Stealth mode/night Press the button to enter stealth mode or optional vision button night vision mode.
- Page 11 Item Description Programmable button Press to enter the chosen program. (user definition) RF button Press to activate wireless network (WLAN and WWAN) and Bluetooth communications. Power button Press to turn your notebook on or off. Waterproof Keyboard Press the keys to input information. Touch pad Use to point, select, drag, or scroll objects on the screen.
- Page 12 Back View Item Description Docking connector Connect the notebook to a docking station. RF Pass-thru Use for the external antenna of WWAN or GPS. Connector (x2) Battery latch Lock the battery in place. HDD latch release Press and hold the button to slide the HDD latch to button the unlock position.
- Page 13 Left View Item Description ODD cover latch Lock the optical disk drive cover in place. Eject button Push to open the tray. Pin Hole Eject If the Eject button fails to work properly, insert a paper clip into this hole to open the tray. CAUTION: Turn off the notebook before performing manual ejection.
- Page 14 Right View Item Description Battery compartment Contain the battery. Battery latch Slide to the left and hold it in place to remove the battery. PC Card slot Use to insert Type II PC Card. Card reader Use to insert memory cards to transfer pictures, music, and data between your notebook and flash compatible devices.
- Page 15 Rear View Item Description Kensington lock slot Connect to a Kensington-compatible notebook security lock. HDMI output port Connect an HDMI device such as an external HDMI LCD TV. VGA port Connect a peripheral device, such as an external monitor/projector. RS-232 port Connect a serial peripheral devices.
- Page 16 Status Indicators The status indicators in the bottom left corner of the notebook light up when a particular function of the notebook is active. Each indicator is marked with a symbol. Icon Item Description The LED always lights on (blue) when the system is Power running.
-
Page 17: Getting Started
€ ‚ Getting Started This chapter will guide you on how to use your notebook. Powering Up Your Notebook Your notebook can be powered up using the AC adapter or the Lithium-ion battery. Connecting the AC Adapter The AC adapter powers up your notebook and charges the battery. 1. -
Page 18: Installing The Battery
€ ‚ Installing the Battery To install the battery, follow the steps below: 1. Insert the battery to the battery compartment. 2. Push completely until the battery locks into place. 3. Slide the battery latch to the lock position to secure the battery. - Page 19 € ‚ Checking the Battery Level It is important that you monitor the battery status regularly to ensure you do not run out of power at a critical moment. To check the remaining battery power, double-click the battery icon ( ) in the system tray.
- Page 20 € ‚ Removing the Battery To remove the battery, follow the steps below: 1. Slide the battery latch to the unlock position. 2. Slide the battery latch to the right (as shown in the illustration) and hold it in place. Then pull the battery out to disengage it from its compartment.
-
Page 21: Starting Your Notebook
€ ‚ Starting Your Notebook Turning On Your Notebook 1. To open the display panel, unlock the chassis latch to open the notebook chassis. 2. Lift the cover lid up to upright position. 3. Press the button until the Power LED lights up ƒ... -
Page 22: Using The Keyboard
€ ‚ Using the Keyboard No. Keys Description These function keys are used to perform designated tasks. Function keys The tasks for each key may vary from one application to another. Press the [Fn] key in combination with other keys to [Fn] execute a command. -
Page 23: Using The Touch Pad
€ ‚ Application Press to display an application shortcut menu. This action is the same as right-clicking a mouse button. Using the Touch Pad The touch pad is a cursor-pointing device that provides all the features of a two- button mouse. -
Page 24: Using The Quick Menu
€ ‚ Using the Quick Menu Press the button to enter the Quick menu:... - Page 25 € ‚ Item Description Version View the Bios version, EC version, and Quick Menu version. Battery Charge View the battery charge cycle and battery status. Cycles Bluetooth Click the tab to enable/disable the Bluetooth function. WIFI Click the tab to enable/disable the Wi-Fi (WLAN) function. Mobility Click the tab to adjust or configure the brightness, volume level, Center...
- Page 26 € ‚ Item Description There are three available options: • Stealth mode: Turn off the LCD backlight, LEDs (LED indicators and keypad backlight), speakers, camera flash, and RF devices. • Night vision mode: Adjust the brightness of the LCD under 1.7 nits and turn off the LEDs (LED indicators and keypad backlight) and camera flash.
- Page 27 € ‚ Using the Memory Cards Your notebook supports different types of memory cards to provide faster data transfer. Supported types are as follows: • SD card • SDXC card • Mini-SD card (with adapter) Inserting a Memory Card 1.
-
Page 28: Using The Smart Card
€ ‚ Using the Smart Card Your notebook is equipped with a built-in smart card reader that allows you to make secure purchases, store security information, and provide identification and information using a smart card. Inserting a Smart Card 1. -
Page 29: Ards
Inserting a PC Card 1. Pull to open the I/O port cover. 2. Insert a PC card firmly into the PC card slot until it clicks into the connector. NOTE The SA14S semi-rugged notebook only supports 32-bit PCMCIA card. •... -
Page 30: Using The Optical Disk Drive
€ ‚ Using the Optical Disk Drive You can use the optical disk drive (ODD) to play or record DVD or CD disc. Placing a Disc 1. Slide latch to the right to open the ODD cover. 2. Eject button to eject the tray. 3. -
Page 31: Using The Fingerprint Scanner
€ ‚ Using the Fingerprint Scanner Windows 10 For Windows 10 OS, it supports application that enables you to „ … † ‡ ˆ ‰ ‘ ’ “ “ ˆ protect your notebook from unauthorized access using the fingerprint or facial recognition. - Page 32 € ‚ Windows 7 For Windows 7 OS, it supports application that enables you to protect ” … ˆ • – — ’ your notebook from unauthorized access, hide the encrypted private files, set the auto-login to your favorite websites, or launch an application by simply swiping your finger on the fingerprint scanner.
- Page 33 € ‚ 4. Create a Windows password and click Next to continue. You will be prompted to enter this password every time you log on. 5. Click one box to enroll your fingerprint and click Next to continue.
- Page 34 € ‚ 6. Swipe your selected finger on the fingerprint scanner for three times. 7. After you have completed the enrollment, a “Succeeded” message appears on the screen.
- Page 35 € ‚ 8. Repeat step 5~7 to enroll another fingerprint or click Next to continue. 9. The Secure Drive configuration may take a while to complete.
- Page 36 € ‚ Click Finish to complete the initial setup of BioExcess. To directly launch BioExcess application, click Launch Control Center checkbox. NOTE • You can also launch the BioExcess application by clicking Start > BioExcess. Click the respective option and configure the necessary settings.
-
Page 37: Connecting To A Wireless Local Area Network
˜ € € ™ € ˜ € € ™ € Connecting to Wireless Connections You can connect your notebook to a wireless local area network, WWAN, or Bluetooth. Before using a wireless built-in device, you need to turn the respective built-in wireless functions on. - Page 38 ˜ ˜ € € ™ € € € ™ € 6. Enter the network security key. 7. Click Next. After the connection is established, you can see the wireless icon ) in the Notification area. NOTE • Wi-Fi access requires service from a wireless service provider. Contact your service provider for more information.
-
Page 39: Connecting To A Bluetooth Device
˜ € € ™ € ˜ € € ™ € Connecting to a Bluetooth Device Your notebook can connect and communicate with other Bluetooth-enabled devices. To add a device, follow the steps below: 1. Press the button to open the Quick menu. 2. - Page 40 ˜ ˜ € € ™ € € € ™ € 6. Select the device you want to connect, then click Pair to start pairing. 7. Verify the pairing code on the screen of your device and pairing device match. If the passcodes match, click Yes to complete the pairing connection.
-
Page 41: Wide Area Network (Wwan)
˜ € € ™ € ˜ € € ™ € Connecting to a Wireless Wide Area Network (WWAN) With WWAN function, it allows your notebook to connect to the Internet using mobile or cellular data networks. To enable the function, follow the steps below: 1. -
Page 42: Bios Setup Menu
€ Using the BIOS Setup Utility Your notebook has a BIOS setup utility which allows you to configure important system settings, including settings for various optional functions of the notebook. This chapter explains how to use the BIOS setup utility. BIOS Setup Menu The BIOS Setup Utility allows you to configure your notebook basic settings. -
Page 43: Navigating And Entering Information In Bios
€ Navigating and Entering Information in BIOS Use the following keys to move between fields and to enter information: Keyboard Description Selects screen. Moves up/down to select items. Enter Confirms the selection and enters the selected menu screen. + / - Changes an option for the selected items. -
Page 44: Main Menu
€ Main Menu The Main menu displays the system overview information about BIOS version, system information, and total memory size. You can also set the system date and time. Advanced Menu The Advanced menu allows you to specify CPU parameters, configure the keyboard backlight timer, device state, and Trusted Computing settings, set the device to wake up on LAN and resume the operation when the AC power adapter is connected, and calibrate fan and battery. -
Page 45: Boot Menu
€ Boot Menu The Boot menu allows you to configure the boot settings and boot sequence. Security Menu The Security menu allows you to set or change the Administrator and User passwords, and configure Secure Boot settings. -
Page 46: Menu
€ Save & Exit Menu The Save & Exit menu allows you to save or discard the changes, and restore the default values for all setup options before leaving the BIOS Setup Menu.
Need help?
Do you have a question about the SA14S and is the answer not in the manual?
Questions and answers