Table of Contents
Advertisement
Advertisement
Table of Contents

Related Manuals for Durabook S14I


Summary of Contents for Durabook S14I
- Page 1 EN-1...
-
Page 2: Table Of Contents
Table of Contents ..................5 EFORE TART ..................5 ACKAGE ONTENTS ..................6 RODUCT VERVIEW Front View ....................... 6 Back View ........................ 7 Right View ....................... 8 Left View ........................9 Rear View ......................10 ..................11 TATUS NDICATORS GETTING STARTED ..............12 ................ - Page 3 Setting Photo Timer ....................29 Configuring Camera Settings ................... 29 Viewing Photos/Videos .................... 30 MAKING CONNECTIONS ............31 ............... 31 NSTALLING THE EMORY SIM C ................32 NSTALLING THE ................. 35 NSTALLING THE MART ..............36 SING THE PTICAL RIVE Placing a Disc ......................
- Page 4 Declaration of Conformity ..................76 RF exposure warning ....................77 Battery Disposal ..................... 77 WARNING EXPLOSION HAZARD ................77 CLASS 1 LASER PRODUCT ..................78 ................. 80 AFETY NSTRUCTIONS EN-4...
-
Page 5: Before You Start
Before You Start Before You Start Congratulations on your purchase of this notebook. This semi-rugged notebook is portable and provides users with maximum mobile computing experience in a wide range of working environments. Before you begin using your notebook, read this chapter to familiarize yourself with the main components installed in the system. -
Page 6: Product Overview
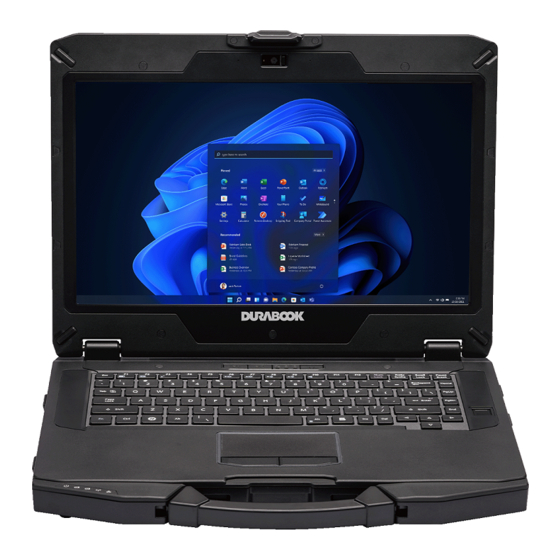
Before You Start Product Overview Front View Item Description Front camera Use to take pictures, record videos, or video conference. Camera cover Protects the camera. Microphones Records the surrounding sound. Display screen Optional capacitive touch panel. Programmable Press to enter the chosen program (user definition) buttons (P1/P2) Status indicators Indicates the corresponding function status. -
Page 7: Back View
Before You Start Item Description Fingerprint scanner Scans fingerprints for biometric identification. Touch pad Use to point, select, drag, or scroll objects on the screen. Touch pad button Press to select objects or display a shortcut menu. Back View Item Description CTO door Remove the door to access the SIM card slot. -
Page 8: Right View
Before You Start Item Description Battery latch release Slide and hold the button to disengage the button battery connector. Speakers Emits sound. Right View Item Description HDD compartment Contains the hard disk drive. Audio Combo jack Connects to headphones, external speakers, or microphone. -
Page 9: Left View
Before You Start Left View Item Description Media bay Varies depending on SKU: Optical disk drive Second battery pack Express Card 54 slot x 1 and PCMCIA Type II x 1; or PCMCIA Type II x 2 ODD LED indicator A blinking ODD LED indicates ODD activity. -
Page 10: Rear View
Before You Start Rear View Item Description HDMI port or optional HDMI port: Connects to an HDMI device such as Mini DP port x2 an external HDMI LCD TV. Mini DP port: Connects to an external display. USB 2.0 port Connects to USB 2.0 peripheral devices. -
Page 11: Status Indicators
Before You Start Status Indicators The status indicators light up when a particular function of the notebook is active. Each indicator is marked with a symbol. Icon Item Description The LED light stays on (blue) when the system is running. Power When the system is in sleep mode, the LED blinks. -
Page 12: Getting Started
Getting Started Getting Started This chapter will help you get started using the device. CAUTION! Before any internal installation procedures are carried out on the system, make sure the system is turned off and cooled down for 5 minutes. Failing to turn off the system before opening it can cause permanent damage to the system and serious or fatal injury to the user. -
Page 13: Charging The Battery
Getting Started Charging the Battery The Li-Ion battery is not fully-charged upon purchase. To charge the battery, follow the steps below: 1. Install the battery into your notebook. See procedures above. 2. Connect the AC adapter to the DC-in jack on your notebook. 3. -
Page 14: When To Replace The Battery Pack
Getting Started When to replace the Battery Pack The battery performance gradually decreases over time and usage. We recommend you replace your battery pack after 18 to 24 months of usage. Removing the Battery To remove the battery, follow the steps below: 1. -
Page 15: Connecting The Power
Getting Started Connecting the Power Your notebook can be powered up using the AC adapter or the Lithium-ion battery. Connecting the AC Adapter The AC adapter powers up your notebook and charges the battery. 1. Connect the AC adapter to the DC-in jack on your notebook. 2. -
Page 16: Starting Your Notebook
Getting Started Starting Your Notebook Turning On Your Device 1. To open the display panel, unlock the chassis latch to open the notebook chassis. 2. Lift the cover lid to upright position. 3. Press the button until the Power LED lights up. Besides using the keyboard or touch pad for operations on your notebook, you can also use a mouse. -
Page 17: Using The Keyboard
Getting Started Using the Keyboard No. Keys Description These function keys are used to perform designated tasks. Function keys The tasks for each key may vary from one application to another. Press the [Fn] key in combination with other keys to [Fn] execute a command. -
Page 18: Using The Touch Pad
Getting Started Press the NumLk key to activate the numeric keypad. Numeric Press the keys on the numeric keypad to enter numbers or keypad operands as you would on a calculator. Application Press to display an application shortcut menu. This action is the same as right-clicking a mouse button. -
Page 19: Operating Your Notebook
Operating Your Notebook Operating Your Notebook This chapter will guide you through how to use your notebook. Using the Quick Menu To enter the Quick menu, tap the Quick Menu icon ( ) on the task bar. You can also access the Quick menu in the All apps list. Quick Menu Overview NOTE ... -
Page 20: Viewing The Version Information
Operating Your Notebook Viewing the Version Information In the Version section, you can view the Bios version, EC version, and Quick Menu version. Viewing the Battery Charge Cycles In the Battery Charge Cycles section, you can view the battery charge cycle and battery status. -
Page 21: Configuring The Programmable Button (P2)
Operating Your Notebook Configuring the Programmable Button (P2) On the P2 Button Setting section, you can assign the function for the P2 button. There are four available options: Touch Screen Mode: Toggles the touch screen mode. Launch Application: Shortcut key for launching the specific application. To assign the application, refer to the “Assigning an Application to the P1/P2 Button”... -
Page 22: Accessing The Mobility Center
Operating Your Notebook Accessing the Mobility Center Tap the Mobility Center tab to adjust or configure the brightness, volume level, mute function, battery status, screen orientation, external display, sync, and presentation settings. EN-22... -
Page 23: Configuring The Touchscreen Settings
Operating Your Notebook Configuring the Touchscreen Settings Your notebook is equipped with a touchscreen. Using the touchscreen, you can navigate the screen by using touch gestures (any input from your finger, a glove, or a stylus). CAUTION! Do not use any sharp objects, such as a pen or pencil, on the touchscreen to prevent scratches. -
Page 24: Configuring External Antenna Switching Mode
Operating Your Notebook Configuring External Antenna Switching Mode Select the respective external antenna tab to configure the setting. Tap the WIFI Antenna tab to enable/disable the device to automatically switch to the external WLAN antenna when it is affixed on a docking station. ... -
Page 25: Using The Camera
Operating Your Notebook Using the Camera Using the Camera application, you can use this notebook to take photos or videos. Opening Camera App To access the Camera application, do one the following: a. Tap > Camera. b. In the Cortana search box, enter ‘camera’. -
Page 26: Taking Photos
Operating Your Notebook Taking Photos to capture a photo. EN-26... -
Page 27: Recording Videos
Operating Your Notebook Recording Videos to switch to Video mode. to start recording a video. The recording time appears on the bottom of the screen. To stop recording the video, tap EN-27... -
Page 28: Adjusting Brightness
Operating Your Notebook Adjusting Brightness › to switch to Pro mode. to display the brightness control slider. Do the following: Tap and drag upwards to brighten your photo or video. Tap and drag downwards to darken your photo or video. EN-28... -
Page 29: Setting Photo Timer
Operating Your Notebook Setting Photo Timer to toggle the desired time delay. : Self-timer is off : 2-second self-timer : 5-second self-timer : 10-second self-timer Configuring Camera Settings to enter the Settings menu. Select the desired menu option and setting. Menu Option Description When I press... -
Page 30: Viewing Photos/Videos
Operating Your Notebook take photos continuously. Start capturing video – Tap and hold the Camera button to create a video. Aspect ratio Select the aspect ratio of the photos. Framing grid Show or hide the framing grid lines. When the setting is set to On, the system will keep taking Time lapse photos until the Camera button is pressed. -
Page 31: Making Connections
Making Connections Making Connections This chapter will guide you through installing peripheral devices to maximize the use of your notebook. Installing the Memory Card Your notebook supports different types of memory cards to provide faster data transfer. Supported types: Micro SDHC, Micro SDXC 1. -
Page 32: Installing The Sim Card
Making Connections Installing a SIM Card You can use a SIM card for wireless internet access. NOTE Check the availability of service and data plan rates with your network service provider. Make sure to turn off the notebook before inserting the SIM card. 1. - Page 33 Making Connections Without LTE module: Proceed to Step With LTE module: Remove the screw securing the LTE module. Then carefully pull to disconnect the LTE module from the mainboard connector. 3. Push the SIM card slot forward to release it from the latch. EN-33...
- Page 34 Making Connections 4. Lift the SIM card slot upwards. 5. Slide a SIM card into the SIM card slot. 6. Gently press down the SIM card slot. EN-34...
-
Page 35: Installing The Smart Card
Making Connections 7. Push the SIM card slot as indicated with the arrow below until it locks into place. 8. Replace the CTO door and secure it using the screws. Installing a Smart Card Your notebook is equipped with a built-in smart card reader that allows you to make secure purchases, store security information, and provide identification and information using a smart card. -
Page 36: Using The Optical Disk Drive
Making Connections Using the Optical Disk Drive You can use the optical disk drive (ODD) to play or record DVDs or CDs. Placing a Disc 1. Pull to open the media bay cover. 2. Press the Eject button to eject the tray. 3. -
Page 37: Connecting The Microphone/Headset
Making Connections Be sure that the notebook is turned off before performing the manual ejection. Connecting the Microphone/Headset Your notebook is equipped with an audio combo jack that enables you to use the headset or microphone. To connect to a headset, open the I/O cover and plug the stereo headphone cable into the audio combo jack of your device. -
Page 38: Connecting Usb Devices
Making Connections Connecting USB Devices You can connect your notebook to other USB devices, such as a mouse, keyboard, digital camera, printer, or an external hard disk drive. 1. Pull to open the I/O port cover. 2. Connect one end of the USB cable to the USB port of your device. 3. -
Page 39: Connecting To External Displays
Making Connections Connecting to External Displays You can connect an additional display to your notebook by using the mini DisplayPort or VGA cable. 1. Pull to open the I/O port cover. 2. Connect one end of the mini DisplayPort or VGA cable to the Mini DisplayPort or VGA port of your device. -
Page 40: Connecting To A Local Area Network (Lan)
Making Connections Connecting to a Local Area Network (LAN) You can connect your notebook to a local area network (LAN) using the Ethernet cable. 1. Pull to open the I/O port cover. 2. Connect one end of the Ethernet cable to the RJ-45 port of your notebook. 3. -
Page 41: Replacing The Hard Disk Drive (Hdd)
Making Connections Replacing the Hard Disk Drive (HDD) To replace the HDD, follow the steps below: 1. Slide the HDD latch release button upwards and hold it in place. Then pull the HDD out to disengage it from its compartment. 2. -
Page 42: Connecting To Wireless Connections
Making Connections Connecting to Wireless Connections You can connect your notebook to a Bluetooth, wireless local area network (WLAN), or WWAN. NOTE Do not disassemble the bumper. Otherwise, the antenna may be damaged, resulting in poor reception. Make sure to slide the RF Signal switch to enable the RF functions. Connecting to a Bluetooth Device Your notebook can connect and communicate with other Bluetooth-enabled devices. - Page 43 Making Connections 2. Tap the arrow icon ( ) on the system tray to display hidden icons. 3. Tap the Bluetooth icon ( ) and select Add a Bluetooth Device. 4. Tap + and select the kind of device you want to add. EN-43...
- Page 44 Making Connections 5. Select the device you want to connect. Verify the pairing code on the screen of your device and pairing device match, then tap Connect to start pairing. NOTE If the device that you want to add does not appear on the screen, please check if the device is turned on and discoverable.
- Page 45 Making Connections NOTE Most Bluetooth-enabled devices need to be paired with your notebook. The PIN you enter on the notebook must be the same PIN to be entered on the other Bluetooth device. Once a partnership has been created, connecting to that device again will no longer require entering the PIN.
- Page 46 Making Connections Connecting to a Wireless Local Area Network Your notebook comes with a WLAN module. A wireless network can be added either when the network is detected or by manually entering the settings information. To connect, follow the steps below: 1.
- Page 47 Making Connections 3. Tap Connect. Some networks require a network security key or a password. Check the Connect automatically box to automatically connect to this network when it is available. 4. Enter the network security key. 5. Tap Next. After the connection is established, you can see the wireless icon ) in the Notification area.
- Page 48 Making Connections Connecting to a Wireless Wide Area Network (WWAN) The WWAN function allows your notebook to connect to the Internet using mobile or cellular data networks. To connect, follow the steps below: 1. Insert a valid SIM card into the SIM card slot (refer to page 32). 2.
- Page 49 Making Connections 3. Select the mobile network carrier and tap Connect to establish the connection. Check the Let Windows manage this connection box to allow the system to automatically connect to this mobile data network. EN-49...
-
Page 50: Using The Bios Setup Utility
Using the BIOS Setup Utility Using the BIOS Setup Utility Your notebook has a BIOS setup utility which allows you to configure important system settings, including settings for various optional functions on the notebook. This chapter explains how to use the BIOS setup utility. BIOS Setup Menu The BIOS Setup Utility allows you to configure your notebook’s basic settings. - Page 51 Using the BIOS Setup Utility Navigating and Entering Information in BIOS Use the following keys to move between fields and to enter information: Keyboard Description Select screen Select item Enter Select + / - Change Opt. General Help Previous Values Optimized Defaults Save &...
-
Page 52: Main Menu
Using the BIOS Setup Utility Main Menu The Main menu displays the device’s system overview information, including the system date and time. Item Description BIOS Information Displays the BIOS version detected during boot up. Displays the CPU type and speed, total memory, mainboard version, UEFI Firmware version, processor type, System Information ME FW version, ME Firmware SKU, serial number, and... -
Page 53: Advanced Menu
Using the BIOS Setup Utility Advanced Menu The Advanced menu allows you to configure specific system settings. Item Description Configures the CPU parameters. For details, refer to CPU Configurations CPU Configurations on page 54. Assigns the function for the P1 button. - Stealth mode button (by default). - Page 54 Using the BIOS Setup Utility Item Description LAN from S3/S4, wake on wireless LAN from S3/S4, and USB3.0 power share. For details, refer to Power Configurations on page 57. TPM Configurations Configures Trusted Computing settings. FAN Calibrations Performs the fan calibration. Battery Calibrations Performs the battery calibration.
- Page 55 Using the BIOS Setup Utility Device Configurations Select this option to configure the device settings. Item State Description Enabled Turns on the function. USB Port 1 Disabled Turns off the function. Enabled Turns on the function. USB Port 2 Disabled Turns off the function.
- Page 56 Using the BIOS Setup Utility Item State Description Disabled Turns off the function. Enabled Turns on the function. Bluetooth Disabled Turns off the function. Enabled Turns on the function. Disabled Turns off the function. Enabled Turns on the function. Intel AMT Disabled Turns off the function.
- Page 57 Using the BIOS Setup Utility Power Configurations Select this option to configure the power management settings. Item State Description Keyboard Configures the length of time the keyboard Keyboard Backlight Off, backlight will remain on. Backlight Timer 1/3/5/10/15/30 Settings /60/120 Minutes Enable Turns on the function.
-
Page 58: Boot Menu
Using the BIOS Setup Utility Boot Menu The Boot menu allows you to configure the boot settings and boot sequence. Item Description Boot up NumLock Selects the keyboard NumLock state. State Launch CSM Enables/Disables CSM support. Launch Network PXE Selects the LAN PXE boot mode. OpRom Option ROM Sets the display mode for Option ROM messages. -
Page 59: Security Menu
Using the BIOS Setup Utility Security Menu The Security menu allows you to set or change the Administrator and User passwords. Item Description Administrator Sets the administrator password. Password Secure Boot Customizes the Secure Boot settings. EN-59... -
Page 60: Save & Exit Menu
Using the BIOS Setup Utility Save & Exit Menu The Save & Exit menu allows you to save/discard the changes and restore the default values for all setup options before leaving the BIOS Setup Menu. Item Description Save Changes and Resets the system after saving any changes. -
Page 61: Maintaining And Caring For Your Notebook
Maintaining and Caring for Your Notebook Maintaining and Caring for Your Notebook Taking care of your notebook will reduce the risk of damage to your device and ensure that it operates properly. To help you maintain the quality and function of your notebook, this chapter provides guidelines on how to protect, store, clean, and travel with your device. - Page 62 Maintaining and Caring for Your Notebook Do not cover or block any ventilation openings on the notebook. For example, do not place the notebook on a bed, sofa, rug, or other similar surface. Overheating may occur, which could result in damage to your notebook.
-
Page 63: Cleaning Your Notebook
Maintaining and Caring for Your Notebook Battery Pack Guidelines Do not expose the battery to temperatures below 0°C (32°F) or above 46°C (115°F). This may adversely affect the battery pack. While the battery may not provide 100% capacity at temperature extremes, its capacity is restored when the battery temperature returns to a normal range, around 20°°C (68°F). -
Page 64: Traveling With Your Notebook
Maintaining and Caring for Your Notebook recommendations please contact your support representative. Cleaning the Display Use a soft, dry cloth. In some cases, you can use a small amount of water to remove streaks or smears. For difficult display cleaning tasks, use a 50/50 mixture of isopropyl alcohol and water. -
Page 65: Troubleshooting
Troubleshooting Troubleshooting This chapter advises you on what actions to take when solving common computer problems that may be caused by issues with hardware or software. Preliminary Checklist Here are the initial steps you should follow before taking further action when encountering any problem: 1. - Page 66 Troubleshooting Allow the system to remain idle for one hour with the AC adapter connected to the device. The Battery Power LED lights up when the battery starts charging. If the battery still fails to start charging after an hour, remove the battery, wait several seconds, and then install it again.
-
Page 67: Display Problems
Troubleshooting Bluetooth Wireless Transmission Problems I cannot connect to another device with Bluetooth wireless technology. Ensure that you have activated the Bluetooth feature on both devices. Make sure that the distance between the two devices is within the acceptable limit and that there are no walls or other obstructions between the devices. -
Page 68: Hard Disk Problems
Troubleshooting Hard Disk Problems The hard disk will not spin up so the device can’t boot up. This occurs if the unit is exposed to extremely low temperatures. This is not a hardware failure associated with the hard disk. The integrated hard disk drive heater will warm the drive to a safe operating temperature. - Page 69 Troubleshooting 3. Under Reset this PC, tap Get started. 4. Select one of the two options depending on your needs. - Keep my files (requires around 3 to 4hr) - Remove everything (requires around 5 to 6hr) EN-69...
- Page 70 Troubleshooting 5. You are informed of the programs that will be removed. Tap Next to proceed. 6. Tap Reset to start resetting. NOTE If you see a message as shown below that means WinRE (Windows Reset) is disabled. EN-70...
- Page 71 Troubleshooting 7. To enable resetting Windows, follow the steps below: a. Hover mouse over Start menu. b. Right click and select Command Prompt (Admin) from the pop-up menu. c. Enter the following command: Reagentc /enable d. Press Enter. Wait until you see the “Operation Successful” status on the screen.
-
Page 72: Other Problems
Troubleshooting Other Problems The device won’t turn on. Make sure a fully charged battery is properly installed. Connect external power to charge the battery if it is not charged. If you are using the AC adapter, check the electrical outlet you are using to ... -
Page 73: Appendix
Appendix Appendix Copyright © Copyright 2018. All rights reserved. No part of this user manual may be transmitted, stored in a retrieval system, or translated into any language or computer language, in any form or by any means, without the prior written permission of the manufacturer. Information is subject to change without prior notice. - Page 74 Appendix Audio High Definition Audio Two speakers, Sound pressure 85dB at 0.5M Average at 0.8, 1K, 1.2K, and 1.5KHz with maximum volume Mic. Array Camera Integrated 2.0Mega-pixel Web-cam with a Shutter and Mic*2 Support visual in-use White indicator I/O Ports ...
- Page 75 Appendix Discrete Graphics SKU) Battery: Main battery pack (3S2P (6-cell Li-Ion), 10.8V, 4,700mAh) / 2 battery pack (3S2P (6-cell Li-Ion), 10.8V, 4,700mAh) (optional) Buttons Power ON / OFF Button Two Programmable Buttons (P1 / P2) Dimension 350 x 282 x 38mm (without Discrete VGA) Weight ...
-
Page 76: Regulatory Statement
Appendix Regulatory Statement Federal Communications Commission Statement This equipment has been tested and found to comply with the limits for a Class B digital device, pursuant to Part 15 of the FCC Rules. These limits are designed to provide reasonable protection against harmful interference in a residential installation. -
Page 77: Rf Exposure Warning
Appendix RF exposure warning This equipment must be installed and operated in accordance with provided instructions and must not be co-located or operating in conjunction with any other antenna or transmitter. End-users and installers must be provided with antenna installation instructions and transmitter operating conditions for satisfying RF exposure compliance. -
Page 78: Class 1 Laser Product
Appendix CLASS 1 LASER PRODUCT LASERSCHUTZKLASSE 1 PRODUKT TO EN60825 CAUTION THIS APPLIANCE CONTAINS A LASER SYSTEM AND IS CLASSIFIED AS A "CLASS 1 LASER PRODUCT.” TO USE THIS MODEL PROPERLY, READ THE INSTRUCTION MANUAL CAREFULLY AND KEEP THIS MANUAL FOR FUTURE REFERENCE. - Page 79 Appendix CAUTION FOR ADAPTER THIS NOTEBOOK IS FOR USE WITH DEDICATED AC ADAPTER. Ensure you connect the power cord to a socket-outlet with earthing connection. The NB must be powered by using UL62368-1/ UL60950-1 Listed power adapter, rated 19Vdc, 4.74A minimum. ...
-
Page 80: Safety Instructions
Appendix Safety Instructions These safety instructions should always be observed to ensure safe operation when handling the device. Do not place this device on an unstable table or surface. The device may fall, causing serious damage to its housing and components. ... - Page 81 Appendix Instructions de sé curité Ces instructions de sécurité doivent toujours être suivies pour assurer le fonctionnement sûr de l’appareil lors de sa manipulation. Ne placez pas cet appareil sur une table ou surface instable. L’appareil pourrait tomber et causer des dégâts sérieux à son boî tier et ses composants. ...
Need help?
Do you have a question about the S14I and is the answer not in the manual?
Questions and answers