
Related Manuals for GRAUPNER 3972


Summary of Contents for GRAUPNER 3972
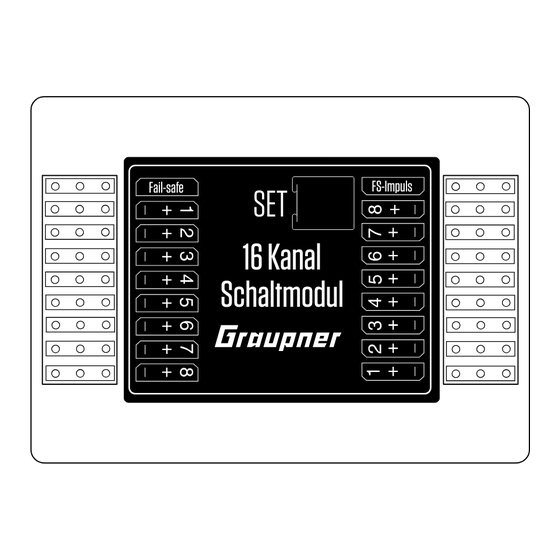
- Page 1 Manual 16 channel switch module suitable for Multichannel and Nautic No. 3972 FS-Impuls Fail-safe 16 Kanal Schaltmodul...
-
Page 3: Table Of Contents
Index Personal notes ..............4 Introduction ................. 5 Service Centre ..............5 Intended use ..............6 Declaration of conformity ..........6 Package content ..............6 Technical data ..............7 Symbols explication ............8 Safety notes ................ 8 Installing the Module ............9 Setting the electric connections ........ -
Page 4: Personal Notes
Personal notes... -
Page 5: Introduction
Due to technical changes, the information may be changed in this manual without prior notice. Be always updated by check- ing periodically on our website, www.graupner.de to be always updated with the products and firmware. This product complies with national and European legal require- ments. -
Page 6: Intended Use
1 patch cable 10 cm Operating instructions 1 Coding bridge 4 Distance sleeves Declaration of conformity No. 3972 16 channel switch module Graupner/SJ declares that the product is conform to EU norms. DIN EN 55014-1 6 / 19 3972_MP_V1... -
Page 7: Technical Data
16 different functions to one transmitter channel. Older MHz sets (4014, 6014 and similar) require a decoder in the transmitter (old Graupner No. 4108) In HoTT systems it is just required to activate one of the two available muctichannels. -
Page 8: Symbols Explication
Symbols explication Always observe the information indicated by this warning sign. Particularly those which are additionally marked with the CAU- TION or WARNING. The signal word WARNING indicates the poten- tial for serious injury, the signal word CAUTION indicates possibil- ity of lighter injuries. -
Page 9: Installing The Module
The 16 channel switch module has been developed for use in RC models and it should only be used for the previewed scope. Please note that the module should only be used within the indi- cated limit values (see technical data). Use and store the unit in a dry environment only. -
Page 10: Setting The Electric Connections
Setting the electric connections The module consumes so few current that you can connect it through the included patch cable directly to the multichannel output of the receiver. You can connect functions with low power consumption directly to the switch channel of the module, but only if the total power consumption of all the connected functions is lower than 1,0 A and only if the receiver voltage is enough (see switch plan). - Page 11 Connection of a small function to channel 6B Receiver X2 - 6B X2 - C9 16 channel X2 - B9 Switch module X2 - A9 X2 - 6C Patch cable V-/GND Connection of a big function to channel 4 + 4...18 V max.
-
Page 12: Occupation Of The Pin Lines
No. 4159.1 No. 3972 No. 4159.2 Note on use of switch relais In case of use of the Graupner switch relais please pay Switch relais attention to the inverted polarity! See connection scheme on the left. In case of use of a No.4159.3 it is necessary to create a connection cable because this polarity inversion is split to two connectors. -
Page 13: Programming Hott Transmitter
Programming the switch assignment of HoTT transmitter To allow the transmitter to transmit the data correctly, you still have to set one option in your transmitter. Enter the "Telemetry" menu, open the "Settings & view" line and move through the touch pads to the "CH OUT TYPE" line. Here please select the "SAME"... - Page 14 Programming the switch assignment of HoTT transmitter Here activate both multichannels as multichannel, while the sec- ond multichannel has been assigned to the channel 6, with which we will proceed in the description. Now move the cursor to the right field, select the "MULTICH 8CH"...
- Page 15 Programming the switch assignment of HoTT transmitter Soon after you will have to actuate the desired switch. After the actuation it looks like this, even if here you can see soon the switch number. Please use the same process to assign the other switches in the transmitter.
-
Page 16: Programming Jr Transmitter
Programming the switch assignment of Graupner/JR transmitter Older MHz transmitters (4014, 6014 etc.) require the control or decoder module (old Graupner No. 4108). A switch assigna- tion, as required for the HoTT transmitters, is here not neces- sary. Accurate notes for the function are indicated in the respective transmitter manual. -
Page 17: Fail-Safe Function
Memory function deactivation You can also deactivate the memory function in the same way as you have activated it. Switch as usual the model and the transmitter on and proceed as follows: • Activate (ON) the switch that you want to remove from the memory function •... -
Page 18: Validating The Data
Firmware update The 16 channel switch module has been specifically been devel- oped for Graupner HoTT 2,4 GHz transmission systems and needs no other settings. If you have any question or problem during the use, please contact us under Hotline service@graupner. -
Page 19: Warranty
The cur- rent version can be found on the Internet at www.graupner.de the relevant product page. In addition, the company Graupner has no responsibility or liability for any errors or inaccuracies that may appear in construction or operation manuals.
Need help?
Do you have a question about the 3972 and is the answer not in the manual?
Questions and answers