Table of Contents
Advertisement
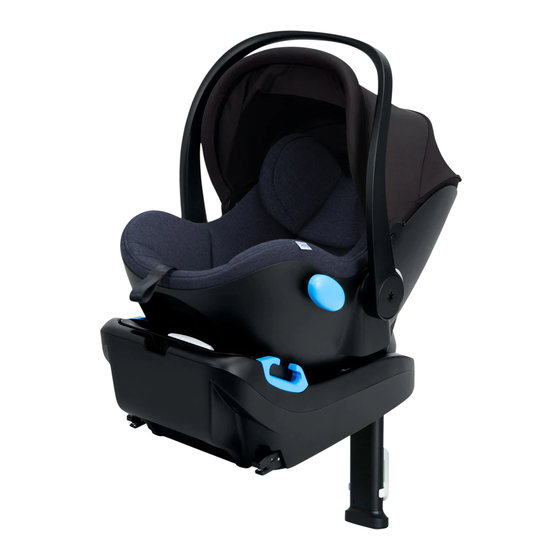
LI19USA1
Liing Instruction Manual
HEIGHT
32 in. (or less)
81.3 cm (or less)
Keep instructions for future use.
Store in the Instruction Manual Storage Slot in
Car Seat Base.
E01-2533-A1-US
WEIGHT
4–35 lb
1.8–15.9 kg
WARNING
• Read and understand all
information and instructions on
product labels and in this manual
and in your vehicle owner's
manual before installing or using
this car seat/infant carrier.
• Failure to properly install or
use this car seat or follow the
warnings in this manual and on
the car seat's labels can result
in serious injury or death to the
child in a sharp turn, sudden
stop or crash.
February 2019
Advertisement
Table of Contents

Related Manuals for Clek Liing


Summary of Contents for Clek Liing
- Page 1 LI19USA1 Liing Instruction Manual WARNING • Read and understand all information and instructions on product labels and in this manual and in your vehicle owner’s manual before installing or using this car seat/infant carrier. • Failure to properly install or...
-
Page 2: Checklist For Proper Use
Checklist for Proper Use IMPORTANT: This is only a checklist — you MUST read and understand all of the warnings and instructions on this car seat’s labels and in this manual before installing or using this car seat or carrier. General Use Requirements: √... -
Page 3: When Installing This Car Seat With The Base
When installing this Car Seat with the Base: √ Car Seat is securely installed in a vehicle rear seat. – If car seat must be installed in a front seat, the front air bag for that position MUST be deactivated and the vehicle owner’s manual MUST state that this is an acceptable position to install a rear-facing car seat. -
Page 4: When Installing This Car Seat Without The Base
When installing this Car Seat without the Base: √ Carrier is securely installed in a vehicle rear seat. – If Carrier must be installed in a front seat, the front air bag for that position MUST be deactivated and the vehicle owner’s manual MUST state that this is an acceptable position to install a rear-facing car seat. -
Page 5: When Using This Carrier Outside Of The Vehicle
When using this Carrier outside of the vehicle: √ Harness is buckled and snugly adjusted on the child. If the straps are loosely buckled or unbuckled, the infant can fall out or strangle on Harness. √ Carry Handle is locked in the upright position before lifting Carrier by the Handle. √... -
Page 6: Table Of Contents
Table of Contents Checklist for Proper Use ................2 General Use Requirements ..............2 When installing this Car Seat with the Base ..........3 When installing this Car Seat without the Base ........4 When using this Carrier outside of the vehicle ......... 5 Car Seat Features .................. - Page 7 Removing/Installing Carrier Cover ............96 Recycling Your Car Seat ..............104 Troubleshooting ..................104 Accessories ................... 104 Warranty ..................... 105 ® Clek and Liing are registered trademarks of Clek Inc. For a complete list of Clek Inc. trademarks please visit www.clekinc.com/trademarks.
-
Page 8: Car Seat Features
Car Seat Features – Carrier Shoulder Harness Slots Shoulder Harness Covers Shoulder Harness Straps Chest Clip Buckle Tongues Buckle Crotch Strap Buckle Pad Harness Adjuster Access Slot 10 Harness Adjuster Tab 11 Harness Adjuster Strap 12 Vehicle Lap Belt Guides 13 Carry Handle 14 Carry Handle Adjustment Buttons 15 Canopy... - Page 9 Car Seat Features – Base LI19CAA1 Liing Instruction Manual WARNING • Read and understand all information and instructions on product labels and in this manual Adjust recline so bubble is between and in your vehicle owner’s manual before installing or using 26 Vehicle Belt Guides this car seat/infant carrier.
-
Page 10: Registration & Recall Information
Registration & Recall Information WARNING • You MUST register this restraint (car seat) to be reached in a recall. Child restraints could be recalled for safety reasons. LIING Model Name: ______________________________________________________________ Serial Number: ____________________________________________________________ Manufactured In: ___________________________________________________________ (yyyy/mm/dd) Date of Purchase: ___________________________________________________________... -
Page 11: Registering Your Car Seat
Child restraints could be recalled for safety reasons. You MUST register this restraint to be reached in a recall. Send your name, address, e-mail address if available, and the restraint’s model number and manufacturing date to: Clek Inc. 226 Lesmill Road Toronto, Ontario, Canada M3B 2T5 or call 1-866-656-2462 or register online at http://www.clekinc.com/product-registration/... -
Page 12: Warnings
Warnings WARNING — DEATH or SERIOUS INJURY can occur • Failure to properly install or use this car seat or follow these warnings and instructions and those on this car seat’s labels can result in serious injury or death of the child in a sharp turn, sudden stop or crash. - Page 13 WARNING — DEATH or SERIOUS INJURY can occur (continued) • Securely install this child restraint system rear-facing on a forward- facing vehicle seat using the lower connector system of the Child Restraint Anchorage System (LATCH), if available, or a vehicle seat belt.
- Page 14 WARNING — DEATH or SERIOUS INJURY can occur (continued) • Strangulation Hazard: Children have WARNING/ STRANGLED in loose or partially buckled MISE EN GARDE Harness Straps. Fully restrain the child even when Carrier is used outside the vehicle. • Fall Hazard: Child’s activity can move Carrier.
- Page 15 Carrier. • DO NOT use accessories or parts with this car seat other than those provided by Clek Inc. Use of accessories or parts from other manufacturers could alter the performance of this car seat.
- Page 16 • NEVER use a second hand car seat or a car seat whose history you do not know. • Register your car seat with Clek Inc. • Avoid burn injury — ALWAYS touch the surfaces that will contact your child first before putting child in this car seat. This car seat...
-
Page 17: Certification
Certification • This child restraint system conforms to all applicable Federal motor vehicle safety standards. • This restraint is certified for use in Motor Vehicles and Aircraft. IMPORTANT: Do NOT use with the Base on Aircraft. This restraint is certified for use in Aircraft only when used without the Base. -
Page 18: Child Size Requirements
Child Size Requirements WARNING • DO NOT use this car seat if the child does not meet all of the size requirements listed on the next page. Using this car seat with a child who does not meet these requirements will increase the risk of serious injury or death to the child. - Page 19 Child MUST meet ALL of the following requirements to use this car seat: Min. 1 in. (2.5 cm) √ Child weighs between 4 and 35 lb (1.8 and 15.9 kg). √ Child’s height is 32 in. (81.3 cm) or less. √...
-
Page 20: Adjusting Car Seat To Fit Your Child
Adjusting Car Seat to Fit Your Child Changing Shoulder Harness Height WARNING • To prevent ejection in a crash, Shoulder Harness Straps MUST be through the Shoulder Harness Slots at or just below and closest to the child’s shoulders and through Harness Slots in Headrest. •... -
Page 21: Selecting The Correct Shoulder Harness Slot
This car seat ships with the Shoulder Harness Straps in the lowest of three (3) Shoulder Harness Slots. As the child grows, you will need to change the Shoulder Harness Slot position. The Shoulder Harness Straps MUST be through the Shoulder Harness Slots at or just below and closest to the child’s shoulders. - Page 22 Step 2 Loosen the Harness: • While pressing down on Harness Adjuster Tab, pull out on Shoulder Harness Straps to loosen Harness, as shown in Figure 4. The Harness Adjuster Tab is accessible through the slot sewn into the fabric between the Harness Adjuster Strap and the Crotch Strap.
-
Page 23: Rethreading The Shoulder Harness
Rethreading the Shoulder Harness Step 1 If using with the Newborn Support System Headrest: • Insert the Shoulder Harness Straps through the Harness Slots in the Headrest, ensuring that the Straps are not twisted. • From front of Carrier, insert the Shoulder Harness Straps through the chosen Shoulder Harness Slots in the Carrier Seat Back as shown in Figure 6, ensuring that the Straps are not twisted. - Page 24 Step 2 Re-attach the Harness: • Route Shoulder Harness Straps and Harness Adjuster Strap between Base Attachment Bars and bottom of Carrier, as shown in Figure 8. Figure 8 • Hold the silver Metal Harness Plate straight up ensuring there are no twists in the Harness Adjuster Strap, and slide the loop end of each Shoulder Harness Strap through the slot in the Metal Harness Plate, ensuring that each Strap is completely inside...
- Page 25 Step 3 Check that both Shoulder Harness Straps and the Harness Adjuster Strap are routed between the Base Attachment Bars and the bottom of the Carrier as shown in Figure 10. Figure 10 Checklist for Changing Shoulder Harness Slot: √ Shoulder Harness Straps are through the Shoulder Harness Slots in the Carrier Seat Back that are at or below and closest to the child’s shoulders, and are at the same height on each side.
-
Page 26: Using The Newborn Support System
Using the Newborn Support System WARNING • To prevent ejection in crash, the Newborn Support System MUST be used with infants less than 11 lb (5 kg) and when top of shoulders are below lowest Shoulder Harness Slots. This car seat ships with the Newborn Support System installed. - Page 27 Support Cushion Removal/Installation: To Install: Place the Support Cushion on the Carrier seating surface with the Buckle Slot aligned with the Crotch Buckle, and pull the Buckle and Buckle Pad up through the Buckle Slot in the Support Cushion, as shown in Figure 11.
-
Page 28: Shoulder Harness Cover Removal/Installation
Shoulder Harness Cover Removal/Installation Use of the Shoulder Harness Covers included with this seat is optional. To Install: Position Shoulder Harness Covers around Shoulder Harness Straps with snaps facing away from child’s neck and fasten the snaps together to close as shown in Figure 12. To Remove: Unfasten the snaps on the Shoulder Harness Covers and remove Shoulder Harness Covers. -
Page 29: Securing Your Child In Car Seat
Securing Your Child in Car Seat WARNING • Shoulder Harness Straps MUST be through the Shoulder Harness Slots at or just below and closest to the child’s shoulders. • Strangulation Hazard: Children have STRANGLED in loose or partially buckled Harness Straps. Fully restrain the child even when Carrier is used outside the vehicle. - Page 30 WARNING (continued) • NEVER place blankets between Harness and child. • NEVER place extra padding under or behind the child. Extra padding or bulky clothing may prevent the Harness from being properly adjusted. • Prevent death from heat exposure: NEVER leave child unattended in a vehicle, even when sleeping.
- Page 31 Step 2 Place child in Carrier with back flat against Carrier Seat Back as shown in Figure 14. Make sure the child is NOT slouching. Figure 14 Step 3 Place child’s arms through Shoulder Harness Straps making sure the Straps go over the child’s shoulders and hips as shown in Figure 15.
- Page 32 Step 4 Check position of Shoulder Harness Straps: • The Shoulder Harness Straps MUST be through Shoulder Harness Slots at or just below and closest to child’s shoulders, as shown in Figure 16. See “Changing Shoulder Harness Figure 16 Height” on page 20 to change position of Shoulder Harness Straps.
- Page 33 Step 6 Tighten Harness Straps: • Pull upwards on Shoulder Harness Straps to remove any slack from the straps that goes over the hips/thighs. as shown in Figure 18. • Pull Harness Adjuster Strap to remove slack in the Shoulder Harness Straps as shown in Figure 19.
- Page 34 Step 8 Close Chest Clip and position at arm pit level as shown in Figure 21. Figure 21 Checklist for securing child: √ Newborn Support System is being used if child weighs 11 lb (5 kg) or less and if top of shoulders are below lowest Shoulder Harness Slots. √...
-
Page 35: Removing Your Child From Car Seat
Removing Your Child from Car Seat To help achieve a snug Harness, the Shoulder Harness Straps should be loosened each time the child is removed from the seat and tightened each time the child is buckled in the seat. Step 1 Loosen Harness: •... - Page 36 Step 2 Separate Chest Clip: • Press release tab in (1) and pull apart (2) to separate as shown in Figure 23. Figure 23 Step 3 Unbuckle Harness: • Press red release button on Buckle as shown in Figure 24. Slide Shoulder Harness Straps off of shoulders and remove child from Carrier.
-
Page 37: Operation And Adjustments
Operation and Adjustments Carry Handle Adjustment WARNING • ALWAYS check that the Carry Handle is locked in the Upright Position before lifting Carrier by the Handle. An unlocked handle could move unexpectedly, causing a child to fall. The Carry Handle has three adjustment positions as shown in Figure 25: Upright (1), Stowed (2), Ground (3). - Page 38 Step 2 Adjust the Carry Handle Position: • Press both Carry Handle Adjustment Buttons and rotate Handle until it locks in the desired position as shown in Figure 26. Figure 26...
-
Page 39: Removing Carrier From Car Seat Base
Removing Carrier from Car Seat Base Step 1 Use thumb to press down and hold Carrier Lock Tab (1). While holding the Carrier Lock Tab down, pull out and hold the Release Handle to the open position (2) as shown in Figure 27. Figure 27 Step 2 While holding Release Handle in the open position,... -
Page 40: Adjusting The Canopy
Adjusting the Canopy The Carrier has a 3-position Canopy. All Canopy positions are approved for use in vehicle or outside of vehicle. Position 1 To adjust the Canopy between the closed position (Position 1) and the open position (Position 2): grasp the front of the Canopy and pull it forward or rotate it back. -
Page 41: Vehicle Information
Vehicle Information Vehicle Child Restraint Anchorage System (LATCH) • LATCH stands for Lower Anchors and Tethers for Children. This term refers to the anchors built into a vehicle for attaching child restraints and consists of two lower anchors at the crease between the vehicle seat back and vehicle seat cushion and a top tether anchor behind the vehicle seat as shown in Figure 30. -
Page 42: Vehicle Seat Location Requirements
• 2003 or newer model year vehicles have at least two seating locations with a LATCH Anchorage System. Some 2001 and 2002 model year vehicles have LATCH Anchorage Systems. 2000 model year vehicles or older DO NOT have LATCH Anchorage Systems. See your vehicle owner’s manual if you are unsure if your vehicle is equipped with a LATCH Anchorage System. - Page 43 Some vehicles DO NOT have any seating positions that can be used safely with this car seat. If you are not sure where to place this car seat in your vehicle, consult your vehicle owner’s manual or call Clek customer service at 1-866-656-2462.
- Page 44 • Only install this car seat on vehicle seats that face forward. NEVER install this car seat on vehicle seats facing sideways or backwards, as shown in Figure 33. • Only use this car seat on vehicle seats with seat backs that lock in an upright position.
-
Page 45: Vehicle Belt Requirements
If you are unsure, consult your vehicle owner’s manual or call Clek Customer Service at 1-866-656-2462. -
Page 46: Vehicle Belt Systems
WARNING (continued) • This car seat can not be installed with the Base if installing with an inflatable vehicle belt. • If installing the car seat without the Base using an inflatable vehicle belt, place lap belt through blue Vehicle Belt Guides and place shoulder belt against vehicle seat back. - Page 47 Carrier when you check for secure installation. If it does not stay tightly secured around the Carrier, then a locking clip may be used to obtain a secure installation. Contact Clek Customer Service to purchase a locking clip.
- Page 48 Inflatable Vehicle Belt: Lap/Shoulder belt with a built-in airbag. • This car seat may not be compatible with every inflatable lap/shoulder belt. Contact Clek Customer Service at 1-866-656-2462 for more information. • NEVER install this car seat with the Base if installing with an inflatable vehicle belt.
- Page 49 • If installing the car seat without the Base using an inflatable vehicle belt, place lap belt through blue Vehicle Belt Guides and place shoulder belt against vehicle seat back. DO NOT place the shoulder belt around the back of this car seat. Check your vehicle owner’s manual for information on how to secure a car seat with the lap portion of the inflatable belt.
- Page 50 Retractable Lap Belts (continued): If this type of lap belt is equipped with an Automatic Locking Retractor (ALR), or a Switchable Locking Retractor (SLR), it can be used to secure this car seat with or without the Base. NEVER install this car seat with a lap belt that is equipped with an Emergency Locking Retractor (ELR).
-
Page 51: Installing/Removing Car Seat With Base
Installing/Removing Car Seat with Base WARNING • NEVER use this car seat in the front seat of a vehicle with an active frontal air bag. • NEVER use this car seat in a front vehicle seat location unless recommended by your vehicle owner’s manual. •... - Page 52 WARNING (continued) • Use only in a Rear-Facing position when using this car seat in a vehicle. Serious or crippling injury or death can result if infant faces front of vehicle. • ALWAYS lift up on Carry Handle after placing Carrier on Car Seat Base to make sure that it is securely attached to the Base.
-
Page 53: Installing Car Seat Base With Latch
Installing Car Seat Base with LATCH WARNING • Only use the Car Seat Base LATCH system in vehicle seating locations designated by the vehicle manufacturer for use with LATCH and that have a standard anchor spacing of 11 in. (280 mm). •... - Page 54 Load Leg. However, if you cannot use the Load Leg, Figure 41 Clek recommends installing the Base with a vehicle belt, and not with LATCH. To install the Base with a vehicle belt, go to “Installing Car Seat Base with Vehicle Belt”...
- Page 55 Step 5 Extend LATCH Connectors to the fully extended position as shown in Figure 42: • One hand: Press and hold LATCH Adjustment Button (1). • Other hand: Grasp the end of the LATCH Connector located on the same side of the Base and pull out until it stops (2), and then release LATCH Adjustment Figure 42 Button, to lock into position.
- Page 56 Step 7 Check both LATCH Connector Lock Indicators on the side of the LATCH Connectors to make sure they have changed from solid red (unlocked) to solid green (locked) as shown in Figure 44. Pull forward on the Base to make sure it is securely attached to the vehicle’s LATCH lower anchors on both sides.
- Page 57 Step 8 Adjust Base to fit snugly against the vehicle seat back: • Position one hand on each side of the Base. • Use thumbs to press and hold both LATCH Adjustment Buttons (1) while pushing the Base firmly towards vehicle seat back (2), as shown in Figure 45.
- Page 58 NOTE: If LATCH system does not stay securely attached to either of the vehicle lower anchorages or Base cannot be securely installed using LATCH in that seating location, try a different seating location or install using the vehicle belt. See “Installing Car Seat Base With Vehicle Belt”...
- Page 59 WARNING • NEVER extend the Load Leg further than needed to turn the Load Leg Indicator from red to green. • Only use Load Leg when the Indicator is green. Step 11 Adjust recline: Adjust recline so bubble is between 2 lines designated for child's weight •...
- Page 60 WARNING • Only use this car seat with the Recline Sled adjusted to the position which places the bubble between the two lines of the Recline Indicator appropriate for the child’s weight. – A seat too upright could result in an infant’s head falling forward, which could restrict the ability to breath.
-
Page 61: Removing Car Seat Base Installed With Latch
WARNING • If red indicator on the side of the Release Handle is visible, the Carrier is NOT securely attached to the Base. Step 13 Adjust Carry Handle so that it is locked in the upright position. Step 14 Adjust the front seat of the vehicle rearward as far back as necessary, but without it touching the back of the Carrier. - Page 62 Step 2 Extend LATCH Connectors by pressing and holding both LATCH Adjustment Buttons (1), and then pulling the Base toward you (2), as shown in Figure 52. Figure 52 Step 3 Release the LATCH Connector by pressing down (1) and sliding back (2) the red LATCH Release Button, as shown in Figure 53.
- Page 63 Step 4 Store LATCH Connectors as shown in Figure 54: • Press and hold LATCH Adjustment Button (1). • Grasp the end of the LATCH Connector located on the same side of the Base and push to slide Connector back into Base (2). •...
-
Page 64: Installing Car Seat Base With Vehicle Belt
Installing Car Seat Base with Vehicle Belt WARNING • Not all vehicle belts are safe for use with this car seat. Read the vehicle belt requirements section in this manual and your vehicle owner’s manual. • Refer to vehicle owner’s manual to determine how to secure a child restraint system (car seat) in your vehicle using the vehicle belt. - Page 65 Step 1 Select a forward-facing vehicle seating location which has a vehicle belt which can be used with this car seat. For seating positions with an inflatable vehicle belt, install using LATCH or install without the Base. Step 2 Move the front seat of the vehicle all the way forward. This will give you more room to install the Base.
- Page 66 Load Leg out from the Load Leg Storage on the bottom of the Base, as shown in Figure 57. Figure 57 IMPORTANT: Clek STRONGLY RECOMMENDS using the Load Leg. However, if you cannot use the Load Leg, leave the Load Leg in the Load Leg Storage position and go to the next step.
- Page 67 Step 6 Open Belt Tensioner as shown in Figure 59: • One hand: Press down on the front panel of the Belt Tensioner and hold (1). • Other hand: Squeeze the Belt Tensioner Release Handle to unlock Belt Tensioner (2). •...
- Page 68 Step 8 Remove slack from the vehicle belt and close the Belt Tensioner: If installing with lap/shoulder belt: • Remove slack from vehicle belt around Base by pulling the shoulder belt (the top layer of belt on the Base) out to the side and hold, as shown in Figure 61a.
- Page 69 Step 9 Confirm that both Belt Tensioner Lock Indicators have changed from Red (unlocked) to Green (locked) as shown in Figure 63. If either of the indicators are red, the Belt Tensioner is NOT locked. Figure 63 WARNING • If either Belt Tensioner Lock Indicator is red, the Belt Tensioner is NOT securely closed.
- Page 70 Step 10 Check for secure installation: • While gripping the Base near the blue Vehicle Belt Guides, pull front to back and left to right to check for secure installation, as shown in Figure 64. Vehicle belt MUST stay tightly secured around Base and Base should not move more than 1 in.
- Page 71 • Release Adjustment Handle and push down on Load Leg to lock into position. • Confirm that Load Leg Pressure Indicator has turned from red to green, as shown in Figure 66. If Indicator remains red after the Load Leg has been locked into position, extend Load Leg one position further to increase the contact between the vehicle floor and the Load Leg.
- Page 72 Step 12 Adjust recline: Adjust recline so bubble is between 2 lines designated for child's weight • Pull and hold Recline Sled Adjustment Handle, as shown in Figure 67, and rotate Recline Sled to the position that places the Recline Bubble between the 1.8-5 kg 4-11 lb lines on the Recline Indicator appropriate for the...
- Page 73 Step 13 Secure Carrier onto Base: • Lower Carrier onto Base and push down on each side of the Carrier to connect it to the Base as shown in Figure 68. The red area on the side of the Release Handle will completely disappear when the Carrier is securely attached.
-
Page 74: Removing Car Seat Base Installed With Vehicle Belt
Step 14 Adjust Carry Handle position so that it is locked in the upright position. Step 15 Adjust front seat of the vehicle rearward as far back as necessary, but without it touching the back of the Carrier. Removing Car Seat Base Installed with Vehicle Belt Step 1 Adjust Load Leg to shortest position by pulling out and... - Page 75 Step 3 Open Belt Tensioner as shown in Figure 70: • One hand: Press down on the front panel of the Belt Tensioner and hold (1). • Other hand: Squeeze the Belt Tensioner Release Handle to unlock Belt Tensioner (2). •...
- Page 76 Step 5 Rotate Belt Tensioner toward the vehicle seat and push down to lock closed, as shown in Figure 72. Figure 72 Step 6 Turn Base over and rotate Load Leg into Load Leg Storage on bottom of Base. Press down on Load Leg to lock in place as shown in Figure 73.
-
Page 77: Installing/Removing Car Seat Without Base
Installing/Removing Car Seat without Base WARNING • NEVER use this car seat in the front seat of a vehicle with an active frontal air bag. • NEVER use this car seat in a front vehicle seat location unless recommended by your vehicle owner’s manual. •... - Page 78 WARNING (continued) • Use only in a Rear-Facing position when using this car seat in a vehicle. Serious or crippling injury or death can result if infant faces front of vehicle. • If installing the car seat without the Base using an inflatable vehicle belt, place lap belt through blue Vehicle Belt Guides and place shoulder belt against vehicle seat back.
-
Page 79: Installing Car Seat Without Base With Vehicle Belt
Installing Car Seat without Base with Vehicle Belt Step 1 Secure child in Carrier. See “Securing Your Child in Car Seat” on page 29. Step 2 Select a forward-facing vehicle seating location which has a vehicle belt which can be used with this car seat. Step 3 Figure 74 If the vehicle seat back is adjustable, make sure the seat... - Page 80 Step 6 Position Carrier on vehicle seat with child facing the rear of the vehicle, and rotate Carrier so that the blue Recline Reference Line on side of Carrier is parallel with the ground, as shown in Figure 76. Figure 76 WARNING •...
- Page 81 Step 7 If installing with lap/shoulder belt: • Route lap portion of the vehicle belt through both blue Vehicle Lap Belt Guides (1) and buckle vehicle belt as shown in Figure 77a. DO NOT pull the vehicle belt all the way out during this step.
- Page 82 Step 8 If installing with a lap/shoulder belt follow the instructions for a lap/shoulder belt or inflatable shoulder belt in this section. If installing with a lap-only belt, skip to Step 9. If installing with lap/shoulder belt: • Slowly pull the vehicle shoulder belt all the way out to its full length, and hold.
- Page 83 If you are still unable to shift Carrier so that blue Reference Line is parallel to the ground, remove the vehicle shoulder belt from around the back of the Carrier and let it retract into a position against the front of the vehicle seat back as shown in Figure 79 and shift the Carrier so that the blue Reference Line is parallel to the ground, or move to another seating position.
- Page 84 If installing with lap-only belt: • Use your body to push and wiggle the Carrier into the vehicle seat back and pull free end of lap-only belt to remove all slack as shown in Figure 81. If installing with an inflatable belt: •...
- Page 85 Step 10 Check for secure installation: • Grip Carrier near blue Vehicle Lap Belt Guides and pull Carrier side-to-side and front-to-back to check for secure installation, as shown in Figure 83. The Carrier should not move more than 1 in. (2.5 cm) at the belt path.
-
Page 86: Removing Car Seat Without Base Installed With Vehicle Belt
Removing Car Seat without Base Installed with Vehicle Belt Step 1 If installed with lap-only belt: • Unbuckle vehicle belt. If installed with lap/shoulder belt: • With one hand: Hold the shoulder belt so it doesn’t get shorter. • With the other hand: Unbuckle vehicle belt, remove the shoulder belt from the blue Shoulder Belt Guide, and move the shoulder belt over and off of Carrier. -
Page 87: Using Carrier Outside Of The Vehicle
Using Carrier Outside of the Vehicle Thousands of children are injured or die every year in their car seat when used outside of the vehicle as a result of suffocation, falling and/or strangulation. Carefully review these warnings. Failure to follow these warnings can result in serious injury or death of the child. -
Page 88: Using Carrier On Stroller
Only use Carrier with strollers or stroller car seat adapters that are approved for use with this car seat. For a complete list of approved strollers and stroller car seat adapters, please visit http://www.clekinc.com/support/liing. Carefully review and follow all information and instructions in your stroller manual that are specific to car seat or carrier use with the stroller. -
Page 89: Installing Carrier On Stroller
WARNING • ALWAYS lift up on Carry Handle after placing Carrier on stroller to make sure that it is securely attached to the stroller. • DO NOT use Carrier on the stroller if the Carrier does not securely lock onto the adapter on both sides of the stroller. If the Carrier does not securely lock onto the adapters, the Carrier could fall off the stroller resulting in serious injury to the child. - Page 90 Step 3 IMPORTANT: The Carrier must be installed with the child facing the stroller handle. NEVER install the Carrier with the child facing away from the stroller handle. Securely attach the Carrier onto the car seat adapters: • With the child properly secured in the Carrier position the Carrier so that the Stroller Attachment Points on the Carrier are positioned directly above the stroller car seat adapters, and lower Carrier onto the...
- Page 91 √ Carrier is installed in the orientation that has the child facing the stroller handle. Step 5 Make any necessary adjustments to the stroller handle position IMPORTANT: Certain strollers have handle positions that cannot be used with this Carrier. Please visit http://www.clekinc.com/support/liing for a list of any restrictions.
-
Page 92: Releasing Carrier From Stroller
Releasing Carrier from Stroller Confirm that the Carry Handle is locked in the upright position. Squeeze the Stroller Release Handle on the back of the Carrier as shown in Figure 88, and lift the Carrier off of the stroller. NOTE: If the Carrier feels stuck, it can be helpful to squeeze the Stroller Release Handle while pushing down on the Carrier on the side that feels stuck. -
Page 93: Aircraft Installation
Aircraft Installation Clek strongly recommends that children are secured in a car seat during airline travel. This car seat may only be installed on an aircraft without the Car Seat Base. To install this car seat without the Base, follow the instructions for installing with a lap-only belt in “Installing/Removing Car Seat without Base”... -
Page 94: Care And Cleaning
Care and Cleaning Carrier Cover and Newborn Support System may be spot cleaned or hand washed. If a thorough cleaning is necessary, see “Removing/Installing Carrier Cover” on page 96, and “Support Cushion Removal/Installation” and “Support Headrest Removal/ Installation” on page 27. Follow the hand washing instructions on page 95. Car Seat Cleaning FABRIC CARE INSTRUCTIONS Spot Cleaning:... - Page 95 Step 6 Repeat steps 3-5 as necessary until spot is removed. Step 7 Rinse with clear lukewarm water and blot with clean soft white cloth as final step. Hand Washing: Remove Cover as described on page 96 and hand wash in solution of mild detergent and water, no bleach.
-
Page 96: Removing/Installing Carrier Cover
Removing/Installing Carrier Cover TO REMOVE CARRIER COVER Step 1 Ensure that Canopy is in the closed position. Adjust Carry Handle to the ground position by pressing both Carry Handle Adjustment Buttons and rotating the Carry Handle until it locks into Position 3, as showing in Figure 89. - Page 97 Step 3 Turn Carrier over and remove loop at end of each Shoulder Harness Strap from Metal Harness Plate by sliding Strap out through slot in Metal Harness Plate as shown in Figure 91. From front of Carrier, pull Shoulder Harness Straps out of Carrier Seat Back.
- Page 98 Step 6 Pull Harness Adjuster Strap out of Inner Carrier Shell as shown in Figure 93. DO NOT remove Harness Adjuster Strap from Outer Carrier Shell. Figure 93 Step 7 Remove Crotch Strap and Buckle from Buckle Pad by pressing down on top of Buckle to push it down and out of Buckle Pad as shown in Figure 94.
- Page 99 Step 8 Remove Shoulder Harness Straps from Inner Carrier Shell. For each Shoulder Harness Strap: • Push Buckle Tongue down through hip strap opening in Carrier Cover and Inner Carrier Shell, as shown in Figure 96. Figure 96 • Position Chest Clip so that end of Chest Clip is aligned with the hip strap opening, and push Chest Clip down through hip strap opening in Carrier Cover and Inner Carrier Shell, as shown in...
- Page 100 • Unfasten side tab on each side by sliding tabs down and out from under the edge of the Inner Shell, as shown in Figure 98. • Pull up on top of Carrier Cover to complete removal of Carrier Cover. TO INSTALL CARRIER COVER Step 1 Figure 98...
- Page 101 Step 2 Position Inner Carrier Shell above Outer Carrier Shell and route Shoulder Harness Straps up through hip strap opening in Inner Carrier Shell and Carrier Cover as shown in Figure 100. For each Shoulder Harness Strap: • Push end of Shoulder Harness Strap up through hip strap opening in inner shell and cover.
- Page 102 Step 4 Re-thread Harness Adjuster Strap up through slot in Inner Carrier Shell and Cover as shown in Figure 102. Step 5 Figure 102 Check that entire length of Shoulder Harness Straps and Crotch Strap are pulled to top side of Inner Carrier Shell and Cover, and that straps are free of twists.
- Page 103 Carrier Shell, confirm that Shoulder Harness Straps and Crotch Strap are pulled to top side of Inner Carrier Figure 104 Shell. Contact Clek Customer Service at 1-866-656- 2462 if unable to lock the Inner Carrier Shell in place. Check for this step: √...
-
Page 104: Recycling Your Car Seat
RECYCLING YOUR CAR SEAT For instructions on how to recycle your Clek Liing infant seat, please visit http://www.clekinc.com/support- articles/how-do-i-recycle-my-seat/ Troubleshooting For instructions on troubleshooting your Clek Liing infant seat, please visit http://www.clekinc.com/support/liing Accessories Optional accessories for this product may be purchased... -
Page 105: Warranty
Warranty LIMITED WARRANTY Clek Inc. warrants, only to the original consumer purchaser and only if this product was purchased (new and unused in an unopened box) from an authorized Clek retailer listed at www.clekinc.com, that this product will be free from defects in material and workmanship for one (1) year from the date of original purchase (the “Warranty Period”). - Page 106 This warranty does not cover the effects of normal wear and tear or damage resulting from negligence, modification, improper installation, accidents, misuse or abuse of this product. It is expressly agreed that the obligations of Clek Inc. and the original consumer purchaser’s remedies under the limited warranty contained herein are exclusive and are strictly limited to the repair or replacement of the product.
- Page 107 Este manual de instrucciones también está disponible en español. Para pedir que se le envíe una copia sin cargo alguno, tenga a bien ponerse en contacto con el servicio al cliente de Clek, para lo cual llame al 1-866-656-2462 o envíe un mensaje de correo electrónico a customerservice@clekinc.com. También puede descargar una copia del manual de instrucciones de Liing en español por Internet en https://clekinc.com/...
- Page 108 Keep this Instruction Manual for future use. Store in the Instruction Manual Storage Slot in Car Seat Base. LI19USA1 Liing Instruction Manual WARNING • Read and understand all information and instructions on product labels and in this manual and in your vehicle owner’s manual before installing or using this car seat/infant carrier.
Need help?
Do you have a question about the Liing and is the answer not in the manual?
Questions and answers