Table of Contents
Advertisement
8 267830 001221
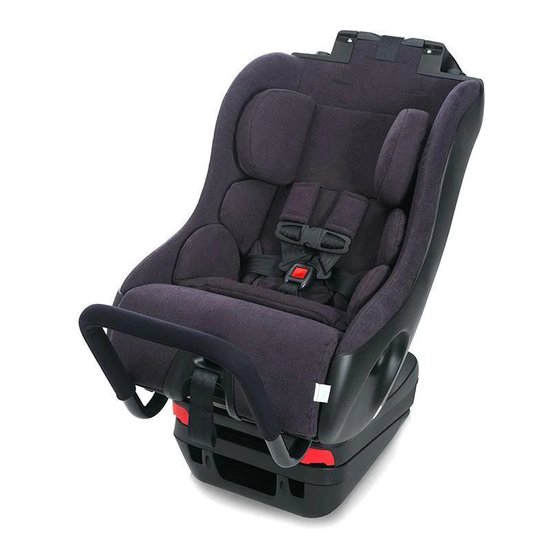
Infant-thingy Instruction Manual
Infant Insert for use with Clek Foonf and Fllo Car Seats
IMPORTANT: This is only a checklist — you must read and understand
all of the warnings and instructions provided with your Clek car seat
and in this manual before installing or using this Infant Insert.
Checklist for Proper Use
√ Infant weighs between 5 and 22 lb (2.3 and 10 kg) and is
between 19 and 33 in. (48 and 85 cm) tall.
√ Car Seat is properly installed Rear-Facing at maximum
recline according to the car seat instruction manual.
√ Crotch Strap is properly adjusted to the car seat's rear
Crotch Strap Slot position and inserted through Crotch
Buckle Slot in Body Support.
√ Shoulder Harness Straps are through Shoulder Harness
Slots closest to and at or below the shoulder of the child
OR adjusted to the lowest Shoulder Harness Slots if infant's
shoulders are below the lowest Shoulder Harness Slots.
√ Head Support Attachment Tabs are secured through 3rd
set of Shoulder Harness Slots above the Shoulder Harness
Straps.
D02-1603-A1
WEIGHT
HEIGHT
5 – 22 lb
19 – 33 in.
(2.3 – 10 kg)
(48 – 85 cm)
February2015
i
Advertisement
Table of Contents

Related Manuals for Clek Infant-Thingy


Summary of Contents for Clek Infant-Thingy
- Page 1 Infant Insert for use with Clek Foonf and Fllo Car Seats IMPORTANT: This is only a checklist — you must read and understand all of the warnings and instructions provided with your Clek car seat and in this manual before installing or using this Infant Insert.
-
Page 2: Infant-Thingy Features
√ Harness is snugly adjusted on child and buckled. √ Body Support is used if child’s weight is less than 11 lb (5 kg) or if the car seat Headrest is used. Infant-thingy Features 1 Head Support 2 Head Support Attachment Tabs... -
Page 3: Table Of Contents
Table of Contents Checklist for Proper Use ..................i Infant-thingy Features ..................ii Warnings ......................2 Adjusting Car Seat to Install Insert ................. 5 Remove Headrest ..................5 Crotch Strap Adjustment ................7 Shoulder Harness Adjustment ............... 10 Shoulder Harness Slot Selection ............. 10 Shoulder Harness Height Adjustment ............ -
Page 4: Warnings
WARNING – DEATH or SERIOUS INJURY can occur Failure to properly install or use this insert or follow these warnings and instructions, the instructions provided with your car seat, and the information on the car seat’s labels can result in serious injury or death of the child in a sharp turn, sudden stop, or crash. - Page 5 WARNING – DEATH or SERIOUS INJURY can occur (continued) • Use only with Clek Foonf or Fllo convertible car seats. • Always install car seat in the most reclined position provided on the car seat labels to protect an infant’s airway. A seat too upright could result in an infant’s head falling forward, which could restrict their ability to breath.
- Page 6 WARNING – DEATH or SERIOUS INJURY can occur (continued) • Never use additional padding behind or under infant. Extra padding or bulky clothing may prevent the Harness from being properly adjusted which may increase the risk of injury in a crash or sudden stop. •...
-
Page 7: Adjusting Car Seat To Install Insert
Adjusting Car Seat to Install Insert Remove Headrest (when Head Support will be used) NOTE: Car seat ships with Headrest already removed. WARNING – DEATH or SERIOUS INJURY can occur • Either the Head Support or car seat Headrest MUST be used at all times. NEVER use the Head Support and car seat Headrest at the same time. - Page 8 Step 1 Locate the Troubleshooting Tool behind the manual on the back of the car seat, as shown in Figure 1. Step 2 Figure 1 Raise Headrest to highest position by pressing and holding Headrest Adjuster button while lifting up on Headrest. Step 3 Insert trouble shooting tool into the small hole in the front of the Headrest Guide on the...
-
Page 9: Crotch Strap Adjustment
Crotch Strap Adjustment (Car Seat) WARNING — DEATH or SERIOUS INJURY can occur • Use only the car seat’s rear Crotch Strap Slot when using Body Support. • NEVER use the longer Crotch Strap length in the rear Crotch Strap Slot when not using the Body Support. - Page 10 To move the Crotch Strap from the forward Crotch Strap Slot to the rear Crotch Strap Slot: • Slide the belt to one side of the Crotch Strap Slot and push the edge of the belt into the adjustment slot as shown in Figure 4 Figure 4.
- Page 11 • Select the longer Crotch Strap length and slide the Crotch Strap into the rear Crotch Strap Slot as shown in Figure 9, ensuring that the red release button on the buckle faces out of the seat as shown in Figure 10. Step 3 Figure 9 Figure 10...
-
Page 12: Shoulder Harness Adjustment
Shoulder Harness Adjustment WARNING — DEATH or SERIOUS INJURY can occur • To prevent loose harness and risk of ejection in a crash: – Loops at the end of the Shoulder Harness Straps must be properly attached to the Metal Harness Plate. –... -
Page 13: Shoulder Harness Height Adjustment
Step 2 Place the child in seat and determine the Shoulder Harness Slots at or just below and closest to the shoulders of your child as shown in Figure 12. NOTE: If child’s shoulders are lower than the lowest Shoulder Harness Slots, adjust Shoulder Harness Straps to the Figure 12 lowest Shoulder Harness Slots. - Page 14 Step 2 Remove Top Tether from storage: Remove car seat Instruction Manual and Tether Belt from back of seat. Pull in and hold retention spring on Tether Hook, then remove Figure 14 hook from storage bar as shown in Figure 14. Step 3 Remove Shoulder Harness Access Panel from back of car seat:...
-
Page 15: Shoulder Harness Rethreading
SHOULDER HARNESS RETHREADING Step 1 Check that Harness Straps are not twisted and, from front of seat, insert Shoulder Harness Straps through the chosen Shoulder Harness Slots as shown in Figure 17. Straps MUST go through the Shoulder Harness Slots at the same height on each side. -
Page 16: To Shorten The Shoulder Harness Webbing
TO SHORTEN THE SHOULDER HARNESS WEBBING For newborns and smaller infants: to make the Harness shorter, attach the Metal Harness Plate to the loop further in from the end of the Shoulder Harness Strap as shown in Figure 20. Check that both Shoulder Harness Straps are Figure 20 attached to the Metal Harness Plate on the same loop while ensuring that each Shoulder... - Page 17 Step 4 Reattach Shoulder Harness Access Panel to back of car seat: • Insert the access panel and twist the access panel lock clockwise as shown in Figure 22 Figure 22. Step 5 Hook Tether Hook around storage bar as shown in Figure 23, fold the Top Tether Belt and insert into Tether Storage.
-
Page 18: Installing/Removing Body Support
Installing/Removing Body Support WARNING — DEATH or SERIOUS INJURY can occur • Always use Buckle Pad with Infant Insert. • Body Support MUST be used with children: – who weigh 11 lb (5 kg) or less. – who must use the Car Seat Headrest but who weigh less than 14 lb (6.4 kg) or whose height is less than 25 in. - Page 19 Step 3 Position each Harness Strap so that the Harness is in front of the Body Support. Check that the Harness Hip Straps come through the space between the Hip Support and Thigh Support sections of the Body Support, as shown in Figure 25. Pull forward on Harness Straps to remove any excess harness webbing between the car seat and the Body Support.
-
Page 20: Removing Body Support
Removing Body Support Step 1 Remove Buckle Pad from Crotch Strap. Step 2 Loosen Harness and set each Harness Strap to the side. Step 3 Remove Body Support from seating area. IMPORTANT: It may be necessary to adjust Harness height and/or Crotch Strap position or Crotch Strap length after removing Body Support. -
Page 21: Installing/Removing Head Support
Installing/Removing Head Support WARNING — DEATH or SERIOUS INJURY can occur • Either the Head Support or car seat Headrest MUST be used at all times. • The Head Support must be used until the child weighs at least 14 lb (6.4 kg) AND is at least 25 in. -
Page 22: Installing Head Support
Installing Head Support Step 1 Remove Top Tether from storage: Remove car seat Instruction Manual and Tether Belt from back of seat. Pull in and hold retention spring on Tether Hook, then remove Figure 27 hook from storage bar as shown in Figure 27. Step 2 Remove Shoulder Harness Access Panel from back of car seat:... - Page 23 Step 3 Locate the third set of Shoulder Harness Slots above the Shoulder Harness Straps and position the Head Support above the Body Support so that the Head Support Attachment Tabs are facing the car seat. Insert each Head Support Attachment Tab through the third Shoulder Harness Slot above each Shoulder Harness Strap by inserting the narrow side of Attachment Tab through the...
-
Page 24: Removing Head Support
Step 4 Reattach Shoulder Harness Access Panel: Insert the access panel and twist the access panel lock clockwise as shown in Figure 31. Figure 31 Step 5 Store the Top Tether by attaching Tether Hook around storage bar as shown in Figure 32, fold Top Tether belt and insert into Tether Storage. - Page 25 Step 2 Remove Shoulder Harness Access Panel from back of car seat: Twist the access panel lock counter-clockwise and pull to remove as shown in Figure 34. Figure 34 Step 3 From back of seat, insert narrow end of each Head Support Attachment Tab through each Harness Slot and continue to push each Attachment Tab through to front of seat as...
- Page 26 Step 7 Install car seat Headrest by inserting the Headrest support rods into the Headrest guides in the top of the seat back as shown in Figure 38 and pushing the headrest down until it locks into position. IMPORTANT: Car seat Headrest MUST be installed when Head Support is not in use.
-
Page 27: Care And Cleaning
Care and Cleaning Step 1 If the spot has dried, try lightly brushing or scraping off the residue. Wipe surface with water. Step 2 If a spot still remains, apply a mild detergent to fabric with a light mist. Step 3 Work area using soft brush or edge of spoon from outside of spot towards the middle. -
Page 28: Instruction Manual Storage
Clek, para lo cual llame al 1-866-656-2462 o envíe un mensaje de correo electrónico a customerservice@clekinc.com. También puede descargar una copia del manual de instrucciones de Foonf en español por Internet en http://clekinc.com/pdfs/infant-thingy_...
Need help?
Do you have a question about the Infant-Thingy and is the answer not in the manual?
Questions and answers