Table of Contents
Advertisement
Quick Links
000002
0
8
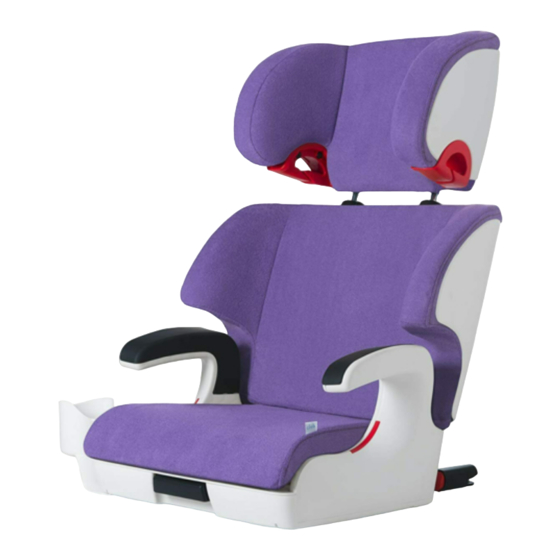
Oobr Instruction Manual
This belt-positioning booster seat (booster seat) is designed for use in either full back mode
or backless mode by children who meet all of the following requirements:
• READ AND UNDERSTAND PRODUCT LABELS AND ALL INSTRUCTIONS IN THIS
MANUAL AND IN YOUR VEHICLE OWNER'S MANUAL BEFORE INSTALLING OR
USING THIS BOOSTER SEAT.
• FAILURE TO PROPERLY INSTALL OR USE THIS BOOSTER SEAT OR FOLLOW THESE
WARNINGS AND THOSE ON THIS BOOSTER SEAT'S LABELS CAN RESULT IN
SERIOUS INJURY OR DEATH TO THE CHILD IN A SHARP TURN, SUDDEN STOP
OR CRASH.
C8AM-70900- M1
38–57 in.
96–145 cm.
38–57 in.
96–145 cm.
40–57 in.
101–145 cm.
40–57 in.
101–145 cm.
WARNING
33–100 lbs.
min. 3
15–45 kg.
years
33–100 lbs.
min. 3
15–45 kg.
years
min.
40–100 lbs.
4
18–45 kg.
years
40–100 lbs.
min.
4
18–45 kg.
years
Advertisement
Table of Contents

Related Manuals for Clek Oobr


Summary of Contents for Clek Oobr
- Page 1 000002 Oobr Instruction Manual This belt-positioning booster seat (booster seat) is designed for use in either full back mode or backless mode by children who meet all of the following requirements: 38–57 in. 33–100 lbs. min. 3 96–145 cm. 15–45 kg.
-
Page 2: Checklist For Proper Use
Checklist for Proper Use When Using This Booster Seat in Backless Mode (without Seat Back) IMPORTANT: This is only a checklist — you must read and understand all of the warnings and instructions on this booster seat’s labels and in this manual before installing or using √... -
Page 3: Table Of Contents
Magna Marque International Inc. Removing Booster Seat in Full Back Mode When Using LATCH Connectors ... 25 use and maintenance of this product, Attn: Clek Customer Service Installing Booster Seat in Backless Mode When Using LATCH Connectors ..... 26 please contact us at: 455 Magna Drive Removing Booster Seat in Backless Mode When Using LATCH Connectors .... -
Page 4: Booster Seat Features
REGISTER THIS RESTRAINT (BOOSTER SEAT) TO BE REACHED IN A RECALL. 13 Seat Base Armrests Seat Back Release Strap (to remove Seat Back for backless mode) Oobr Model Name: ___________________________________________________________________ Seat Back (for full back mode) Serial Number: __________________________________________________________________ Headrest... -
Page 5: Registering Your Booster Seat
Warnings Registering Your Booster Seat Please fill in the information on the previous page for your records. The model name, serial number and manufacturing date can be found on a label affixed to the underside WARNING — DEATH or of this booster Seat Base. SERIOUS INJURY can occur Fill out the prepaid registration postcard attached to the seat and mail it today. - Page 6 WARNING — DEATH or WARNING — DEATH or SERIOUS INJURY can occur (continued) SERIOUS INJURY can occur (continued) • NEVER USE WITH ONLY A LAp BELT TO RESTRAIN A CHILD IN THIS BOOSTER • DO NOT USE ACCESSORIES OR pARTS WITH THIS BOOSTER SEAT OTHER SEAT. USE WITHOUT A LAP AND SHOULDER BELT CAN RESULT IN SERIOUS THAN THOSE PROVIDED BY MAGNA MARQUE INTERNATIONAL. USE OF INJURY OR DEATH.
-
Page 7: Certification
Certification Size & Age Limitations • This booster seat conforms to all applicable Federal Motor Vehicle Safety Standards WARNING and is certified for use in motor vehicles. • This booster seat is not certified for aircraft use because aircraft seats DO NOT have shoulder belts. • FAILURE TO CHOOSE THE CORRECT BOOSTER SEAT MODE (FULL BACK OR BACKLESS) FOR YOUR CHILD’S HEIGHT AND WEIGHT MAY INCREASE THE RISK OF INJURY OR DEATH. The child MUST meet ALL of the following requirements on page 10 through page 12 to use this booster seat: When Using This Booster Seat in Full Back Mode (with Seat Back) -
Page 8: When Using This Booster Seat In Backless Mode (Without Seat Back)
When Using This Booster Seat in Backless Mode • The tops of the child’s ears MUST be below the top of this booster seat’s Headrest, as shown in Figure 1. If the (without Seat Back) tops of the ears are above the top of this booster seat’s Headrest in the highest adjustment position, your child is too large for using this booster seat in full back mode. -
Page 9: Vehicle Information
• IMpROpER pLACEMENT OF THIS BOOSTER SEAT IN YOUR VEHICLE INCREASES behind the vehicle seat. The Clek booster seat has been THE RISK OF SERIOUS INJURY OR DEATH. SOME SEATING pOSITIONS IN designed to attach securely to only the vehicle’s LATCH YOUR VEHICLE MAY NOT BE SAFE FOR THIS BOOSTER SEAT. -
Page 10: Vehicle Seat Belt Requirements
Install this booster seat only on vehicle seats that face forward. NEVER install this booster UNSAFE VEHICLE SEAT BELT SYSTEMS seat on vehicle seats facing sideways or backwards, as shown in Figure 7. DO NOT USE ANY OF THE FOLLOWING VEHICLE SEAT BELT SYSTEMS WITH THIS BOOSTER SEAT: • NEVER use a lap-only belt, as shown in Figure 8. -
Page 11: Installing/Removing Booster Seat Using Latch Connectors
Installing/Removing Booster Seat Installing Booster Seat in Full Back Mode When Using LATCH Connectors Using LATCH Connectors To install Seat Back, see “Installing/Removing Seat Back” IMPORTANT: This booster seat is designed to be used with the vehicle’s LATCH section of this manual on page 53. Anchorage System. - Page 12 To connect to lower anchors, pull and hold WARNING Recline Handle on front of booster Seat Base and pull LATCH Connectors out , as shown in Figure 14. Release Recline Handle. • DO NOT USE THE LATCH CONNECTORS TO SECURE THIS BOOSTER SEAT TO THE VEHICLE’S LATCH ANCHORAGE SYSTEM IF THE SEAT BELT OR SEAT BELT BUCKLE IS NOT EASILY ACCESSIBLE WITH THIS BOOSTER SEAT LATCHED IN pLACE OR IF THE VEHICLE SEAT BELT BUCKLE IS LOCATED IN BETWEEN THE LATCH ANCHORS, AS SHOWN IN FIGURE 12.
- Page 13 See “Installing Booster Seat in Full Back Mode WITHOUT Using on the front of the booster Seat Base LATCH Connectors” section of this manual on page 34. Please notify Clek Customer and push the booster Seat Back towards Service if the LATCH Connectors fail to latch by calling 1-866-656-2462.
-
Page 14: Adjusting The Seat Back Recline
ADJUSTING THE SEAT BACk RECLINE (FULL BACk MODE WHEN USING LATCH To adjust to reclined position, pull on the Recline Handle CONNECTORS ONLY): located on the front of the Seat Base and slide this booster seat towards you to the desired recline position, as shown in Figure 20. -
Page 15: Removing Booster Seat In Full Back Mode When Using Latch Connectors
Removing Booster Seat in Full Back Mode Installing Booster Seat in Backless Mode When Using LATCH Connectors When Using Latch Connectors Step 1. WARNING Pull on the Recline Handle located on the front of the booster Seat Base and slide this booster seat towards you exposing the LATCH Connectors , as shown • WHEN IN BACKLESS MODE, THE BACK OF THIS BOOSTER SEAT BASE MUST... - Page 16 Locate the LATCH lower anchors, as shown in Figure 25. See “Vehicle Child Restraint Anchorage System (LATCH)” section of this manual on page 13 or refer to your vehicle WARNING owner’s manual. • DO NOT USE LATCH CONNECTORS TO SECURE THIS BOOSTER SEAT TO THE VEHICLE’S LATCH ANCHORAGE SYSTEM IF THE SEAT BELT OR SEAT BELT BUCKLE IS NOT EASILY ACCESSIBLE WITH THIS BOOSTER SEAT LATCHED IN pLACE OR IF THE VEHICLE SEAT BELT BUCKLE IS LOCATED IN BETWEEN THE LATCH ANCHORS, AS SHOWN IN FIGURE 26.
- Page 17 To connect to lower anchors, pull and hold Recline Handle on front of booster Seat Base IMPORTANT: If LATCH Connectors fail to connect to the LATCH lower anchors, you can and pull LATCH Connectors out , as shown in Figure 28. still use this seat.
-
Page 18: Removing Booster Seat In Backless Mode When Using Latch Connectors
Removing Booster Seat in Backless Mode Step 4. When Using LATCH Connectors Complete installation by adjusting this booster seat so the back of this booster seat contacts the front of the vehicle Step 1. seat back, as shown in Figure 30. Pull on the Recline Handle located on the front of this booster Seat Base and slide this booster seat towards you exposing... -
Page 19: Installing Booster Seat Without Using Latch Connectors
Installing Booster Seat WITHOUT Installing Booster Seat in Full Back Mode WITHOUT Using LATCH Connectors Using LATCH Connectors To install Seat Back, see “Installing/Removing Seat Back” section of this manual on page 53. WARNING Step 1. Select a forward-facing vehicle seating location, which has • FAILURE TO pROpERLY INSTALL OR USE THIS BOOSTER SEAT INCREASES THE a lap and shoulder belt. -
Page 20: Installing Booster Seat In Backless Mode Without Using Latch Connectors
Installing Booster Seat in Backless Mode Step 2. WITHOUT Using LATCH Connectors Center this booster seat on the vehicle seat and position this booster seat firmly against seat back with LATCH Connectors tucked into the crease between the vehicle seat back and vehicle seat cushion. To remove Seat Back, see “Installing/Removing Seat Back”... -
Page 21: Securing Your Child In Booster Seat
Securing Your Child in Booster Seat Step 2. Center this booster seat on the vehicle seat and position this booster seat firmly against seat back with LATCH Connectors tucked into the crease between the vehicle WARNING seat back and vehicle seat cushion. • USE ONLY A VEHICLE’S LAp AND SHOULDER BELT SYSTEM WHEN Step 3. -
Page 22: When Using Booster Seat In Full Back Mode (With Seat Back)
When Using Booster Seat in Full Back Mode Step 1. (with Seat Back): The child MUST sit in this booster seat with their back flat against the Seat Back, as shown in Figure 41. 38–57 in. 33–100 lbs. min. 3 96–145 cm. - Page 23 Step 3. Step 5. Pull the lap and shoulder belt over the Adjust Headrest height. child while positioning BOTH the lap and The bottom of the Shoulder Belt Guide should be at shoulder belt underneath the Armrest on or above the top of the child’s shoulders, as shown in the vehicle seat belt buckle side and buckle Figure 45.
- Page 24 Step 6. IMPORTANT: If the shoulder belt is off the child’s shoulder, not centered on the child’s chest, or the ears are above the top of the headrest in the highest adjustment position, then your Pull on shoulder belt to remove all slack out of the lap and child is too large to use this booster seat in full back mode.
-
Page 25: Adjusting The Headrest
DO NOT use with the vehicle shoulder ADJUSTING THE HEADREST: belt touching the child’s neck, as shown in Figure 52, or face, as shown in Step 1. Figure 53. With child sitting in this booster seat, have your child lean forward. Step 2. -
Page 26: When Using Booster Seat In Backless Mode (Without Seat Back)
When Using Booster Seat in Backless Mode Step 1. (without Seat Back): The child MUST sit in this booster seat with their back flat against the vehicle seat back, as shown in Figure 56. 40–57 in. 40–100 lbs. min. 101–145 cm. 18–45 kg. - Page 27 Step 3. Step 5. Position the lap belt underneath the Armrest Pull on the shoulder belt to remove all slack out of the lap on the side opposite the vehicle seat belt and shoulder belt and snugly adjust the vehicle seat belt buckle, as shown in Figure 58.
- Page 28 IMPORTANT: If the shoulder belt is off the child’s shoulder, not centered on the child’s • DO NOT use with the vehicle shoulder belt touching the child’s neck, as shown chest, or the ears are above the top of the vehicle seat back or headrest in the highest in Figure 65, or face, as shown in Figure 66, or off their shoulder, as shown in adjustment position, then your child is too large to use this booster seat in backless mode.
-
Page 29: Installing/Removing Seat Back
Installing/Removing Seat Back To Install the Seat Back: Step 1. Facing the back of the Seat Base, align the To Remove the Seat Back: Seat Back legs in the openings in the Seat Step 1. Base behind the Armrests, as shown in Figure 71. -
Page 30: Installing/Removing Cup Holder (Drink-Thingy ™ )
Step 3. Installing/Removing Press the left leg into the Seat Back lock Cup Holder (drink-thingy ™ (listen for audible click), as shown in Figure 73. To Install Cup Holder (drink-thingy ™ Step 1. Remove Seat Cushion from Seat Base and set Seat Cushion to side. -
Page 31: Instruction Manual Storage
Care & Cleaning To Remove Cup Holder (drink-thingy ™ Step 1. Remove Seat Cushion from Seat Base and set Seat Cushion to side. (See section titled Removing/Installing Seat Cushion & Seat Cushion Cover “Removing/Installing Seat Cushion & Seat Cushion Cover,” on page 58.) Step 2. - Page 32 Step 4. To Install Seat Cushion Cover: Turn Seat Cushion over to locate the Step 1. Seat Cushion Cover attachments, Place Seat Cushion Cover on a flat surface as shown in Figure 81. with Seat Cushion Cover attachments facing up, as shown in Figure 84.
-
Page 33: Washing Instructions
Washing Instructions To Install Seat Cushion: Step 1. SEAT CUSHION COVER WASHING INSTRUCTIONS Place Seat Cushion onto top surface of Seat Base. Step 1. Once the Seat Cushion Cover is removed, set the foam pad aside. DO NOT wash Step 2. foam pad. -
Page 34: Seat Back Cover & Headrest Cover Fabric Washing Instructions
SEAT BACk COVER & HEADREST COVER FABRIC WASHING INSTRUCTIONS SEAT FRAME (ExTERIOR PLASTICS ONLY) WASHING INSTRUCTIONS IMPORTANT: The booster Seat Back Cover and Headrest Cover are not removable Use a soft cloth with warm water and soap. Apply light pressure with cloth in small for washing. -
Page 35: Warranty
Warranty Warranty Limitations This warranty does not cover the effects of normal wear and tear or damage resulting Limited Warranty from negligence, modification, improper installation, accidents, misuse or abuse of this product. It is expressly agreed that the obligations of Magna Marque International Inc. and the original consumer purchaser’s remedies under the limited warranty contained Magna Marque International Inc. -
Page 36: Aurora, Ontario Canada
Keep this Instruction Manual for future use. Store in compartment on bottom of this booster seat. w w w.magnaclek.com Magna Marque International Inc. 455 Magna Drive Aurora, Ontario Canada L4G 7A9 1-866-656-2462...
Need help?
Do you have a question about the Oobr and is the answer not in the manual?
Questions and answers