Advertisement
Youshiko YC9460 WiFi Weather Station
Technical Data and Features
Base station:
Perpetual Calendar Up to Year 2099
Day of week in 8 languages user selectable: English, German, Italian, French, Spanish, Dutch, Danish
and Russian
Time in optional 12 / 24 hour format.
Automatic calibration of network ( Internet ) time service
Barometric pressure:
— Air pressure data source network
— Pressure alternatively in hPa/mb or inHg or mmHg
Wind speed and direction:
—Wind speed and direction data source network
—Wind speed alternatively in km/h or Mph
Indoor humidity measurable range: 20%RH to 95%RH
Indoor temperature:
— Temperature measurement ranges:-20°C to 60°C or(-4°F to 140°F)
— Temperature alternatively in °C or °F.
Minimum/maximum display for humidity and temperature
Feels like temperature data source via internet.
The future weather forecast and temperature report function, weather forecast information provided by the
network
Connects directly to Wi-Fi network
Power Supply:
Battery: 2 x LR6 AA ( not included )
Mains adapter: DC5V 1.2A ( Included )
Wireless Outdoor Sensor:
— Outdoor temperature measurement ranges: -40°C (-4°F) ~ 70°C (158°F)
— Outdoor measurable range: 20%RH to 95%RH
— Data transmission frequency: 433 MHz
— Wireless range: max. 60 m (open area)
— Batteries: 2 x LR06 (UM-3), 1.5 V (size AA) ( not included )
— Protection class: IPX4
Advertisement
Table of Contents

Subscribe to Our Youtube Channel
Related Manuals for Youshiko YC9460


Summary of Contents for Youshiko YC9460
- Page 1 Youshiko YC9460 WiFi Weather Station Technical Data and Features Base station: Perpetual Calendar Up to Year 2099 Day of week in 8 languages user selectable: English, German, Italian, French, Spanish, Dutch, Danish and Russian Time in optional 12 / 24 hour format.
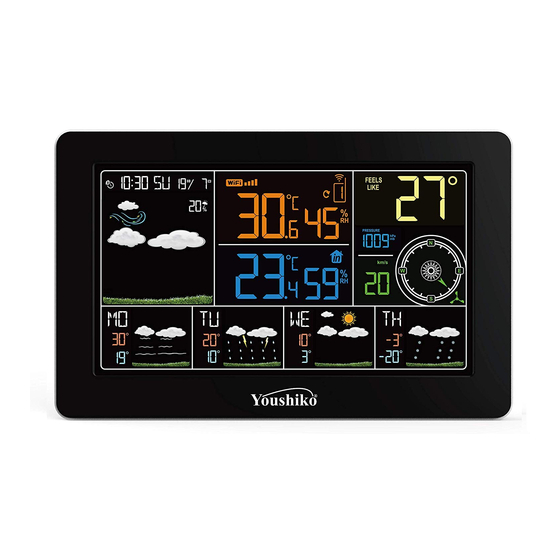
- Page 2 Base station Appearance:...
- Page 3 Part A-Positive LCD A1: Network Time icon A2: Time A3: Week for today A4: Calendar A5: ALARM icon A6: WIFI icon A7: Indoor Temperature A8: Outdoor Temperature A9: Indoor Humidity A10: Remote wireless channel A11: Outdoor Humidity A12: Feels Like Temperature A13: Barometric pressure A14: Wind Direction A15: Wind Speed...
- Page 4 Part C –Wireless Outdoor Sensor: C1: LCD display – Temperature C2: LCD display – Humidity C3: Transmit signal LED C4: “°C/°F” button C5: “TX” button C6: Channel selector switch C7: Battery compartment...
-
Page 5: Initial Operation
Initial operation: Insert required batteries observing polarity [ “+” and “–“ marks] in Wireless Outdoor Sensor , Select the Channel no: 1 or set the correct channel as per your requirement. When you insert the batteries, all the icon on the LCD display will briefly light up for 3 seconds, the Wireless Outdoor Sensor began to switch to the normal working mode, to detect the temperature and humidity in the environment . - Page 6 User registration: After downloading the APP, open APP, Please register yourself with a valid email and password of your choice, the program will jump out of a registration interface, Registration shown below, after registration is completed ( You must activate your password in your mail Box / It may take time to receive the email in your mailbox , so please wait ) and you must do the account activation.
- Page 7 After confirming the base station enters the AP mode, click "NEXT" on the APP interface, And according to the prompt click the prompt box, will automatically jump to the system's WI-FI settings, select the WI-FI network "LivingSmart" and confirm the completion of the connection. Please note: base unit picture showing in APP or in this user manual may be different to your weather station Then return to the APP interface and select the WIFI link named "LivingSmart"...
-
Page 8: Manual Time Setting
The Base Station will now start to make a connection to the outdoor remote sensor. This operation takes about 3 minutes and is displayed by a flashing reception RF antenna symbol “ ” in the “OUTDOOR” display area on the receiver. the “OUTDOOR” display area will show an animation of the RF antenna symbol, indicating the base station is searching for the signal from the outdoor sensor. - Page 9 Press “ ” to confirm your setting, the Time zones start to flash, Now use “ ” and “ ” buttons set a correct time zone (-12 to +12). Press “ ” to confirm your setting, the Hour display starts to flash. Now use “ ”...
-
Page 10: Switching Off The Alarm Signal
and “ ”buttons to set the required hour. Press “ ” button to confirm your setting, the Minute display starts to flash. Use the “ ” and “ ” buttons to set the required minute. Press “ ” button to confirm your setting, the snooze time of the Alarm starts to flash. Use the “ ”... -
Page 11: Low Battery
Twice to sow the minimum temperature and humidity values. Three times to return to the current temperature and humidity levels. To reset the maximum and minimum temperature and humidity, press and hold down the “MEM” button about 2 seconds. This will reset all minimum and maximum data recorded to the current displayed values. F.Y.I.: ... - Page 12 Weather forecast icon that can be displayed on the base station: sunny Mostly sunny Partly cloudy Mostly cloudy Cloudy Patchy Rain Mostly Rain Showers Heavy Rain Thunder Rain Rain and Hail Hail Snow and Hail Patchy Snow Mostly Snow Snow shower Heavy Snow Rain and Snow...
- Page 13 APP interface specification: Front page data display: < home page data display _1> < home page data display _2> D1: Main menu bar D2: Data Refresh D3: Location City D4: Temperature and humidity data of main equipment and weather today D5: Quick setting of temperature and D6: Feel Like humidity alert for main equipment...
- Page 14 Display Interface> , You can choose to view the data chart of the base station or wireless remote sensor Click on the "Daily", "Weekly" and "Monthly" boxes above the < Data Display Interface >, and you can choose to view the daily, weekly and monthly data charts, Slide the screen to the left or right to view data charts at different times.
- Page 15 Data chart presentation – Weekly...
- Page 16 Data chart presentation – Monthly Temperature and humidity alert setting Click on the "D5" in the home page, you can quickly enter the temperature and humidity alert settings interface of the main equipment. Set up wireless sensor for temperature and humidity alert, click on the channel selected by “D8”, and then click “D11”, quickly enter the wireless sensor temperature and humidity alarm interface to set the channel.
- Page 17 Temperature and humidity alert Temperature and humidity alert setting for main equipment settings for wireless device Temperature and humidity alert Temperature and humidity alarm setup is complete, click on the " √ " after the confirmation, the base station next time you open WI-F, will automatically set. When the base station activates the temperature or humidity alarm, It sends an alarm message to APP immediately.
- Page 18 Menu description Click on the “D1”in the home page, and the left side will slide out of the main menu, Click on the area or function block of the icon, which corresponds to the function settings of the table below. E1: Access device management E2: Change account password E3: Location City...
- Page 19 Please do not dispose of old electronic devices and empty batteries in household waste. To protect the environment, take them to your retail store or to appropriate collection sites according to national or local recycling centre. All enquires: service@youshiko.co.uk...
Need help?
Do you have a question about the YC9460 and is the answer not in the manual?
Questions and answers