Advertisement
Advertisement
Table of Contents

Related Manuals for Equinox Systems Fusion 200 Zoom Spot


Summary of Contents for Equinox Systems Fusion 200 Zoom Spot
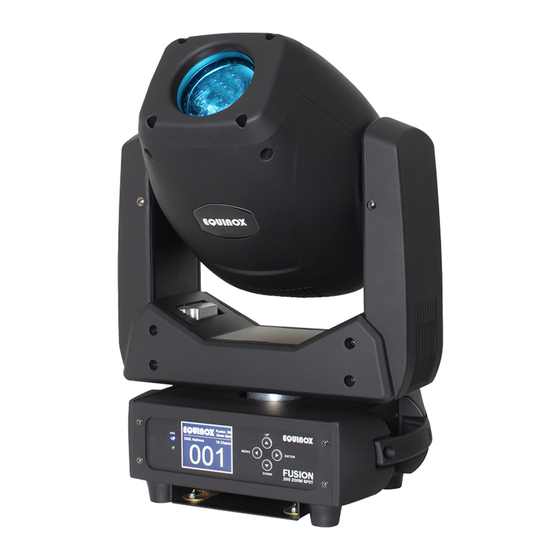
- Page 1 Fusion 200 Zoom Spot User Manual Order code: EQLED054...
-
Page 2: Safety Advice
Incorrect operation may lead to danger e.g: short-circuit, burns and electric shocks etc. Do not endanger your own safety and the safety of others! Incorrect installation or use can cause serious damage to people and/or property. www.prolight.co.uk Fusion 200 Zoom Spot User Manual... - Page 3 CAUTION! The maximum ambient temperature (Ta) of 40° must not be exceeded. CAUTION! If the lens gets damaged ie. cracks or deep scratches so the output is impaired then it must be replaced. www.prolight.co.uk Fusion 200 Zoom Spot User Manual...
- Page 4 6975 4464 Power consumption 240W 25° - Lux 39420 9855 4380 2463 1576 Power supply 100~240V, 50/60Hz Fuse F4A 250V 11° 25° Dimensions 450 x 302 x 200mm Weight 12.7kg Order code EQLED054 www.prolight.co.uk Fusion 200 Zoom Spot User Manual...
-
Page 5: Technical Specifications
Technical specifications 200mm 96mm 302mm 293mm 183mm 274mm www.prolight.co.uk Fusion 200 Zoom Spot User Manual... - Page 6 1 x power cable 02 - Function buttons 05 - PowerCON input 08 - Power switch & 1 x user manual 03 - 3-Pin DMX input 06 - PowerCON output 09 - Carry handles www.prolight.co.uk Fusion 200 Zoom Spot User Manual...
-
Page 7: Installation
The installation should be checked annually by a qualified person. The Equinox Fusion 200 Zoom Spot can be operated in a number of mounting positions as shown in the diagram above, hanging upside-down from the ceiling or truss, mounting sideways on truss or stood upright on a flat level surface. - Page 8 4. Mount the fixture onto your truss system via the clamps and tighten to ensure secure. 5. Pull the safety cable through the safety cable holes located on the metal base plate on the underside of the fixture and around the truss. www.prolight.co.uk Fusion 200 Zoom Spot User Manual...
- Page 9 The LCD control panel situated on the front of the fixture allows the user to access the menu system to adjust the fixtures settings. When the unit has been powered on the display will show “Equinox Fusion 200 Zoom Spot”, “Motor Reset... Please Wait...” whilst the unit performs its motor reset.
- Page 10 “ENTER” button and use the “UP” and “DOWN” buttons to set the required show mode. Press the “ENTER” button to confirm the setting. Show 3 Show 4 is a forward facing show mode. Show 4 www.prolight.co.uk Fusion 200 Zoom Spot User Manual...
-
Page 11: Master/Slave Mode
“Sound Sensitivity” on the LCD display. Now press the “ENTER” button and use the “UP” and “DOWN” buttons to select between “000” and “100”. Press the “ENTER” button to confirm the setting. www.prolight.co.uk Fusion 200 Zoom Spot User Manual... - Page 12 Press the “ENTER” button and use the “UP” and “DOWN” buttons to select between “000” - “255”. Press the “ENTER” button to Strobe confirm the setting. Colour Static Gobo Rotating Gobo Gobo Rotation Focus Prism Prism Rotation Zoom Default www.prolight.co.uk Fusion 200 Zoom Spot User Manual...
- Page 13 “DMX Fail” on the LCD display. Now press the “ENTER” button and use the Show mode “UP” and “DOWN” buttons to choose between “Blackout”, “Hold” or “Show mode”. Press the “ENTER” button to confirm the setting. www.prolight.co.uk Fusion 200 Zoom Spot User Manual...
- Page 14 “UP” and “DOWN” buttons to select “Invert”.Press the “ENTER” button and use the “UP” and “DOWN” buttons to select between “No” and “Yes”. Press the “ENTER” button to confirm the setting. www.prolight.co.uk Fusion 200 Zoom Spot User Manual...
- Page 15 This can be changed manually for home position adjustment. Performing a factory reset will not change these Static Gobo settings. Rotating Gobo Gobo Rotation Focus Prism Prism Rotation Zoom www.prolight.co.uk Fusion 200 Zoom Spot User Manual...
-
Page 16: System Information
“Motor Reset” on the LCD display. Press the “ENTER” button and use the “UP” and “DOWN” buttons to select between “Yes” and “No”. Press the “ENTER” button to perform the motor reset when yes is selected. www.prolight.co.uk Fusion 200 Zoom Spot User Manual... - Page 17 “Factory Reset” on the LCD display. Press the “ENTER” button and use the “UP” and “DOWN” buttons to select between “Yes” and “No”. Press the “ENTER” button to perform the factory reset when yes is selected. www.prolight.co.uk Fusion 200 Zoom Spot User Manual...
- Page 18 Colour scroll CW (fast-slow) 196-199 Colour scroll stop 200-255 Colour scroll CCW (slow-fast) 000-007 Open 008-017 Gobo 1 018-027 Gobo 2 028-037 Gobo 3 038-047 Gobo 4 048-057 Gobo 5 058-067 Gobo 6 068-077 Gobo 7 www.prolight.co.uk Fusion 200 Zoom Spot User Manual...
- Page 19 181-200 P/T, colour change 138-147 (slow-fast) & gobo change Gobo wheel scroll CW 201-240 No function 148-199 (fast-slow) 241-255 Motor reset (hold 10s) 200-203 Gobo scroll stop Gobo wheel scroll CCW 204-255 (slow-fast) www.prolight.co.uk Fusion 200 Zoom Spot User Manual...
- Page 20 138-147 (slow-fast) 028-037 Gobo 3 Gobo wheel scroll CW 038-047 Gobo 4 148-199 (fast-slow) 048-057 Gobo 5 200-203 Gobo scroll stop 058-067 Gobo 6 Gobo wheel scroll CCW 204-255 068-077 Gobo 7 (slow-fast) www.prolight.co.uk Fusion 200 Zoom Spot User Manual...
- Page 21 Disable BL/O whilst 141-160 gobo change Enable BL/O whilst 161-180 P/T, colour change & gobo change Disable BL/O whilst 181-200 P/T, colour change & gobo change 201-240 No function 241-255 Motor reset (hold 10s) www.prolight.co.uk Fusion 200 Zoom Spot User Manual...
-
Page 22: Dmx Setup
3-Pin: CABL10 – 2m CABL11 – 5m CABL12 – 10m 5-Pin: CABL185 – 2m CABL187 – 5m CABL188 – 10m Also remember that DMX cable must be daisy chained and cannot be split. www.prolight.co.uk Fusion 200 Zoom Spot User Manual... -
Page 23: Line Termination
3-pin XLR (female) Pin 1: GND (screen) Pin 1: GND (screen) Pin 2: Signal (-) Pin 2: Signal (-) Pin 3: Signal (+) Pin 3: Signal (+) Pin 4: N/C Pin 5: N/C www.prolight.co.uk Fusion 200 Zoom Spot User Manual... - Page 24 Please note: Caution should be used when power linking other fixtures to the Fusion 200 Zoom Spot as the power consumption of other fixtures will vary. Fixtures fitted with lamps often require 2/3 times more current on startup, these may require their own power source.
-
Page 25: Weee Notice
Business users should contact their supplier and check the terms and conditions of the purchase contract. This product should not be mixed with other commercial wastes for disposal. www.prolight.co.uk Fusion 200 Zoom Spot User Manual... - Page 26 Fusion 200 Zoom Spot User Manual...
- Page 27 Fusion 200 Zoom Spot User Manual...
- Page 28 www.prolight.co.uk Fusion 260ZR User Manual...
Need help?
Do you have a question about the Fusion 200 Zoom Spot and is the answer not in the manual?
Questions and answers