Table of Contents
Advertisement
Quick Links
Advertisement
Table of Contents

Related Manuals for Stevens AeroModel Fokker D.VII


Summary of Contents for Stevens AeroModel Fokker D.VII
- Page 1 Build Instructions Wing Span: 16.5 inches | Wing Area: 76 square inches | Average Flying Weight: 1.8 ounces Build Instructions - Version 1.12 (revised 10.30.2014) Fokker D.VII UM - Build Instructions © 2014 Stevens AeroModel, all rights reserved.! Page 1...
- Page 2 Build Instructions WARRANTY Stevens AeroModel guarantees this kit to be free from defects in both material and workmanship at the date of purchase. This warranty does not cover any component parts damaged by use or modification. In no case shall Stevens AeroModel’s liability exceed the original cost of the purchased kit. Further, Stevens AeroModel reserves the right to change or modify this warranty without notice.
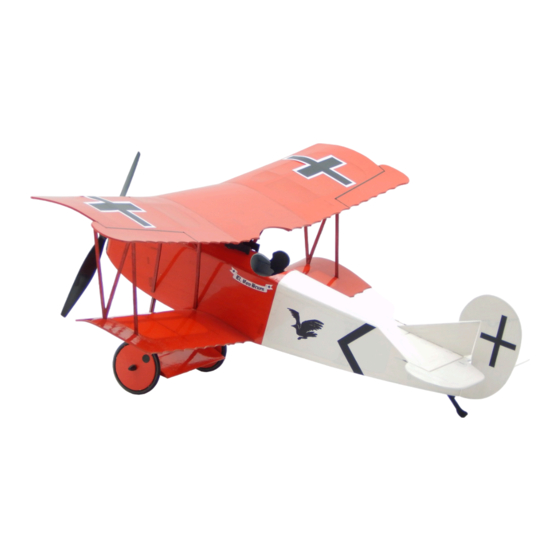
- Page 3 Flown by German aces such as Erich Lowenhart, Ernest Udet, and Herman Goring, among others, the Fokker D.VII earned a reputation as a top fighter aircraft. It was said that the airplane could make a poor pilot good, and a good pilot an ace.
- Page 4 Many of the suggested items listed below are available at your local hobby shop. For your convenience, Stevens AeroModel stocks all the power system components and most of the building supplies required to complete this kit. If you have difficulties sourcing any of these items locally, please visit our website, stevensaero.com to purchase the items necessary to complete your model.
- Page 5 Laser cut sheet wood is available from stevensaero.com for a nominal per/sheet charge. When ordering include the sheet identification given below (example: D-VII_UM-01/10) and quantity required. Please allow 3-5 business days to process replacement sheet order. Fokker D.VII UM - Build Instructions © 2014 Stevens AeroModel, all rights reserved.! Page 5...
- Page 6 Build Instructions Builder’s Notes Fokker D.VII UM - Build Instructions © 2014 Stevens AeroModel, all rights reserved.! Page 6...
- Page 7 Please check our website for updates to these instructions before starting the build. To obtain downloads and updates to this model aircraft kit, please visit the product page at stevensaero.com. Fokker D.VII UM - Build Instructions © 2014 Stevens AeroModel, all rights reserved.! Page 7...
- Page 8 F7, and to the corresponding slot in the fuselage side. The slot in the fuselage side is oversized, and F8 will occupy the front portion of the slot. Do not bond. Fokker D.VII UM - Build Instructions © 2014 Stevens AeroModel, all rights reserved.! Page 8...
- Page 9 Step 1 Step 5 “Bottom” Bottom View Step 2 Step 6 “TOP” Bottom Bottom View Step 3 Step 7 Step 4 Step 8 Bottom View Fokker D.VII UM - Build Instructions © 2014 Stevens AeroModel, all rights reserved.! Page 9...
- Page 10 Fit part F14 (sheet 08/10, 1/8 in. balsa) to the lower set of slots at the top of F13. □ Fit part F15 (sheet 08/10, 1/8 in. balsa) to the next set of slots in F13, immediately above F14. Fokker D.VII UM - Build Instructions © 2014 Stevens AeroModel, all rights reserved.! Page 10...
- Page 11 Build Instructions Step 9 Step 13 Rear View Step 10 Step 14 Rear View Step 11 Step 15 F11b F11a Step 12 Step 16 Fokker D.VII UM - Build Instructions © 2014 Stevens AeroModel, all rights reserved.! Page 11...
- Page 12 Fit F22 (sheet 09/10, 3/16 in. balsa) against F21, with the tabs on F22 resting in the slots in F8. Note: Ensure that the Hook and Loop Tape is facing the top of the fuselage. Fokker D.VII UM - Build Instructions © 2014 Stevens AeroModel, all rights reserved.! Page 12...
-
Page 13: Table Of Contents
Bottom View Step 18 Step 22 Bottom View Step 19 Step 23 Slots Bottom View Bottom View Step 20 Step 24 Bottom View Bottom View Fokker D.VII UM - Build Instructions © 2014 Stevens AeroModel, all rights reserved.! Page 13... - Page 14 If a twist is detected, gently twist the fuselage in the opposite direction until it is straight. “Final bond” the aft end of the fuselage, formers, sides, and bottom with CA. Fokker D.VII UM - Build Instructions © 2014 Stevens AeroModel, all rights reserved.! Page 14...
-
Page 15: Step
Step 29 Bond Bottom View Step 26 Step 30 Bottom View Step 27 Step 31 F28a F28b F28c Step 28 Step 32 Bond Bottom View Fokker D.VII UM - Build Instructions © 2014 Stevens AeroModel, all rights reserved.! Page 15... -
Page 16: Step
These are available at most hobby shops, and in the beauty section of most department stores. Fokker D.VII UM - Build Instructions © 2014 Stevens AeroModel, all rights reserved.! Page 16... -
Page 17: Step
Build Instructions Step 35 Cont. Step 33 Rear View Step 34 Step 36 Bond Step 34 Cont. Step 37 Bond Bond Step 35 Step 38 Fokker D.VII UM - Build Instructions © 2014 Stevens AeroModel, all rights reserved.! Page 17... -
Page 18: Step
The bevelled side of the elevator will now be referred to as the bottom, the un-bevelled side will be referred to as the top. Fokker D.VII UM - Build Instructions © 2014 Stevens AeroModel, all rights reserved.! Page 18... -
Page 19: Step
Step 43 Bottom View Etched Line Step 40 Step 44 Step 41 Step 45 Step 42 Step 46 Top View 45 deg. Right Left Bottom View Fokker D.VII UM - Build Instructions © 2014 Stevens AeroModel, all rights reserved.! Page 19... -
Page 20: Step
Repeat steps 52, 53, and 54 to build the left wing panel, using panel W6(L) (sheet 04/10, 1/20 in. balsa). Fokker D.VII UM - Build Instructions © 2014 Stevens AeroModel, all rights reserved.! Page 20... -
Page 21: Step
Step 48 Step 52 Right Wing Panel W6(R) Bottom View Step 49 Step 53 Bond Bottom View Step 50 Step 54 Top View Bond Tack Fokker D.VII UM - Build Instructions © 2014 Stevens AeroModel, all rights reserved.! Page 21... -
Page 22: Step
Ensure that the angles of the parts match exactly those on the plan. This is critical for proper positioning of the upper wing during final assembly. Fokker D.VII UM - Build Instructions © 2014 Stevens AeroModel, all rights reserved.! Page 22... -
Page 23: Step
Bond Bond Bond Bottom View Step 56 Step 60 Bond W9(R) Bond Bottom View Step 57 Step 61 Bond Front Step 58 Step 62 Front Fokker D.VII UM - Build Instructions © 2014 Stevens AeroModel, all rights reserved.! Page 23... -
Page 24: Step
Starting with full 12 in. lengths of .015 wire, make a snake bend in one end of each push rod. □ Hook the snake bends through the middle hole in each servo tab on the recommended receiver (PKZ3352). Fokker D.VII UM - Build Instructions © 2014 Stevens AeroModel, all rights reserved.! Page 24... -
Page 25: Step
Step 64 Step 68 Jig B Jig A Step 65 Step 69 Jig C “Snake Bend” Jig B Jig A Jig C Step 66 Step 70 Fokker D.VII UM - Build Instructions © 2014 Stevens AeroModel, all rights reserved.! Page 25... -
Page 26: Step
F8, and into the radio compartment. Fit the mounting tabs on the motor to the slots on each side of the opening in the nose. Fokker D.VII UM - Build Instructions © 2014 Stevens AeroModel, all rights reserved.! Page 26... -
Page 27: Step
Step 71 Cont. Step 74 Left Right Remove Spikes Bottom View Step 71 Cont. Step 74 Cont. Remove Humps Left Side Step 72 Step 75 Bottom View Fokker D.VII UM - Build Instructions © 2014 Stevens AeroModel, all rights reserved.! Page 27... - Page 28 CA along the seam between the bottom of the stabilizer and the fuselage. Fokker D.VII UM - Build Instructions © 2014 Stevens AeroModel, all rights reserved.! Page 28...
-
Page 29: Step
Bottom View Step 78 Step 82 Bevelled Side Down Top View Step 79 Step 82 Cont. Right View Tape Bond Bevelled Side Down Bottom View Fokker D.VII UM - Build Instructions © 2014 Stevens AeroModel, all rights reserved.! Page 29... -
Page 30: Step
Fit the machine guns to the slots, and bond with medium CA. Refer to the fuselage side view on the detail sheets for the location of these slots. Fokker D.VII UM - Build Instructions © 2014 Stevens AeroModel, all rights reserved.! Page 30... -
Page 31: Step
Step 84 Step 88 Rudder Right Side Bottom View Bottom View Step 85 Step 89 1/4 in. Bottom View Step 86 Step 90 3/4 in. Fokker D.VII UM - Build Instructions © 2014 Stevens AeroModel, all rights reserved.! Page 31... -
Page 32: Step
The slot for the front struts is just visible on each side of the landing gear pocket. Apply medium CA to the slot, to bond the forward struts (CS1) to the fuselage sides. Fokker D.VII UM - Build Instructions © 2014 Stevens AeroModel, all rights reserved.! Page 32... -
Page 33: Step
Bottom View Bottom View Step 93 Step 97 Bottom View Bond Fully Seated Bottom View Step 94 Step 98 Bottom View Bond Bond Bond Bottom View Fokker D.VII UM - Build Instructions © 2014 Stevens AeroModel, all rights reserved.! Page 33... -
Page 34: Step
This will require that the struts be inserted from the side of the rib, rather than straight down into the rib. “Tack glue” the strut assembly to the rib. Fokker D.VII UM - Build Instructions © 2014 Stevens AeroModel, all rights reserved.! Page 34... -
Page 35: Step
Bond Bottom View Step 101 Step 105 Bottom View Bond Bond Tack Left Side View Step 102 Step 106 Bond Tack Bottom View Bottom View Fokker D.VII UM - Build Instructions © 2014 Stevens AeroModel, all rights reserved.! Page 35... -
Page 36: Step
Note: Do not bond the landing gear wire to the struts, as the landing gear must remain free to flex and absorb the shock of landing. Fokker D.VII UM - Build Instructions © 2014 Stevens AeroModel, all rights reserved.! Page 36... -
Page 37: Step
Bottom View Step 111 Cont. Step 108 Bottom View Bond Bond Bottom View Step 109 Step 112 Bottom View Step 110 Step 113 Bond Bottom View Fokker D.VII UM - Build Instructions © 2014 Stevens AeroModel, all rights reserved.! Page 37... -
Page 38: Step
Complete! Assembly of the Stevens AeroModel Fokker D.VII is now complete. Add details to make this model uniquely yours! Apply right and left pilot decals to profile pilot “P” installed in step 89. Mount the profile pilot within the... - Page 39 Build Instructions Step 114 Complete! Radiator decal Propeller EFL9051 Complete! Complete! Pilot and pilot decal Complete! Fokker D.VII UM - Build Instructions © 2014 Stevens AeroModel, all rights reserved.! Page 39...
- Page 40 Moving the elevator stick forward should move the elevator down. The Fokker D.VII was designed to be a very docile flyer. We set up our flight controls with fairly minimal throws. With the push rods connected, per the instructions in this manual, set the control throws...
- Page 41 Fly the model to a comfortable “1 to 2 mistakes high altitude”, reduce throttle to stop the climb, then trim the model for straight-and-level flight at a comfortable cruise speed. The Fokker D.VII typically cruises at just over one-half throttle.
Need help?
Do you have a question about the Fokker D.VII and is the answer not in the manual?
Questions and answers