
Subscribe to Our Youtube Channel
Related Manuals for Baumer O200


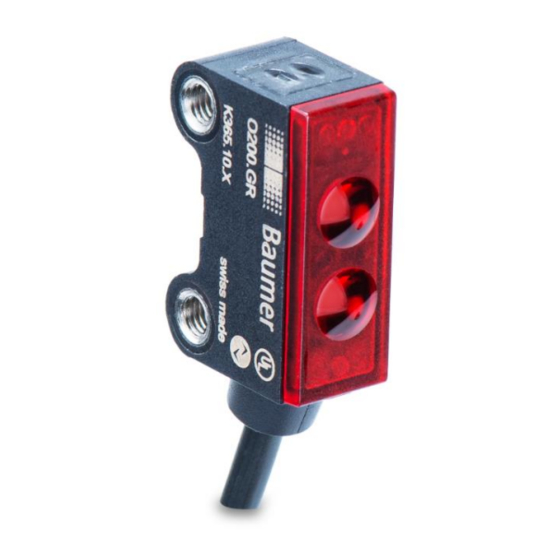
Summary of Contents for Baumer O200
- Page 1 Instruction Manual for O200 Sensors with IO-Link Instruction Manual O200 Sensors with IO-Link...
-
Page 2: Table Of Contents
Teach Channel Selection, TPO & Teach Status ................26 Static ............................. 27 5.2.1 Single Point Mode: 1-Point Teach ....................29 5.2.2 Single Point Mode: 2-Point Teach (Only O200.G, O200.R) ............30 5.2.3 Window Mode: Window Teach (Only O200.G) ................30 Dynamic (Only O200.G, O200.R) ....................31 5.3.1 Dynamic in Single Point Mode ...................... -
Page 3: Sensors Covered By This Manual
This gives them maximum flexibility in the connection solution. As a member of the IO-Link Consortium, Baumer is involved in developing the standard and is one of the first manufacturers to feature the new Smart Sensor Profile 1.1. in its sensors. -
Page 4: Io-Link Communication Mode
Through this data stream, sensors (IO devices) can be parameterized. Additionally this data stream also allows to transmit data for identification and analyzation. The figure below shows the different types of data and their value for the application. Figure 2 Different IO Link data streams en_BA_O200_IO-Link_V1.docx 4/34 Baumer Electric AG 15.08.2018/ Frauenfeld, Switzerland... -
Page 5: Io-Link Device Description (Iodd)
Additionally, the sensors described in this manual can be operated as “adjustable switching sensors (AdSS)” according to the Smart Sensor Profile. When treated as AdSS the sensors-Master communications happens via a fully standardized command set. Thus operation without IODD file is possible. en_BA_O200_IO-Link_V1.docx 5/34 Baumer Electric AG 15.08.2018/ Frauenfeld, Switzerland... -
Page 6: Sensor In The Io-Link Communication Mode
(bottom right). Figure 3 Illustrates the signal path from raw data to an output either through a physical pin (top right) or as output via the process data (bottom right) en_BA_O200_IO-Link_V1.docx 6/34 Baumer Electric AG 15.08.2018/ Frauenfeld, Switzerland... -
Page 7: Process Data
An auto-reset and timefilters are included, to be able to create a full-featured counter being able to count lot sizes without any need to code software on the PLC. See section 4.3.4 to learn how to configure this bit. en_BA_O200_IO-Link_V1.docx 7/34 Baumer Electric AG 15.08.2018/ Frauenfeld, Switzerland... -
Page 8: Process Data-Out
1000 m Means 1000*10 As O200 sensors only provide measuring values where no scale factor is required, the scale factor is set fixed to 0 (zero). Bit 16 to 31: MDC / Measurement Value MDC stands for measurement data channel. Via this channel the distance value or the switch counts of SSC1 or 4 can be read out as 16 bit integer value. -
Page 9: Parameter
Allowed values 0 … 32000 Measurement Intensity measuring value Value.Intensity (Only available for O200.R) 0 … 32000 Measurement The quality value represents the excess gain Value.Quality Value ration in % 100 = Exactly the amount of light needed for a... -
Page 10: Switch Counts
Parameter name Short Description Rights Unit / Allowed values Defines the measuring value which is MDC Selection.Source Intensity (Only O200.R) mapped to the MDC channel for Quality Value availability via the process data-IN Switch Counter SSC1 path. Switch Counter SSC4 MDC Descriptor 4.2.4... -
Page 11: Configuration - Switching Signal Channel (Ssc)
Setpoints SP 4.3.1 Using this parameter the user can modify the switchpoint of the sensor by enter the intensity (O200.R) or distance value (O200.G, O200.S) at which the sensor should switch (teach-by-value function). Figure 4 shows the illustration of the switching behavior. Regarding Single point mode only SP1 is relevant, SP2 is not active. -
Page 12: Ssc Configuration
SSC Configuration 4.3.2 4.3.2.1 Switching Mode Figure 7 Single Point Mode (O200.G, O200.R) Figure 8 Window Mode (Only O200.G) A single setpoint (SP1) is defined at which the The sensor switches withing a range defined by two sensor switches. different setpoints (SP1 and SP2) Figure 9 Single Point Mode SmartReflect (O200.S) - Page 13 4.3.2.3 Hysteresis Alignment Mode (Only O200.G) In case of axial detection tasks like stop trigger or level detection, an accurate switching distance is required. To adapt the switching behavior and the hysteresis to the movement direction of the object, the alignment of the hysteresis can be changed.
- Page 14 Center Aligned 4.3.2.3.3 A compromise between left and right aligned. The hysteresis is aligned symmetrical around the individual setpoints. Figure 16 Center Aligned, Single Point Mode Figure 17 Center Aligned, Window Mode en_BA_O200_IO-Link_V1.docx 14/34 Baumer Electric AG 15.08.2018/ Frauenfeld, Switzerland...
-
Page 15: Timefilter
To optimize the timing of the execution of a subsequent actor triggered by the outssput of the sensor. Figure 18: Response Delay Parameter name Short Description Rights Unit / Allowed values Response Delay.SSC1 Time Sets the response delay time, 0 to 60.000 ms Available for SSC1 and SSC4 en_BA_O200_IO-Link_V1.docx 15/34 Baumer Electric AG 15.08.2018/ Frauenfeld, Switzerland... - Page 16 To detect a unwanted gap size within a continuous flow of products. Figure 19: Release Delay Parameter name Short Description Rights Unit / Allowed values Release Delay.SSC1 Time Sets the release delay time, 0 to 60.000 ms Available for SSC1 and SSC4 en_BA_O200_IO-Link_V1.docx 16/34 Baumer Electric AG 15.08.2018/ Frauenfeld, Switzerland...
- Page 17 Figure 20 Minimum Pulse Duration Parameter name Short Description Rights Unit / Allowed values Minimum Pulse Duration.SSC1 Time Sets the response delay time, 0 to 60.000 ms Available for SSC1 and SSC4 en_BA_O200_IO-Link_V1.docx 17/34 Baumer Electric AG 15.08.2018/ Frauenfeld, Switzerland...
-
Page 18: Counter / Ssc4
Autoreset of switch counter if given SSC4 Config.Auto Reset Enabled switch counts are reached. Disabled If autoreset is switched from disabled to enabled, the selected switch counter-source is automatically being reset to zero. en_BA_O200_IO-Link_V1.docx 18/34 Baumer Electric AG 15.08.2018/ Frauenfeld, Switzerland... - Page 19 Timefilters like Response Delay can help to optimize the timing of the execution of a subsequent actor. Figure 21 illustrates the behavior of SSC4 using different setting. SSC4 source is hereby the switchcounter of SSC1. Figure 21 Behavior SSC4/Counter: Single-Point or Window, Autoreset enabled or disabled en_BA_O200_IO-Link_V1.docx 19/34 Baumer Electric AG 15.08.2018/ Frauenfeld, Switzerland...
-
Page 20: Signal Processing
4.4 Signal Processing Measurement Mode (Only O200.G, S) 4.4.1 With this parameter pre-defined modes can be selected to achieve optimal results without much trial and error. Parameter name Short Description Rights Unit / Allowed values Measurement Mode Choose measurement mode for... -
Page 21: Local User Interface
Accepted range 0xFF: qTeach always locked Default: 5 min Teach Mode Settings.Teach Mode Defines the teach mode for Xpert Static the qTeach and teach by Xpress Static wire. Xpert Dynamic Xpress Dynamic en_BA_O200_IO-Link_V1.docx 21/34 Baumer Electric AG 15.08.2018/ Frauenfeld, Switzerland... - Page 22 Mode Level 1 Level 2 Xpert Static 1 Point Teach 2-Point Teach (O200.S: not active) Enter teach level by activating Enter teach level by activating qTeach >4 … <6 sec. qTeach-in >2 .. <4 sec (Green LED flashes with 2 Hz)
- Page 23 (Green & yellow LED flash with 2 Hz) Tap qTeach to change the logic No further actions required indicated by the LEDs Green LED: Normal Yellow LED:Inverted Xpress Static One Step Teach Xpress Dynamic One Step Teach en_BA_O200_IO-Link_V1.docx 23/34 Baumer Electric AG 15.08.2018/ Frauenfeld, Switzerland...
-
Page 24: Indication Leds
On, the behaviour of the related LED is as described in Figure 23. Off, the LED is deactived except if the function Find Me is activated. (See section 3.2.2) Inverted, the LED behaviour is inverted to the definition in Figure 23. en_BA_O200_IO-Link_V1.docx 24/34 Baumer Electric AG 15.08.2018/ Frauenfeld, Switzerland... -
Page 25: Quality Parameters
4.7 Quality Parameters The O200 sensors offers quality values to give an idea about the reliability or trend of the process based on the ratio of the current signal and the threshold or minimum required signal. Contamination indicaton Alignment indication... -
Page 26: Teach Commands
If Teach SP1 or Teach SP1 TP2 was Not Taught / Taught Flag SP1 TP2 performed, this flag is set to Taught Teach Status.Teach Only available for O200.G Not Taught / Taught Flag SP2 TP1 Teach Status.Teach Default: Idle 0 = Idle... -
Page 27: Static
SP1 = (TP1 + TP2) / 2 O200.R: Teaches the sensor hitting the reflector with and without an object in between SP1 = sqrt(TP1 * TP2) Window Window O200.G Defines a window based on two positions Teach en_BA_O200_IO-Link_V1.docx 27/34 Baumer Electric AG 15.08.2018/ Frauenfeld, Switzerland... - Page 28 Sets SP1 at the current position of the object which is within the allowed range. In singlepoint mode, the teachpoint offset TPO needs to be considered (O200.G,R). Teach SP2 Sets SP2 at the current position of the object which is within the allowed range.
-
Page 29: Single Point Mode: 1-Point Teach
Figure 25 shows the switching behavior of the selected SSC if the teach-in was successful. Regarding the O200.S SmartReflect sensors, the SP1 is related to the background position / position of the reference part of the machine. Tolerance describes the allowed distance variation of the reference to be still being detected. -
Page 30: Single Point Mode: 2-Point Teach (Only O200.G, O200.R)
Single Point Mode: 2-Point Teach (Only O200.G, O200.R) 5.2.2 Defines SP1 based on TP1 and TP2 for an optimized switching behaviour. O200.G: Teaches the position of the object and of the background. O200.R: Teaches the sensor hitting the reflector with and without an object in between... -
Page 31: Dynamic (Only O200.G, O200.R)
5.3 Dynamic (Only O200.G, O200.R) By using the dynamic teach-in commands, it is possible to define the setpoints by evaluating the minimum and maximum measurement values within a time frame.Accepted duration: 2 … 15 sec. When to apply? For moving and/or small objects The command sequence to perform a dynamic teach-in is the same for all switching modes. -
Page 32: Dynamic In Window Mode (Only O200.G)
Dynamic in Window Mode (Only O200.G) 5.3.2 If the selected SSC is configured to Window mode (Section 4.3.2.1) during the dynamic teach-in the minimum and maximum values are evaluated. Setpoint SP1 is set to Min, SP2 is set to Max. -
Page 33: Glossar
Glossar Write only access Read and write access Read only access Switching Signal Channel Measurement Data Channel Switching Point AdSS Adjustable switching sensor en_BA_O200_IO-Link_V1.docx 33/34 Baumer Electric AG 15.08.2018/ Frauenfeld, Switzerland... - Page 34 Baumer worldwide Belgium Brasil Canada Baumer SA/NV Baumer do Brasil Ltda Baumer Inc. BE-2260 Westerlo BR-04726-001 São Paulo- CA-Burlington, ON L7M 4B9 Phone +32 14 57462 0 Capital Phone +1 (1)905 335-8444 Phone +55 11 56410204 China Denmark France Baumer (China) Co., Ltd.
Need help?
Do you have a question about the O200 and is the answer not in the manual?
Questions and answers