Table of Contents
Advertisement
Quick Links
Advertisement
Table of Contents

Subscribe to Our Youtube Channel
Related Manuals for Baumer PosCon3D


Summary of Contents for Baumer PosCon3D
-
Page 2: Table Of Contents
Object to be measured ......................... 52 Interfaces and outputs ........................54 Touch panel........................... 58 Memory ............................58 Safety instructions and maintenance ..................59 General safety instructions ......................59 _PosCon3D.docx en_BA_OxE7 2/64 Baumer Electric AG 17.07.2014 14:21/tof V1.01 ANW_81125407 Frauenfeld, Switzerland... - Page 3 Cleaning the sensors ........................60 Error correction and tips ......................60 Effects of deviations in the inclination angle ................. 60 Error correction ..........................61 Change history ..........................63 _PosCon3D.docx en_BA_OxE7 3/64 Baumer Electric AG 17.07.2014 14:21/tof V1.01 ANW_81125407 Frauenfeld, Switzerland...
-
Page 4: General Information
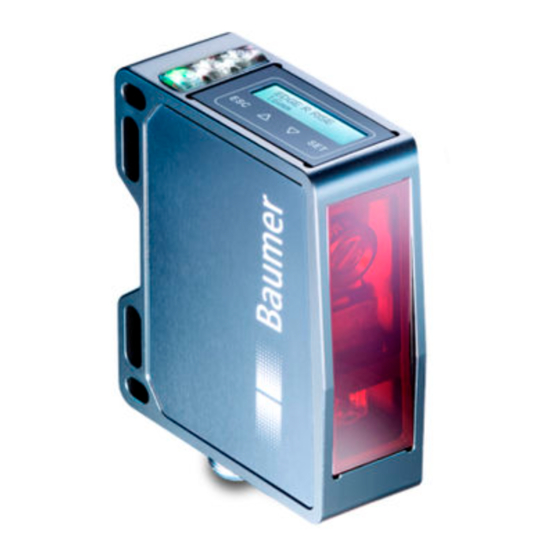
Read these operating instructions carefully and follow the safety instructions! 1.2 Intended use The Baumer PosCon 3D sensor detects edges and outputs their position, distance, and center between edges. It was especially developed for easy handling, flexible use, and precise measurement. The red light laser ensures that the light beam is always visible, which makes sensor alignment easier and minimizes installation errors. -
Page 5: Commissioning In 4 Steps
= Enables the panel if locked <---- = Jump to run mode Setting the language English The language will be selected and confirmed by Deutsch pressing SET for 2 seconds. Italiano Français _PosCon3D.docx en_BA_OxE7 5/64 Baumer Electric AG 17.07.2014 14:21/tof V1.01 ANW_81125407 Frauenfeld, Switzerland... -
Page 6: Installation
Now an object is slowly pushed toward the presumed zero point. The zero point is reached by the left rising edge of the object when the value 0 mm is shown on the sensor display and the yellow LED switches.. _PosCon3D.docx en_BA_OxE7 6/64 Baumer Electric AG 17.07.2014 14:21/tof V1.01 ANW_81125407 Frauenfeld, Switzerland... -
Page 7: Measuring Mode
3. When all conditions are met (see table on right), confirm by pressing Set for 2 seconds Reference surface too uneven 4. Enter thickness of the auxiliary plate (if present) Reference surface too small (<50 mm) _PosCon3D.docx en_BA_OxE7 7/64 Baumer Electric AG 17.07.2014 14:21/tof V1.01 ANW_81125407 Frauenfeld, Switzerland... - Page 8 3. When all conditions are met (see table on right), large Reference surface too confirm by pressing Set for 2 seconds uneven 4. Enter thickness of the auxiliary plate (if present) Reference surface too small (<50 mm) _PosCon3D.docx en_BA_OxE7 8/64 Baumer Electric AG 17.07.2014 14:21/tof V1.01 ANW_81125407 Frauenfeld, Switzerland...
- Page 9 3. When all conditions are met (see table on right), Reference surface too confirm by pressing Set for 2 seconds uneven 4. Enter thickness of the auxiliary plate (if present) Reference surface too small (<50 mm) _PosCon3D.docx en_BA_OxE7 9/64 Baumer Electric AG 17.07.2014 14:21/tof V1.01 ANW_81125407 Frauenfeld, Switzerland...
-
Page 10: Measurement
Left Right The sensor is equipped with a switching output that can be configured as a point or as a window via the DIGITAL OUTPUT function. Point Window _PosCon3D.docx en_BA_OxE7 10/64 Baumer Electric AG 17.07.2014 14:21/tof V1.01 ANW_81125407 Frauenfeld, Switzerland... -
Page 11: Connection
Nevertheless direct contact between the eye and beam should be avoided. 3.1 Connection cable An 8-pole, shielded connection cable (connector) is required. Baumer connection cables with the following order codes are recommended: • ESG 34FH0200G (length 2 m, straight plug) •... -
Page 12: Pin Assignment And Connection Diagram
RS485 receive/transmit+ (A) Pin 7 BU = blue Ground GND Pin 8 RD = red sync in Input synchronization NOTE It is recommended to connect unused inputs to GND (0V). _PosCon3D.docx en_BA_OxE7 12/64 Baumer Electric AG 17.07.2014 14:21/tof V1.01 ANW_81125407 Frauenfeld, Switzerland... -
Page 13: Installation
R1, R2, and R3 serve as a reference for sensor alignment during installation. The terms "Left" and "Right" are also important here. Also important are the terms "Left" and "Right". 13 mm Left Right Laser beam Level R3 Level R2 Level R1 _PosCon3D.docx en_BA_OxE7 13/64 Baumer Electric AG 17.07.2014 14:21/tof V1.01 ANW_81125407 Frauenfeld, Switzerland... -
Page 14: The Reference Surface
• must not have any edges in the sensor measuring range • should be as even as possible • can be taught in with the FLEX MOUNT function _PosCon3D.docx en_BA_OxE7 14/64 Baumer Electric AG 17.07.2014 14:21/tof V1.01 ANW_81125407 Frauenfeld, Switzerland... -
Page 15: Sensor Alignment
To facilitate sensor alignment, the LIVE MONITOR can be used as an aid. LIVE MONITOR continuously outputs the currently measured angle and the distance from the reference surface. _PosCon3D.docx en_BA_OxE7 15/64 Baumer Electric AG 17.07.2014 14:21/tof V1.01 ANW_81125407 Frauenfeld, Switzerland... -
Page 16: Standard Installation
In standard installation, the sensor is mounted at a right angle (90°) to the reference surface or the object (when there is no reference surface). To Reference Surface To Object _PosCon3D.docx en_BA_OxE7 16/64 Baumer Electric AG 17.07.2014 14:21/tof V1.01 ANW_81125407 Frauenfeld, Switzerland... - Page 17 "Analog signal output". Reference point 0 mm -62.5 mm 0 mm +62.5 mm 5.75 mA / 1.87 V 12 mA / 5 V 18.25 mA / 8.12 V _PosCon3D.docx en_BA_OxE7 17/64 Baumer Electric AG 17.07.2014 14:21/tof V1.01 ANW_81125407 Frauenfeld, Switzerland...
-
Page 18: Angled Installation
Blind region Blind region Measuring Measuring field 0 mm field 0 mm -68.8 mm 0 mm -73.0 mm +57.3 mm 0 mm +54.6 mm Reference point Reference point _PosCon3D.docx en_BA_OxE7 18/64 Baumer Electric AG 17.07.2014 14:21/tof V1.01 ANW_81125407 Frauenfeld, Switzerland... -
Page 19: Blind Region
Nevertheless the placement of objects there should be avoided because the shadowing of objects can create a fictitious edge which is detected by the sensor and results in the output of an incorrect measuring value. Blind region _PosCon3D.docx en_BA_OxE7 19/64 Baumer Electric AG 17.07.2014 14:21/tof V1.01 ANW_81125407 Frauenfeld, Switzerland... -
Page 20: Practical Zero Point Search
With the mounting bracket for standard installation, the sensor can be mounted quickly and easily at a 90° angle to the reference surface. Mounting kit 11120705 Contents of this set: 90° mounting bracket Threaded plate 2x spherical head screw M4x35 1x Torx tool T20 _PosCon3D.docx en_BA_OxE7 20/64 Baumer Electric AG 17.07.2014 14:21/tof V1.01 ANW_81125407 Frauenfeld, Switzerland... - Page 21 ±30° with this mounting kit. Mounting kit 11126837 Contents of this set: 30° mounting bracket, vertical Threaded plate 2x spherical head screw M4x35 1x Torx tool T20 _PosCon3D.docx en_BA_OxE7 21/64 Baumer Electric AG 17.07.2014 14:21/tof V1.01 ANW_81125407 Frauenfeld, Switzerland...
-
Page 22: Configuration Via Touch Panel
Rectangle field active This symbol appears on the left side of the screen when the measuring field is rectangular (AUTO). _PosCon3D.docx en_BA_OxE7 22/64 Baumer Electric AG 17.07.2014 14:21/tof V1.01 ANW_81125407 Frauenfeld, Switzerland... - Page 23 RS-485. The keys must be unlocked with a RS-485 command. When the locked keys are touched, the following text appears on the display: RS-485 locked the touch keys _PosCon3D.docx en_BA_OxE7 23/64 Baumer Electric AG 17.07.2014 14:21/tof V1.01 ANW_81125407 Frauenfeld, Switzerland...
- Page 24 Object just under the measuring range limit or outside measuring range or invalid insufficient received signal (e.g. soiling) received signal (e.g. soiling) Supply voltage Short circuit Green Sensor ready for operation Check connection _PosCon3D.docx en_BA_OxE7 24/64 Baumer Electric AG 17.07.2014 14:21/tof V1.01 ANW_81125407 Frauenfeld, Switzerland...
-
Page 25: Function Tree
5.2 Function tree The menu that can be accessed via the touch panel is shown below. _PosCon3D.docx en_BA_OxE7 25/64 Baumer Electric AG 17.07.2014 14:21/tof V1.01 ANW_81125407 Frauenfeld, Switzerland... - Page 26 _PosCon3D.docx en_BA_OxE7 26/64 Baumer Electric AG 17.07.2014 14:21/tof V1.01 ANW_81125407 Frauenfeld, Switzerland...
-
Page 27: Live Monitor
Distance to the the reference surface reference surface Left Right Distance Angle NOTE An angle of 0° means that the sensor is at a right angle to the reference surface. _PosCon3D.docx en_BA_OxE7 27/64 Baumer Electric AG 17.07.2014 14:21/tof V1.01 ANW_81125407 Frauenfeld, Switzerland... -
Page 28: Meas Type
Distance in mm measured from the center of the measuring range of the sensor to the edge. Left Right Right Left Measuring Measuring value value in mm in mm _PosCon3D.docx en_BA_OxE7 28/64 Baumer Electric AG 17.07.2014 14:21/tof V1.01 ANW_81125407 Frauenfeld, Switzerland... - Page 29 Distance in mm measured from the center of the measuring range of the sensor to the edge. Left Right Left Right Measuring Measuring value value in mm in mm _PosCon3D.docx en_BA_OxE7 29/64 Baumer Electric AG 17.07.2014 14:21/tof V1.01 ANW_81125407 Frauenfeld, Switzerland...
- Page 30 Output of the distance from the center of an object to the center of the measuring range in mm. Right Left Left Right Measuring Measuring value value in mm in mm _PosCon3D.docx en_BA_OxE7 30/64 Baumer Electric AG 17.07.2014 14:21/tof V1.01 ANW_81125407 Frauenfeld, Switzerland...
- Page 31 Output of the distance from the center of a gap to the center of the measuring range in mm. Right Left Left Right Measuring Measuring value value in mm in mm _PosCon3D.docx en_BA_OxE7 31/64 Baumer Electric AG 17.07.2014 14:21/tof V1.01 ANW_81125407 Frauenfeld, Switzerland...
-
Page 32: Edge Height / Object Height / Gap Depth
Therefore they are frequently used to smoothen series. The arithmetic mean (or also the average) is the sum of a collection of numbers divided by the number of numbers in the collection: _PosCon3D.docx en_BA_OxE7 32/64 Baumer Electric AG 17.07.2014 14:21/tof V1.01 ANW_81125407 Frauenfeld, Switzerland... - Page 33 , minimize the sum of absolute deviations; i.e. the following applies to a random x _PosCon3D.docx en_BA_OxE7 33/64 Baumer Electric AG 17.07.2014 14:21/tof V1.01 ANW_81125407 Frauenfeld, Switzerland...
-
Page 34: Flex Mount
The axes are no longer referred to as X and Z but as K and M When this function is activated, this is indicated by an angle symbol on the left side of the display _PosCon3D.docx en_BA_OxE7 34/64 Baumer Electric AG 17.07.2014 14:21/tof V1.01 ANW_81125407 Frauenfeld, Switzerland... - Page 35 Minimum length of reference surface or auxiliary plate Note The following menu items TEACH REF and THICKNESS REF must be completed so that FLEX MOUNT can be activated. _PosCon3D.docx en_BA_OxE7 35/64 Baumer Electric AG 17.07.2014 14:21/tof V1.01 ANW_81125407 Frauenfeld, Switzerland...
- Page 36 To ensure correct teaching-in of the reference surface, THICKNESS REF must always be completed after the angle teach-in process. Only in this manner can the effective reference surface be determined with due regard to the thickness of the auxiliary plate. _PosCon3D.docx en_BA_OxE7 36/64 Baumer Electric AG 17.07.2014 14:21/tof V1.01 ANW_81125407 Frauenfeld, Switzerland...
- Page 37 Once FLEX MOUNT is active, the measuring field and the digital output will be reset to the default values (FLEX MOUNT = Maximum measuring field, DIGITAL OUT = 0 mm). _PosCon3D.docx en_BA_OxE7 37/64 Baumer Electric AG 17.07.2014 14:21/tof V1.01 ANW_81125407 Frauenfeld, Switzerland...
-
Page 38: Field Of View
When using AUTO, already set measurement field limitations (left, right and offset) are canceled (eg offset is set to 0). AUTO- Height Rectangle Measuring field Width 0 mm _PosCon3D.docx en_BA_OxE7 38/64 Baumer Electric AG 17.07.2014 14:21/tof V1.01 ANW_81125407 Frauenfeld, Switzerland... - Page 39 Examples with inclination angle of -30° The width increases when the height is reduced Examples with inclination angle of -15° The width increases when the height is reduced _PosCon3D.docx en_BA_OxE7 39/64 Baumer Electric AG 17.07.2014 14:21/tof V1.01 ANW_81125407 Frauenfeld, Switzerland...
- Page 40 Sensor). NOTE If the measuring field is already limited with a rectangle (AUTO), the rectangle can be limited additionally using LIMIT LEFT, LIMIT RIGHT and OFFSET. _PosCon3D.docx en_BA_OxE7 40/64 Baumer Electric AG 17.07.2014 14:21/tof V1.01 ANW_81125407 Frauenfeld, Switzerland...
- Page 41 250 mm - 240 mm + 10 mm = 20 mm Entered OFFSET = 20 mm 240 mm 250 mm 10 mm; offset 10 mm Taught-in Reference surface 10 mm reference surface Reference point _PosCon3D.docx en_BA_OxE7 41/64 Baumer Electric AG 17.07.2014 14:21/tof V1.01 ANW_81125407 Frauenfeld, Switzerland...
- Page 42 LIMIT (blue). 5.9.6 FIELD OF VIEW "Set to max. values“ sets all adjustments of the measuring field back to the standard settings (maximum measuring field, see red area). _PosCon3D.docx en_BA_OxE7 42/64 Baumer Electric AG 17.07.2014 14:21/tof V1.01 ANW_81125407 Frauenfeld, Switzerland...
-
Page 43: Digital Out
Window point 2 (for the WINDOW mode) is selected in mm using the arrow keys. The point must be within the measuring range. The window must be> 2 mm. 5.10.5 OUTPUT LEVEL The output can be set to active high or active low here (inverted). _PosCon3D.docx en_BA_OxE7 43/64 Baumer Electric AG 17.07.2014 14:21/tof V1.01 ANW_81125407 Frauenfeld, Switzerland... -
Page 44: System
The sensor type and serial number are displayed here to enable clear identification of the sensor. • SENSOR TYPE • SERIAL NUM 5.11.5 LANGUAGE Select the language: • English • Deutsch • Italiano • Français _PosCon3D.docx en_BA_OxE7 44/64 Baumer Electric AG 17.07.2014 14:21/tof V1.01 ANW_81125407 Frauenfeld, Switzerland... -
Page 45: Settings
Setting 2 • Setting 3 5.12.3 SHOW SHOW displays the setting values. SHOW ACTIVE Displays the active settings. SHOW SETTING 1-3 Displays the settings stored in storage space 1-3 _PosCon3D.docx en_BA_OxE7 45/64 Baumer Electric AG 17.07.2014 14:21/tof V1.01 ANW_81125407 Frauenfeld, Switzerland... - Page 46 MEAS TYPE EDGE HEIGHT OBJECT PRECISION FLEX MOUNT LIMIT LEFT LIMIT RIGHT OFFSET DIGITAL OUT SWITCH POINT / WINDOW P1 (WINDOW P2) OUTPUT LEVEL RS485 BAUD RS485 ADDR _PosCon3D.docx en_BA_OxE7 46/64 Baumer Electric AG 17.07.2014 14:21/tof V1.01 ANW_81125407 Frauenfeld, Switzerland...
-
Page 47: Function And Definition
-25…+75 °C Protection class IP 67 1) Measurement with Baumer standardized measuring equipment and targets depending on measuring range (distance) 2) Measurement on 90% remission (white) without filtering / averaging 3) Measurement with reduced field of view (offset 90mm) _PosCon3D.docx... - Page 48 Measuring frequency in dep. Range (Width) Measuring frequency in Hz 125 100 Measuring range (Width) in mm Measurement conditions: Background white; Measuring distance 250 mm; Offset 0 mm _PosCon3D.docx en_BA_OxE7 48/64 Baumer Electric AG 17.07.2014 14:21/tof V1.01 ANW_81125407 Frauenfeld, Switzerland...
-
Page 49: Dimensions
6.2 Dimensions *Optical axis _PosCon3D.docx en_BA_OxE7 49/64 Baumer Electric AG 17.07.2014 14:21/tof V1.01 ANW_81125407 Frauenfeld, Switzerland... -
Page 50: Functional Principle
(i.e. of an edge) along the laser line. Thanks to the new Baumer technology, the position of the edge is output irrespectively of the distance between the sensor and the object to be measured. - Page 51 Because the measuring field is exactly aligned to the housing reference surfaces at the factory, the beam position in every sensor is exactly in the same spot, which makes planning and sensor replacement very easy. _PosCon3D.docx en_BA_OxE7 51/64 Baumer Electric AG 17.07.2014 14:21/tof V1.01 ANW_81125407 Frauenfeld, Switzerland...
-
Page 52: Object To Be Measured
The width of the object to be measured must not be less than 1…1.5 mm, and its height (step) must not be less than 2 mm. Right Left Width >1…1.5 mm Height > 2 mm _PosCon3D.docx en_BA_OxE7 52/64 Baumer Electric AG 17.07.2014 14:21/tof V1.01 ANW_81125407 Frauenfeld, Switzerland... - Page 53 Measurement is always carried out at the level that is closer to the sensor. The average increase must be greater than ±1.5 mm at 0.5 mm. >1.5 mm 0.5 mm 0.5 mm _PosCon3D.docx en_BA_OxE7 53/64 Baumer Electric AG 17.07.2014 14:21/tof V1.01 ANW_81125407 Frauenfeld, Switzerland...
-
Page 54: Interfaces And Outputs
Using the following formulas, the measuring values in mm can be converted into the analog output signal: = 12 ∗ 0.1 ! = 5 # + ∗ 0.05 Analog output Edge/Center width/Center gap Volt Distance from the center in mm _PosCon3D.docx en_BA_OxE7 54/64 Baumer Electric AG 17.07.2014 14:21/tof V1.01 ANW_81125407 Frauenfeld, Switzerland... - Page 55 Using the following formulas, the measuring values in mm can be converted into the analog output signal: = 4 ∗ 0.1 ! = Analog output Width or Gap Volt WIDTH/GAP in mm _PosCon3D.docx en_BA_OxE7 55/64 Baumer Electric AG 17.07.2014 14:21/tof V1.01 ANW_81125407 Frauenfeld, Switzerland...
- Page 56 If it is not possible to prevent several sensors from affecting each other through appropriate installation, the sensors affecting each other can be operated asynchronously by the Sync-In cable. The superordinate control generates the signals for this. _PosCon3D.docx en_BA_OxE7 56/64 Baumer Electric AG 17.07.2014 14:21/tof V1.01 ANW_81125407 Frauenfeld, Switzerland...
- Page 57 16 sensors may be connected to one bus. When activating the RS485 interface, the analog output, the digital output and the alarm output are disabled. See separate RS 485 manual. _PosCon3D.docx en_BA_OxE7 57/64 Baumer Electric AG 17.07.2014 14:21/tof V1.01 ANW_81125407 Frauenfeld, Switzerland...
-
Page 58: Touch Panel
20.5 Capacitive operator interfaces 31.5 6.7 Memory All changes made in the sensor are saved in a permanent memory and are not deleted even after a power outage. _PosCon3D.docx en_BA_OxE7 58/64 Baumer Electric AG 17.07.2014 14:21/tof V1.01 ANW_81125407 Frauenfeld, Switzerland... -
Page 59: Safety Instructions And Maintenance
In case the front (optics) or the display pane breaks, the sensor must be immediately disconnected from the power supply and may be restarted only by an authorized service company. _PosCon3D.docx en_BA_OxE7 59/64 Baumer Electric AG 17.07.2014 14:21/tof V1.01 ANW_81125407 Frauenfeld, Switzerland... -
Page 60: Cleaning The Sensors
6.64 % 22° 7.28 % 23° 7.95 % 24° 8.65 % 25° 9.37 % 26° 10.12 % 27° 10.90 % 28° 11.71 % 29° 12.54 % 30° 13.40 % _PosCon3D.docx en_BA_OxE7 60/64 Baumer Electric AG 17.07.2014 14:21/tof V1.01 ANW_81125407 Frauenfeld, Switzerland... -
Page 61: Error Correction
Check MEAS TYPE • The edges of the object are not EDGE HEIGHT/OBJEKT HEIGHT/GAP DEPTH function detected defines the minimum step of an edge. The edge of an object _PosCon3D.docx en_BA_OxE7 61/64 Baumer Electric AG 17.07.2014 14:21/tof V1.01 ANW_81125407 Frauenfeld, Switzerland... - Page 62 The edge is outside the measuring field or the measuring field was limited, see Section FIELD OF VIEW Transmitting laser light is dim Sync-In input is on High--> set to Low _PosCon3D.docx en_BA_OxE7 62/64 Baumer Electric AG 17.07.2014 14:21/tof V1.01 ANW_81125407 Frauenfeld, Switzerland...
-
Page 63: Change History
Change history 27.06.2014 Manual released in version 1.0 11.07.2014 Version 1.01. Adaptation graphics chapter LIVE MONITOR _PosCon3D.docx en_BA_OxE7 63/64 Baumer Electric AG 17.07.2014 14:21/tof V1.01 ANW_81125407 Frauenfeld, Switzerland... - Page 64 _PosCon3D.docx en_BA_OxE7 64/64 Baumer Electric AG 17.07.2014 14:21/tof V1.01 ANW_81125407 Frauenfeld, Switzerland...
Need help?
Do you have a question about the PosCon3D and is the answer not in the manual?
Questions and answers