Table of Contents
Advertisement
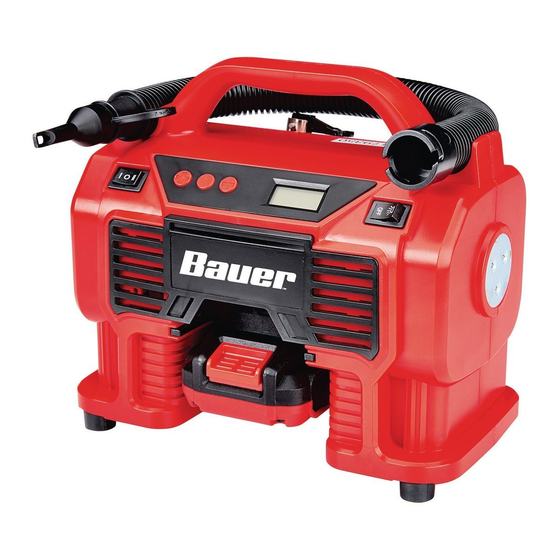
Owner's Manual & Safety Instructions
Save This Manual
operating, inspection, maintenance and cleaning procedures. Write the product's serial number in the
back of the manual near the assembly diagram (or month and year of purchase if product has no number).
Keep this manual and the receipt in a safe and dry place for future reference.
For Best Results,
Use 3.0 Amp Hour Battery
(Sold Separately)
Email our technical support at: productsupport@harborfreight.com
When unpacking, make sure that the product is intact
and undamaged. If any parts are missing or broken,
please call 1-888-866-5797 as soon as possible.
©
Copyright
2018 by Harbor Freight Tools
No portion of this manual or any artwork contained herein may be reproduced in
any shape or form without the express written consent of Harbor Freight Tools.
Diagrams within this manual may not be drawn proportionally. Due to continuing
improvements, actual product may differ slightly from the product described herein.
Tools required for assembly and service may not be included.
Keep this manual for the safety warnings and precautions, assembly,
Visit our website at: http://www.harborfreight.com
®
. All rights reserved.
Read this material before using this product.
Failure to do so can result in serious injury.
SAVE THIS MANUAL.
19b
Advertisement
Table of Contents

Related Manuals for Bauer 1854C-B


Summary of Contents for Bauer 1854C-B
- Page 1 Owner’s Manual & Safety Instructions Save This Manual Keep this manual for the safety warnings and precautions, assembly, operating, inspection, maintenance and cleaning procedures. Write the product’s serial number in the back of the manual near the assembly diagram (or month and year of purchase if product has no number). Keep this manual and the receipt in a safe and dry place for future reference.
-
Page 2: Table Of Contents
table of contents Safety ............2 Maintenance ..........14 Specifications ..........8 Parts List and Diagram ......18 Setup ............9 Warranty ............ 20 Operation ........... 10 WARninG SyMBOLS AnD DEFinitiOnS This is the safety alert symbol. It is used to alert you to potential personal injury hazards. - Page 3 Air compressor Safety Warnings 1. Risk of fire or explosion - do not spray 12. This product is not a toy. flammable liquid in a confined area or Keep it out of reach of children. towards a hot surface. Spray area must be 13.
-
Page 4: Battery Tool Use And Care
Battery tool use and care 1. Prevent unintentional starting. Ensure the 6. Under abusive conditions, liquid may be switch is in the off-position before connecting ejected from the battery; avoid contact. to battery pack, picking up or carrying the If contact accidentally occurs, flush with power tool. - Page 5 Lithium Battery Safety Warnings LitHiUM BAttERiES StORE A LARGE AMOUnt OF EnERGy AnD WiLL VEnt FiRE OR EXpLODE iF MiStREAtED: 1. Keep Battery pack dry. 3. Charge Battery Pack only according to its Charger’s instructions. 2. DO nOt DO Any OF tHE FOLLOWinG tO tHE BAttERy pAcK: 4.
-
Page 6: Extension Cords
Grounding tO pREVEnt ELEctRic SHOcK AnD DEAtH FROM incORREct GROUnDinG: check with a qualified electrician if you are in doubt as to whether the outlet is properly grounded. Do not modify the power cord plug provided with the charger. Do not use the charger if the power cord or plug is damaged. - Page 7 Symbology Pounds per square inch of pressure Double Insulated Measure of atmospheric Volts pressure on Earth at sea level Kilopascal is a unit of Alternating Current pressure measurement Cubic Feet per Minute flow Amperes WARNING marking concerning Cubic Feet per Minute flow ScFM Risk of Explosion.
-
Page 8: Specifications
Specifications Charger Input Rating 120VAC / 60Hz Battery Type Bauer 20V Li-Ion (sold separately) Air Pressure 160 PSI (max) Low Pressure Air Flow Rate 13.4 SCFM Page 8 For technical questions, please call 1-888-866-5797. Item 64533... -
Page 9: Setup
Setup - Before Use: Read the EntiRE iMpORtAnt SAFEty inFORMAtiOn section at the beginning of this manual including all text under subheadings therein before set up or use of this product. note: For additional information regarding the parts listed in the following pages, refer to Parts List and Diagram on page 18. -
Page 10: Operation
Operating instructions Read the EntiRE iMpORtAnt SAFEty inFORMAtiOn section at the beginning of this manual including all text under subheadings therein before set up or use of this product. tool Set Up tO pREVEnt SERiOUS inJURy FROM AcciDEntAL OpERAtiOn: Make sure that the power Switch is in the off-position and remove its Battery pack before performing any procedure in this section. - Page 11 note: The Inflator/Deflator has a sleep mode feature that powers off the unit after approximately 5 minutes of nonuse. Press the Power button to turn the unit back on. notice: The Inflator/Deflator can become hot during use. Allow the Inflator/Deflator to cool for ten minutes after each ten minutes of continuous use.
- Page 12 inflating and Deflating Using Low pressure Hose - Large inflatables tO pREVEnt OVERHEAtinG WHiLE inFLAtinG, keep the air intake and vents clear of obstructions. Always wear AnSi-approved eye protection during use. note: The Inflator/Deflator has a sleep mode feature that powers off the unit after approximately 5 minutes of nonuse.
- Page 13 Light 1. Turn on the unit by pressing Power Button . 2. Turn the light on by pressing the Light Light Switch to the position. Switch 3. Turn the light off by pressing the Light Switch to the OFF position. Light 4.
-
Page 14: Maintenance
Maintenance and Servicing procedures not specifically explained in this manual must be performed only by a qualified technician. tO pREVEnt SERiOUS inJURy FROM AcciDEntAL OpERAtiOn: Make sure that the trigger is in the off-position and remove its Battery pack before performing any procedure in this section. tO pREVEnt SERiOUS inJURy FROM tOOL FAiLURE: Do not use damaged equipment. -
Page 15: Troubleshooting
troubleshooting problem possible causes Likely Solutions Tool will not start. 1. Battery Pack not properly 1. Remove Battery Pack, make sure there are no connected. obstructions, reinsert the Battery Pack according to its shape (it should only fit one way), and press firmly until the Battery Pack locks in place. - Page 16 pLEASE READ tHE FOLLOWinG cAREFULLy THE MANUFACTURER AND/OR DISTRIBUTOR HAS PROVIDED THE PARTS LIST AND ASSEMBLY DIAGRAM IN THIS MANUAL AS A REFERENCE TOOL ONLY. NEITHER THE MANUFACTURER OR DISTRIBUTOR MAKES ANY REPRESENTATION OR WARRANTY OF ANY KIND TO THE BUYER THAT HE OR SHE IS QUALIFIED TO MAKE ANY REPAIRS TO THE PRODUCT, OR THAT HE OR SHE IS QUALIFIED TO REPLACE ANY PARTS OF THE PRODUCT.
- Page 17 Record product’s Serial number Here: note: if product has no serial number, record month and year of purchase instead. note: Some parts are listed and shown for illustration purposes only, and are not available individually as replacement parts. Item 64533 For technical questions, please call 1-888-866-5797.
-
Page 18: Parts List And Diagram
parts List and Diagram parts List part Description part Description Self-Tapping Screw, ST4 x 16 LED Cap Presta Adapter Sensor Connect Tube Nozzle Adapter Pressure Gauge Panel Assembly Ball Needle Adapter Clamp Adapter Holder Pinch Valve Adapter Rear Housing Low Pressure Hose Self-Tapping Screw, ST3 x 10 Low Pressure Connector Motor Plate... - Page 19 Assembly Diagram Item 64533 For technical questions, please call 1-888-866-5797. Page 19...
-
Page 20: Warranty
Limited 90 Day Warranty Harbor Freight Tools Co. makes every effort to assure that its products meet high quality and durability standards, and warrants to the original purchaser that this product is free from defects in materials and workmanship for the period of 90 days from the date of purchase. This warranty does not apply to damage due directly or indirectly, to misuse, abuse, negligence or accidents, repairs or alterations outside our facilities, criminal activity, improper installation, normal wear and tear, or to lack of maintenance.
Need help?
Do you have a question about the 1854C-B and is the answer not in the manual?
Questions and answers