Table of Contents
Advertisement
Quick Links
smart
Living
Installation · Programming · Operating
Keep this manual safe for reference and future maintenance
Thank you for choosing the Yale Smart HD CCTV System.
This manual will guide you through the product Installation
and system set up.
Display extreme caution when using ladders or steps,
please follow manufacturer's instructions.
Be careful when using hand and power tools and follow
the manufacturer's guidelines when using them. Take care
that the correct tools are used. Wear goggles or protective
clothing where required
Requirements
A broadband router with one free Ethernet port is
required. iOS 9+ or Android 4.4+ required to view via
the Yale CCTV App. Mobile data speed could effect
quality and connection.
For more information on this product and Yale Smart
Living Range visit www.yale.co.uk/smart-living
Consumer Support: info@yale.co.uk
Smart HD
CCTV System
Y402B-HD
Y804B-HD
Contents
The 2 year guarantee for this Yale HD
CCTV System is active from the date of
2
purchase (A copy of this guarantee is
available on our website).
Please register online within
12 months of purchase at
www.yale.co.uk/registeryourproduct
Information and illustrations are subject to change within this
document. Yale reserves the right to alter the specification and
product design at anytime without notice. Yale® is a registered
trademark. © 2016 ASSA ABLOY. All rights reserved.
2
2
3
4
5
8
12
16
20
25
28
28
Issue No: 1A
Advertisement
Table of Contents

Subscribe to Our Youtube Channel
Related Manuals for Yale Y402B-HD


Summary of Contents for Yale Y402B-HD
-
Page 1: Table Of Contents
Keep this manual safe for reference and future maintenance Contents 1. Inside the Box Thank you for choosing the Yale Smart HD CCTV System. This manual will guide you through the product Installation 2. Glossary of Terms and system set up. -
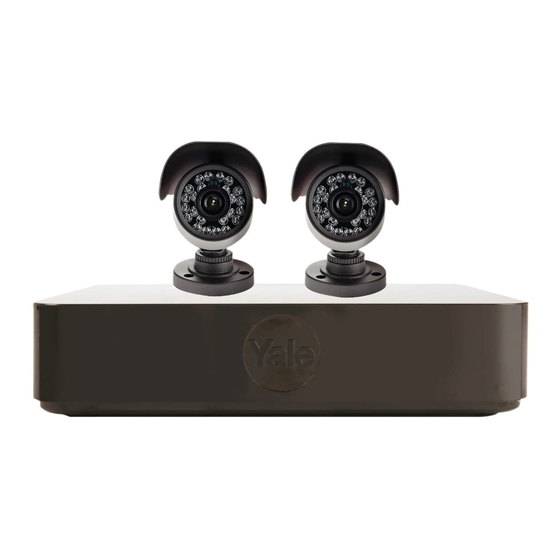
Page 2: Inside The Box
– Terabyte. Amount of storage space within the HDD (e.g. 1TB/2TB). QR Code – Quick Response Code. Scan this using the Yale CCTV App for quick pairing. Note – none of the Yale HD CCTV systems connect into a laptop for viewing video images. -
Page 3: Dvr Connectivity
Y402B-HD Y804B-HD 1. BNC Video Inputs: These are the video inputs used when connecting your Yale HD cameras. These are numbered 1 – 4 (or 8 for an 8 channel DVR) as they would appear on screen when streaming 2. Audio Input: These will accept a standard in-line audio microphone device. -
Page 4: Connecting Your Dvr
Connecting your DVR smart Living Monitor BNC/DC cable Please ensure the system is fully working prior to installation. Connect all the cameras using the supplied cables and make sure it operates as intended. • Remember the DVR unit is most likely to be left on 24 hours a day, 7 days a week. Please bear this in mind when choosing the installation location. -
Page 5: Dvr Main Menu
Quick Start Menu When you turn the DVR system on for the first time the quick start menu will appear in the centre of the screen. Enable Yale Cloud for remote viewing via internet. Click Next to continue. You will be presented with a QR code for App registration. Click ‘Cancel’ to exit this screen to continue DVR setup. - Page 6 Main Menu: Takes you to an area containing most of your settings and features. Quick Start: Takes you back to your QR code to scan with the Yale CCTV App. Record Mode: A shortcut to changing the recording mode of each camera.
- Page 7 Motion Detect System Info Covered Lens Signal Loss DVR/NVR Mode Settings General Alarm System Local Network Yale Cloud Home Screen Display Disarm User Account Unlock PTZ Config Tour Logout Change Password Please ensure you set up a password should you wish to connect this DVR to the internet for remote viewing.
-
Page 8: Record
Record REC Config From the Main Menu, hover over ‘Record’ and then move the mouse over ‘REC Config’ and left click to select. Here you will be able to set your DVR to different recording formats (Schedule, Always or Stop). First select the Channel you wish to configure. - Page 9 Playback From the Main Menu, hover over ‘Record’ and then move mouse over ‘PlayBack’ and left click to select. This option allows you to view past recordings and to make a backup file using a USB Flash Drive as desired. NOTE - To use any of these features other than live viewing you must pause the footage.
- Page 10 Backup From the Main Menu, hover over ‘Record’ and then move mouse over ‘Backup’ and left click to select. This option allows you to back up your video recording onto a USB Flash Drive. 1. Insert a USB Flash Drive into the top USB port on the back of the DVR and left click on the ‘Detect’ button (top right of the screen).
- Page 11 Video Encode From the Main Menu, hover over ‘Record’ and then move mouse over ‘Video Encode’ and left click to select. This option allows you to change the Hard Drive recording and internet streaming video quality for every channel/camera. Your DVR will automatically be set to HD720/HD1080 depending on model. You can change the quality of the Hard Drive recording (left column) and internet streaming (right column).
-
Page 12: Detection
Detection Motion Detect From the Main Menu, hover over ‘Detection’ and then move mouse over ‘Motion Detect’ and left click to select. This option allows you to set the DVR to record when motion is detected in selected areas i.e. window, doorway, gate or driveway. - Page 13 5. Set the time period you wish motion detection to take place. Left click the ‘Set’ button next to the ‘Period’ heading (image A). 6. The system will default to 24/7. Select the day and time period you want the system to have motion detection enabled by left clicking.
- Page 14 Icon to be supplied Covered Lens From the Main Menu, hover over ‘Detection’ and then move mouse over ‘Covered Lens’ and left click to select. This function helps detect any deliberate covering of the camera lens to obstruct recording. To enable covered lens detection, select the channel/camera you wish to activate then check the Enable box next to Channel.
- Page 15 Signal Loss From the Main Menu, hover over ‘Detection’ and then move the mouse over ‘Signal Loss’ and left click to select. This function alerts you if you lose the signal to any camera. This can be caused by the power being interrupted to the cameras or the DVR.
-
Page 16: Settings
Please contact your internet provider for further support. Yale Cloud From the Main Menu, hover over ‘Settings’ and then move mouse over ‘Yale Cloud’ and left click to select. TOOLS TO SET UP EMAIL FTP AND DDNS: Currently not supported. - Page 17 Screen Display From the Main Menu, hover over ‘Settings’ and then move mouse over ‘Screen Display’ and left click to select. CHANNEL TITLE: Change the channel/camera name (i.e. drive, garden, shed, front door etc). Left click on the channel/camera and using the onscreen keyboard, rename the channel/camera then left click ‘OK’. TIME DISPLAY: Displays live time and date.
- Page 18 From the Main Menu, hover over ‘Settings’ and then move mouse over ‘User Account’ and left click to select. You can change your password and add more users with varying access rights. When using this system with the Yale CCTV App you will need an internet connection. Please make sure you change your password for security.
- Page 19 Tour From the Main Menu, hover over ‘Settings’ and then move mouse over ‘Tour’ and left click to select. You can then set your screen to rotate between channels/cameras. Tick ‘Enable Tour’, select which channel/camera to view and how long to view for. If you select cameras 1, 3 and 4 for 5 seconds, it will show camera 1 for 5 seconds, then camera 3 for 5 seconds, then camera 4 for 5 seconds.
-
Page 20: Professional Settings
Professional Settings NOTE: For general users these can be left as default and do not need to be changed at all. From the Main Menu, hover over ‘Professional’ and then move mouse over desired function and left click to select. HDD Manage, Info &... - Page 21 Upgrade This option allows you to upgrade your DVR Firmware. If the DVR Firmware requires an update Yale will inform you via email if your product is registered. Auto Maintain This option allows you to periodically reboot your DVR and to delete old files. Rebooting will extend the DVR and its mechanical Hard Drive.
- Page 22 Import/Export This option allows you to save and load log & DVR configuration onto a USB Flash Drive. To Export LOG details 1. Enter a USB Flash Drive into the top USB port in the DVR. 2. Your USB Flash Drive name will appear in the Device Name box (if you don’t see your USB Flash Drive name appear, please reboot the DVR with the USB Flash Drive connected).
- Page 23 Simply left click the box of the area you want to reset or left click ‘Select All’ followed by ‘OK’ to reset. Details you can reset are: • General • Video Encode • Record Configurations • Alarm Set • Local Network • Yale Cloud • Screen Display • User Account...
- Page 24 System Info Here you can see all the DVR information including MAC, Serial Number and how many channels are available. The DRV logs a host of information including log-in attempts and network connection times. It’s all listed here so you can see exactly how the system is used.
-
Page 25: Extending Your Yale System
Extending Your Yale System When using a Yale CCTV / Alarm Link Adapter (model: EF-USBDVR), you can control your Yale EF Series alarm and/or Yale Connected Smart Locks via the Yale CCTV App. Additional External Camera iOS 9 + Smart HD CCTV System Android 4.4 +... - Page 26 Please note: When your DVR has been rebooted you may need to first unlock using the DVR screen before this will work on the Yale CCTV App. 9. On the Yale CCTV App, swipe the information bar left and then press the ‘Unlock’ button.
- Page 27 Operation Arm: Press the Arm button on the DVR screen or Yale CCTV App. The alarm will now enter Full Arm mode. Home Arm: Press the Home Arm button on the DVR screen or Yale CCTV App. The alarm will now enter Home Arm mode.
-
Page 28: Connecting Your Dvr To The Internet
You may find that your connection works much faster when you are connected to a home WIFI network. The remote viewing feature requires our central server. Yale offers no guarantee on the availability of our free server. We would contact individual users via email should the situtation change. - Page 29 You can view your DVR remotely using the Yale CCTV App. Please download this App from the iOS App Store or Google Play Store. Search “Yale CCTV”. Please make sure you have a fast mobile internet connection (ideally 10Mbps +, and preferably Wi-Fi connection to ensure the App runs smoothly).
- Page 30 Date: 03/03/2016 On behalf of ASSA ABLOY Ltd. NoPb Issue No: 1A WEEE THE YALE BRAND, with its unparalleled global reach and Note: Waste electrical products range of products, reassures more people in more countries and batteries should not be than any other consumer locking solution.
Need help?
Do you have a question about the Y402B-HD and is the answer not in the manual?
Questions and answers