Masimo Root Operator's Manual
Hide thumbs
Also See for Root:
- Operator's manual (152 pages) ,
- Operator's manual (172 pages) ,
- Manual (36 pages)
Table of Contents
Advertisement
Quick Links
Download this manual
See also:
Operator's Manual
Advertisement
Table of Contents

Related Manuals for Masimo Root


Summary of Contents for Masimo Root
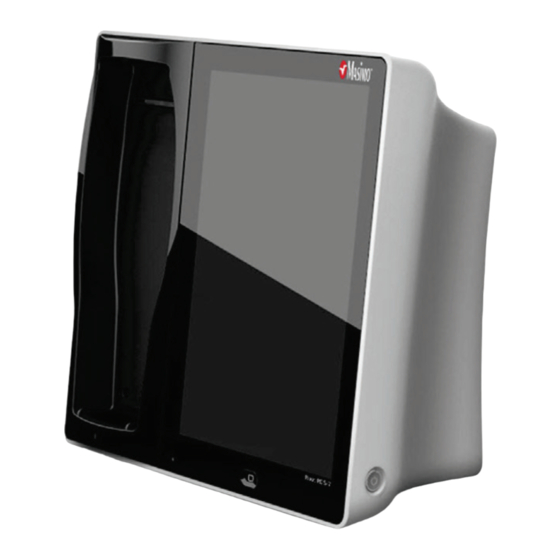
- Page 1 Operator's Manual ® Root...
- Page 3 These operating instructions provide the necessary information for proper operation of all models of the Root®. There may be information provided in this manual that is not relevant for your system. General knowledge of pulse oximetry and an understanding of the features and functions of Root are prerequisites for its proper use.
-
Page 5: Table Of Contents
About the Main Screen -------------------------------------------------------------------------------- 27 About the Status Bar ----------------------------------------------------------------------------------28 About the Action Bar ---------------------------------------------------------------------------------- 31 Using the Touchscreen Interface -------------------------------------------------------------------- 32 Menu Navigation -------------------------------------------------------------------------------------- 35 Understanding Windows ----------------------------------------------------------------------------- 36 Accessing Main Menu Options ----------------------------------------------------------------------- 43 Alarm Interface ---------------------------------------------------------------------------------------- 60 www.masimo.com Masimo... - Page 6 Using Iris Connectivity Ports ------------------------------------------------------------------------ 85 Chapter 8: Messages -------------------------------------------------------------------------------------- 87 Chapter 9: Troubleshooting ----------------------------------------------------------------------------- 89 Troubleshooting Radical-7, Radius-7, and MOC-9 Modules ------------------------------------- 89 Troubleshooting Root --------------------------------------------------------------------------------- 89 Chapter 10: Specifications ------------------------------------------------------------------------------- 91 Alarms --------------------------------------------------------------------------------------------------- 91 Nurse Call Specifications ----------------------------------------------------------------------------- 91...
- Page 7 Cleaning ----------------------------------------------------------------------------------------------- 103 Replacing the Fuses --------------------------------------------------------------------------------- 103 Power-On Self Test ----------------------------------------------------------------------------------- 104 Nurse Call Setting Connections ------------------------------------------------------------------- 104 Battery Test ------------------------------------------------------------------------------------------- 105 Repair Policy ------------------------------------------------------------------------------------------ 105 Return Procedure ------------------------------------------------------------------------------------- 105 Contacting Masimo ---------------------------------------------------------------------------------- 106 Index ------------------------------------------------------------------------------------------------------- 109 www.masimo.com Masimo...
-
Page 9: About This Manual
About This Manual This manual explains how to set up and use Root®. Important safety information relating to general use of Root appears in this manual. Read and follow any warnings, cautions, and notes presented throughout this manual. The following are explanations of warnings, cautions, and notes. -
Page 11: Product Description And Features, Intended Use And Indications For Use
Ability to display data on a secondary display. For all prescribing information and instructions for use of the compatible medical devices that are connected to Root, see Operator’s Manual or Instructions for Use for the specific medical device. Intended Use The Masimo Root Monitoring System is indicated for use by healthcare professionals for the monitoring of multiple physiological parameters in healthcare environments. -
Page 12: Contraindication
In addition, the Masimo Radical-7 Pulse CO-Oximeter and accessories are indicated to provide the continuous noninvasive monitoring data obtained from the Masimo Radical-7 Pulse CO-Oximeter and accessories of functional oxygen saturation of arterial hemoglobin (SpO and pulse rate to multi-parameter devices for the display of those devices. -
Page 13: Safety Information, Warnings, And Cautions
WARNING: Do not use Root during or nearby magnetic resonance imaging (MRI) or in an MRI environment. WARNING: Do not place Root or accessories in any position that might cause it to fall on the patient. WARNING: To ensure safety, avoid stacking multiple devices or placing anything on the device during operation. -
Page 14: Performance Warnings And Cautions
Note: Do not monitor more than a single patient at a time on Root. Note: It is recommended that Root is attached to an AC power source when it is not in use to ensure that the battery remains fully charged. - Page 15 CAUTION: Do not place the Root on electrical equipment that may affect the device, preventing it from working properly. CAUTION: Failure to charge Root promptly after a Low Battery alarm may result in the device shutting down. CAUTION: To minimize radio interference, other electrical equipment that emits radio frequency transmissions should not be in close proximity to Root.
-
Page 16: Cleaning And Service Warnings And Cautions
CAUTION: Do not submerge the Root in any cleaning solution or attempt to sterilize by autoclave, irradiation, steam, gas, ethylene oxide or any other method. This will seriously damage the device. - Page 17 These limits are designed to provide reasonable protection against harmful interference in a hospital environment. Note: This Class A digital apparatus complies with Canadian ICES-003. Note: Root is not intended for use during patient transport outside the healthcare facility. www.masimo.com Masimo...
-
Page 19: Chapter 1: Description
Radical-7 can communicate monitored parameters and measurements.* Root Display and Provides a frontal display and interface for user interactions. Touchscreen Home Button Provides access to the Main Screen. Root Charging Shows an indication of the battery charge for Root. Indicator www.masimo.com Masimo... - Page 20 Root Chapter 1: Description Ref. Feature Description AC Power Shows an indication of AC power connection Root. Indicator Radical-7 Shows an indication of battery charge for the Radical-7 in the Charging Docking Station. Indicator *Only the touchscreen version of the Radical-7 is able to communicate monitored parameters and measurements.
- Page 21 Root Chapter 1: Description Ref. Feature Description Ethernet Port Provides a network connection to Root using an RJ-45 cable. USB Ports (2) Provide USB 2.0 connectivity. Power Entry Contains the input connector for a hospital grade AC power cord Module and the fuse holder.
- Page 22 System Status Provides an indication of system messages and alarm priority. See System Status Lights on page 67. Lights Power Button Places Root in Power On, Sleep and Power Off modes. MOC-9 Ports (3) Provide connectivity for MOC-9 modules. www.masimo.com Masimo...
-
Page 23: Chapter 2: Setting Up
If anything is missing or damaged, contact Masimo's Technical Service Department. See Return Procedure on page 105. Guidelines for Setting Up Root has a built-in bracket interface that allows it to be mounted on a pole or roll stand. When setting up Root, follow these guidelines: •... -
Page 24: Power On
Power Button for two (2) seconds until a single audible tone sounds. Once Root turns on, if no Radical-7, Radius-7, or MOC-9 module is connected, the Root display shows the following message: Please Connect a Device. The user is now able to connect Radical-7, Radius-7, and MOC-9 module. -
Page 25: Initial Battery Charging
2. Plug the hospital grade AC power cord into an AC power source. 3. Verify that Root's battery is charging by ensuring that the AC Power Indicator (1) is green and the Battery icon on the Status Bar (2) is solid green or has the charging symbol. -
Page 26: Radical-7 Connection
Chapter 2: Setting Up Radical-7 Connection It is recommended that Root be powered on before performing the steps below. Snap the Radical-7 into the Docking Station. If the Radical-7 is not yet turned on, press the power button on the Radical-7 to power it on. -
Page 27: Radius-7 Connection
Root Chapter 2: Setting Up Radius-7 Connection It is recommended that Root be powered on before performing the steps below. Ensure the Radius-7 Battery Charging Adapter is properly docked in the Docking Station area of Root. Activate the Bluetooth radio on Root. (for more information see Operator’s Manual for Radius-7). -
Page 28: Nurse Call Connection
Root Chapter 2: Setting Up Insert the MOC-9 end of the module securely into a MOC-9 port on Root. See Chapter 6: MOC-9 on page 81 Nurse Call Connection Use a Nurse Call connection cable to connect to a Nurse Call System. -
Page 29: Chapter 3: Operation
Chapter 3: Operation The information in this chapter assumes that Root is set up and ready for use. This chapter provides necessary information for proper operation of the device. Do not operate Root without completely reading and understanding these instructions. -
Page 30: About The Status Bar
About the Status Bar At the top of the Main Screen is the Status Bar with interactive icons. Each icon provides a shortcut to a menu item or an action on Root. An example is shown below. Ref. Feature Description Displays alarm status and temporarily mutes all audible alarms for Root, Radical-7, Radius-7, and MOC-9 modules. - Page 31 Chapter 3: Operation Ref. Feature Description Allows for patient monitoring to be temporarily suspended. Available when using Root with Radical-7 or Radius-7. Standby Mode See Standby Mode on page 64. Provides access to the Device Output screen for activation or deactivation of IntelliBridge connection.
- Page 32 Radical-7 or battery is currently charging. Radius-7 Battery See Radical-7 and Radius-7 Charging Indicator on page 68. Displays charging status for Root and provides access to the Battery Root screen. The example shows that the battery is currently Root Battery charging.
-
Page 33: About The Action Bar
About the Action Bar At the bottom of the Main Screen is the Action Bar with interactive icons. Each icon provides a shortcut to a menu item or an action on Root. An example is shown below. Ref. Feature Description Patient Admit Info Provides Access for input of patient info either by importing or manual entry. -
Page 34: Using The Touchscreen Interface
See Customizing Windows on desired position, and drop it by page 41. Drop releasing. Below is a list of all the different types of controls available on Root and the various ways to interact with each type of control. Control Applicable Actions Description... - Page 35 Root Chapter 3: Operation Control Applicable Actions Description Labeled Toggle Slide knob Switches between toggle states Press left or right of Quickly moves knob left or right toggle Press label Quickly moves knob left or right Spinner Press center (focused)
- Page 36 Root Chapter 3: Operation Control Applicable Actions Description Swipe left or right Scrolls icons left or right (anywhere) Press bottom Quickly centers tile corresponding to indicator icon indicator icon Window Press parameter or When no parameter or measurement alarm is...
-
Page 37: Menu Navigation
To navigate to the previous screen, press the arrow at the top left corner of the touchscreen. To return to the Main Screen, at any time, press the Home Button at any time. The Home Button is always illuminated when Root is powered on. www.masimo.com... -
Page 38: Understanding Windows
Chapter 3: Operation Understanding Windows Root creates a Window for Radical-7, Radius-7, and compatible medical devices that are connected to Root. Parameters or measurements can be expanded or minimized within a Window to customize view. Radical-7 Windows are shown in the examples below. - Page 39 Root Chapter 3: Operation Ref. Feature Description The area where all data from a docked Radical-7, Radius-7, or connected Window MOC-9 module are displayed. This menu allows the user to change between Trend View and Analog Action View. For NIBP and Temperature, the action menu allows access to Menu additional settings.
- Page 40 Root Chapter 3: Operation Using Trend View In Trend View, a parameter or measurement is displayed as a graph of its values over time. The following diagram and table describe key features of a parameter's Trend Display in Trend View.
- Page 41 Root Chapter 3: Operation Using Analog View The Analog View shows parameter and measurement data as a needle pointing to graduations in a circular array around a dial. This view provides indications of change that can be interpreted at a quick glance.
- Page 42 Root Chapter 3: Operation Specific ranges of the Analog View are: Ref. Feature Color Description White Area of the display range where an alarm will not be Normal Range triggered. Caution Range Yellow Area of the display range that provides a caution indicator.
- Page 43 Root Chapter 3: Operation Customizing Windows Windows can be customized by expanding and minimizing parameters and measurements in both Trend View and Analog View. When a parameter is minimized, it is only displayed in the Well with its Numeric Value and Parameter Label. When a parameter is expanded, it will be shown as either a Trend Display or Gauge.
- Page 44 Root Chapter 3: Operation Minimizing a parameter or measurement Order Instruction Step 1 Press and hold the Numeric Value until it shrinks. Step 2 Drag the Numeric Value to the Well. Step 3 Release the Numeric Value. www.masimo.com Masimo...
-
Page 45: Accessing Main Menu Options
Root Chapter 3: Operation Accessing Main Menu Options To access the Main Menu options At the bottom right corner of the touchscreen, press the Main Menu icon. The Main Menu options are: Layout See Layout on page 44. rainbow See Rainbow on page 46 Sounds See Sounds on page 47. - Page 46 When a Radical-7 or Radius-7 is docked to Root and/or multiple MOC-9 modules are connected to Root, the user will have the option to select from several pre-configured layouts. Image below shows layout options available with Radical 7 docked in Root.
- Page 47 Root Chapter 3: Operation Additional Settings for Layouts There are different ways to display the parameters and measurements by changing the Layout Style. Option Description Factory Default User Configurable Settings Settings Controls the sizing of Trend Trend Style Dynamic Fixed or Dynamic Displays.
- Page 48 *When the number of Trend Displays reaches maximum viewing capacity, additional parameters expanded will result in the replacement of existing Trend Displays. Rainbow The rainbow icon is displayed only when a Radical-7 or Radius-7 is docked to Root. See Operator manuals for Radical-7 or Radius-7. www.masimo.com...
- Page 49 Root Chapter 3: Operation Sounds Use the Sounds screen to control the volume level of sounds and duration of audio pause for Root. Option Description Factory Configurable Settings Default Setting Alarm Highest Slide towards the left to decrease Sets the alarm volume level.
- Page 50 Root Chapter 3: Operation Device Settings The Device Settings menu allows the user to view and customize settings for Root. The Device Settings options are: Localization See Localization on page 49. Kite See Kite on page 49 Wi-Fi See Wi-Fi on page 50.
- Page 51 Description Factory Default Configurable Settings Setting Selects the language display Choose from available Language English for Root. languages. mm/dd/yy or Date Format Sets the display format for mm/dd/yy current date. dd/mm/yy 12 hour or Time Format Sets the display format for 12 hour current time.
- Page 52 Wi-Fi communication feature in order to preserve Root’s primary alarms. Use the Wi-Fi screen to enable or disable Wi-Fi connectivity. When Root is connected to a Wi-Fi network, the Wi-Fi icon on the Status Bar conveys the strength of the connection. See About the Status Bar on page 28.
- Page 53 The Bluetooth radio allows for the detection of the close proximity of Masimo’s MyView Presence Tag. Root’s detection of Masimo’s MyView Presence Tag is an optional feature that allows for the display of predetermined customized settings by a clinician. Root utilizes only configured MAC addresses to establish Bluetooth communication to prevent unauthorized connection to other Bluetooth enabled devices.
- Page 54 Chapter 3: Operation Root Battery Use the Root Battery screen to view the specific percentage of charge on the battery. The user can also access Root's Battery screen by pressing the Battery icon on the Status Bar. See About the Status Bar on page 28.
- Page 55 Root Chapter 3: Operation Brightness Use the Brightness screen to adjust the brightness of the Root display. Option Description Factory Configurable Default Settings Setting Auto Allows automatic adjustment of Root's display brightness based on ambient light. Off On or Off...
- Page 56 30 sec 3 min, 5 min, 10 5 min, 10 min, or 15 min, as Interval min, 15 min, or Off well as Off. Allows for Root software to Allow Unsigned be reverted back to older On or Off Upgrade version...
- Page 57 Factory Defaults Options are restored to Press Restore. factory value. *Changes to USB Ports baud rate will take effect after Root is power cycled, turned off then on again. Note: Restore Factory Defaults can only be performed during non-monitoring and no cable connections are present.
- Page 58 Root Chapter 3: Operation Device Output The Device Output screen allows the user to configure additional data output options. A Nurse Call can be triggered based on alarm, low Signal IQ events or both. In addition, Nurse Call Polarity can be inverted to accommodate local Nurse Call station requirements.
- Page 59 IntelliBridge connectivity allows Root to transmit parameters and waveforms to Philips multi-parameter patient monitors that support Philips IntelliBridge device interfacing modules. This option allows parameters and waveforms on Root to be displayed on a Philips monitor and, if applicable, transmitted to the electronic medical record system.
- Page 60 Chapter 3: Operation About Use the About screen to view the serial number as well as software and hardware version information about Root. These details may be helpful during troubleshooting. Option Description Serial Number Displays the serial number for the device.
- Page 61 (Adult, Pediatric, and Neonatal) configure parameter alarms, averaging time, and sensitivity modes. Root has the ability to support up to eight (8) custom profiles to accommodate usage in any hospital environment. For more information regarding Profiles, see the Instructions for Use or Operator’s Manuals for Radical-7, Radius-7, and appropriate MOC-9 module(s).
-
Page 62: Alarm Interface
Root Chapter 3: Operation Alarm Interface Alarms can have different priority levels and come from different sources. The following tables describe alarm behaviors in more detail. Priority Alarm Sound High 10-pulse burst Medium 3-pulse burst Alarm Example Explanation Source Parameter... - Page 63 The example shown here is a "Low Level Battery" alarm. Note that the border of the entire Root display is illuminated yellow, and the explanation of the alarm is shown in the Status Bar (Low Battery). For more details about specific alarms on Radical-7, Radius-7, and MOC-9 modules, see Directions for Use or Operator’s Manuals for Radical-7, Radius-7, and MOC-9 modules.
- Page 64 Audio Pause Audio Pause temporarily suspends all audible alarms on Root. When it is active, visual alarms are not impacted and will still display. The Audio Pause icon is located on the left side of the Status Bar – do not confuse with the Sounds icon on the right side of the Status Bar. See About the Status Bar on page 28.
- Page 65 To configure Audio Pause, see Sounds on page 47. Audio Pause active. 15 seconds until Audio Pause is inactive. Note: When Audio Pause is activated, powering off and then powering on Root will return Audio Pause to its default inactive state.
- Page 66 To enable Standby Mode (suspend monitoring) On Root, open the Access Control menu. Swipe the standby enabled button to ON. Return to the home screen on Root, and the Standby icon will appear on the screen in the top-left corner.
-
Page 67: Trend Download
Radius-7, and MOC-9 modules. Trend data from Root can be transferred to a computer via USB for evaluation. Trend data is stored in non-volatile memory, so it is not erased when Root is shut off. Trend data download is initiated using the Masimo Instrument Configuration Tool, which converts the data to a .TXT or .CSV file. - Page 68 To take a screenshot, swipe across the Root screen from right to left using three fingers simultaneously (see image below). A confirmation flash will appear on the entire screen and a status message will be displayed briefly at the top of the Root screen. The status message indicates the filename of the screenshot taken.
-
Page 69: Lights
Root Chapter 3: Operation A confirmation status message will display briefly at the top of the Root screen when the file transfer is complete. Unplug the USB drive from Root. To import the screenshots from the USB drive onto a computer, open the folder titled “screen_shot”... - Page 70 Battery is not being charged. Root is not connected to AC power source. Radical-7 and Radius-7 Charging Indicator When Root is connected to an AC power source, it is able to charge a correctly docked Radical-7 or Radius-7. This is true whether the device is powered on, in Sleep Mode, or powered off.
- Page 71 Battery is unable to charge. Battery is fully charged, not being charged. Sleep and Power Off To put Root in the Sleep Mode or Power Off Mode, follow these steps: State Description Press and hold the Power Button for two (2) seconds until one (1) audible tone Sleep sounds.
-
Page 73: Chapter 4: Admit And Discharge To Patient Safetynet
A Not Admitted message will appear on the Root screen when the sensor is placed onto a patient and a patient has not yet been admitted on the Root. Press the Admit button on the screen to admit the patient or press skip and the patient data will not be transmitted to the Masimo Patient Safety Net. -
Page 74: Admitting A Patient
Root Chapter 4: Admit and Discharge to Patient SafetyNet Admitting a Patient To admit a patient: Press the admit icon on the bottom-left of the main screen. Enter the authentication PIN. Either press the patient info search button (1) to select existing patient information, or enter new patient information in the data fields (2). -
Page 75: Discharging A Patient
Root Chapter 4: Admit and Discharge to Patient SafetyNet Discharging a Patient To discharge a patient: Press the discharge icon on the bottom-left of the main screen. Enter the authentication PIN. Press the Discharge button. A confirmation message will appear. -
Page 76: Not Monitoring Message
When the sensor is off the patient for an extended period of time, a Not Monitoring message will appear on the screen. Acknowledge the message by pressing Cancel or Discharge. Press Discharge to discharge the patient that is currently admitted on the Root, or press Cancel to keep the same patient admitted. -
Page 77: Monitoring Resumed Message
The Electronic Medical Record (EMR) Push feature allows clinicians to send validated patient vitals data from any of the Masimo devices, MOC-9 modules, or Iris devices connected to Root directly to a Patient Data Management System, such as an Electronic Medical Record (EMR). - Page 78 Chapter 4: Admit and Discharge to Patient SafetyNet Sending Data to the EMR To send user data, select the EMR push icon at the bottom of the Root main/home screen. When the EMR Push screen appears, the following manual entry items can be configured before sending data to EMR: •...
- Page 79 In the example below, note that the temperature has been obtained using the Root with integrated temperature function. Select to send the data, including any manual entries, to the EMR. A Successfully Sent Data to EMR confirmation screen appears. Select OK. Select OK to return Root to the main screen. www.masimo.com Masimo...
- Page 80 -- and 1 to 10 in increments of 1 feels * Not displayed unless an appropriate device or sensor is connected to Root. ** Not displayed if a temperature/blood pressure measurement is taken using Root with noninvasive blood pressure and temperature.
-
Page 81: Chapter 5: Radius-7
Root. When Radius-7 is connected to Root via Bluetooth, the device automatically creates a Window that displays all the data from Radius-7. Root also acts as a charging station for Radius-7. Radius-7 is docked onto Root via a Battery Charging Adapter. See Radius-7 Operator's Manual for more information. -
Page 83: Chapter 6: Moc-9
SedLine, ISA Capnography, and third-party technologies in an all-in-one view on Root. When any MOC-9 module is connected, Root automatically creates a Window that displays all the data from that module. The example below shows the “SedLine” and “Capnography”... -
Page 85: Chapter 7: Iris
Root to Patient SafetyNet or Connectivity Gateway, which can send the data to electronic health records. Below is an example of one way Root can be used in a network setting using Patient SafetyNet. Root receives and may display information from Radical-7, MOC-9 modules, as well as standalone devices. -
Page 86: Iris Status Screen
Iris option on the Main Menu. Connection Description of Connection Status Color Standalone device is successfully connected to Root, and Root is Green successfully connected to a Patient SafetyNet or Connectivity Gateway. Standalone device connection to Iris adapter is established, but there is... -
Page 87: Using Iris Connectivity Ports
Additionally, the Ports are also mapped to the Iris icon on the Status Bar. When a standalone device is connected to Root via one of the Ports, the corresponding part of the icon will be lit green or yellow. In the example below, a standalone device is connected to Iris Connectivity Port 1. -
Page 89: Chapter 8: Messages
Chapter 8: Messages The following messages are specific to Root: Message Explanation Next Step The internal battery needs to be Battery Charge is Charge Root's battery using AC charged. System Status Lights Low. power. flash yellow. MOC-9 module Reconnect module or acknowledge... -
Page 91: Chapter 9: Troubleshooting
Press Power Button for two (2) seconds. enough. The battery may be Root does not turn on. Connect Root to AC power to charge battery. depleted. One of the fuses is Replace the fuse. See Replacing the Fuses on not operating page 103. - Page 92 Root has a continuous eight (8) seconds. If alarm continues to sound, Internal failure. speaker tone. Power Off Root. Root requires service. See Return Procedure on page 105. To Power On when turned off or in Sleep Mode, Power Button may press Power Button for two (2) seconds.
-
Page 93: Chapter 10: Specifications
Chapter 10: Specifications This chapter contains specifications of Root. For information on the specifications of Radical-7, Radius-7, MOC-9 modules, and standalone devices, see Directions for Use or Operator's Manuals for these devices. Alarms Audio Alarm System Status Audio Description Type... -
Page 94: Electrical
Root Chapter 10: Specifications Electrical Root AC Power requirements 100-240 VAC~, 47-63 Hz, 65VA Max Fuses (2) 2 Amp, Metric, (5x20mm), 250V, 1500A Breaking Capacity Battery Type Lithium Ion Voltage 10.8V (Nominal) Capacity 4 hours* Maximum Charging Time 4 hours *This represents approximate run time at the lowest brightness, using a fully charged battery. -
Page 95: Touchscreen Display
Root Chapter 10: Specifications Touchscreen Display Characteristic Description Type Backlit Active Matrix TFT LCD Resolution 1280 x 800 pixels Size 10.1 in (25.65 cm) Diagonal Color 24 bit RGB Touchscreen Type Multi-Touch P-Cap Wireless Specifications Communication (Wi-Fi) Type WLAN Radio: IEEE 802.11 a/b/g 802.11a: 5180-5240 MHz, 5745-5825 MHz... - Page 96 Root Chapter 10: Specifications Communication (Bluetooth) Type Bluetooth Frequency 2402-2480 MHz Max Peak Output Power Bluetooth 1.3 dBm Classification of Output Conducted Power Rating Output Power Type Fixed at the Factory Modulation Types Modulation Signals Analog and Digital Available Data Rates...
-
Page 97: Compliance
Root Chapter 10: Specifications Compliance EMC Compliance EN 60601-1-2, Class A Software Compliance EN 60601-1-4:1996 + A1: 1999 Electrical and Mechanical Safety UL 60601-1:2003 CAN/CSA 22.2 No. 601.1:2005 IEC 60601-1 / UL 60601-1: 1988 + A1: 1991 + A2:1995 EN 60601-1: 1990 + AI: 1993 + A2:1995... -
Page 98: Guidance And Manufacturer's Declaration-Electromagnetic Emissions
Root Chapter 10: Specifications Guidance and Manufacturer's Declaration-Electromagnetic Emissions Guidance and Manufacturer's Declarations - Electromagnetic Emissions The ME Equipment is intended for use in the electromagnetic environment specified below. The customer or the user of the ME Equipment should assure that it is used in such an environment. -
Page 99: Guidance And Manufacturer's Declaration-Electromagnetic Immunity
Voltage dips, short 100% for 0.5 a typical commercial or hospital interruptions and cycle voltage variations on environment. Root provides a battery 60% for 5 power supply input for continued operation during power cycles lines. mains interruption for a maximum of 4 hours. - Page 100 Root Chapter 10: Specifications Guidance and Manufacturer's Declaration - Electromagnetic Immunity Portable and mobile RF communications equipment should be used no closer to any part of the ME Equipment, including cables, than the recommended separation distance calculated from the equation applicable to the frequency of the transmitter.
-
Page 101: Recommended Separation Distances
Root Chapter 10: Specifications Guidance and Manufacturer's Declaration - Electromagnetic Immunity (a) Field strengths from fixed transmitters, such as base stations for radio (cellular/cordless) telephones and land mobile radios, amateur radio, AM and FM radio broadcast and TV broadcast cannot be predicted theoretically with accuracy. To assess the electromagnetic environment due to fixed RF transmitters, an electromagnetic site survey should be considered. -
Page 102: Symbols
Root Chapter 10: Specifications For transmitters rated at a maximum output power not listed above, the recommended separation distance d in meters (m) can be estimated using the equation applicable to the frequency of the transmitter, where P is the maximum output power rating of the transmitter in watts (W) according to the transmitter manufacturer. - Page 103 No parameter alarms (polyvinyl chloride) material Not made with natural rubber Caution latex Manufacturer Catalog number (model number) Date of manufacture Masimo reference number YYYY-MM-DD Storage temperature Serial number range Keep dry Fragile, handle with care Storage humidity Do not use if package is damaged...
- Page 104 Root Chapter 10: Specifications Symbol Description Symbol Description AC current Fuse Wireless features can be used in member states with the Wireless Symbol level restriction of indoor use in France -Class 2 wireless device Stand-By Iris Connection RS-232 Interface Ethernet...
-
Page 105: Chapter 11: Service And Maintenance
Cleaning Root is a non-sterile and reusable device. The surface of the Root should be cleaned when the device is visibly dirty, before and after each procedure, and/or according to hospital practice. To surface clean, wipe down the outer surface of Root using any of the following: •... -
Page 106: Power-On Self Test
Power-On Self Test To conduct a Power-On Self Test Connect Root to AC power, and verify that the AC Power Indicator is illuminated. Power On Root. Within five (5) seconds, all available indicators will illuminate, the device will emit a tone, and the Masimo logo will display. -
Page 107: Battery Test
Verify that the Root Charging Indicator is illuminated. When Root is fully charged, the Root Charging Indicator turns off. Power On Root and verify that the Root Battery Indicator icon on the Status Bar shows a full charge. Repair Policy Masimo or an authorized Service Department must perform warranty repair and service. -
Page 108: Contacting Masimo
(6) months from the original date the Product was obtained by the end-user purchaser. Masimo’s sole obligation under this warranty is the repair or replacement, at its option, of any defective Product or software media that is covered under the warranty. - Page 109 Products or Software. In no event shall Masimo’s liability arising from any Product or Software (under contract, warranty, tort, strict liability, or otherwise) exceed the amount paid by purchaser for the Product or Software.
- Page 110 Product or the Software on a temporary basis. Purchaser shall not assign or transfer this License, in whole or in part, by operation of law or otherwise without Masimo's prior written consent; except that the Software and all of Purchaser’s rights hereunder shall transfer automatically to any party that legally acquires title to the Product with which this Software is included.
-
Page 111: Index
Compliance Warnings and Cautions • 14 Alarm Silence • 28, 62 Connectors • 91 Alarms • 91 Contacting Masimo • 106 Audio Pause • 28, 47, 56, 62 Contraindication • 10 Customizing Windows • 32, 41, 46 Back View • 18 Battery Test •... - Page 112 Replacing the Fuses • 89, 103 Localization • 30, 48, 49 Restrictions • 108 Return Procedure • 21, 89, 90, 105 Root Battery • 23, 48, 52 Menu Navigation • 35 Root Charging Indicator • 30, 68 MOC-9 Connection • 25 Monitoring Resumed Message •...
- Page 113 Trend Download • 65 Trend Settings • 43, 58 Troubleshooting Radical-7, Radius-7, and MOC-9 Modules • 89 Troubleshooting Root • 89 Understanding Windows • 36 Unpacking and Inspection • 21 Using Analog View • 37, 39 Using Iris Connectivity Ports • 85 Using MOC-9 Ports •...
- Page 116 37365/LAB-8425C-0617...
Need help?
Do you have a question about the Root and is the answer not in the manual?
Questions and answers