4RF Aprisa SR+ Manual
Demo kit
Hide thumbs
Also See for Aprisa SR+:
- User manual (492 pages) ,
- Product description (49 pages) ,
- Quick start manual (2 pages)
Table of Contents
Advertisement
Advertisement
Table of Contents

Related Manuals for 4RF Aprisa SR+


Summary of Contents for 4RF Aprisa SR+
- Page 1 September 2018 Version 1.3.0...
- Page 2 Copyright © 2018 4RF Limited. All rights reserved. This document is protected by copyright belonging to 4RF Limited and may not be reproduced or republished in whole or part in any form without the prior written permission of 4RF Limited.
-
Page 3: Table Of Contents
PC Settings ..................7 Radio Settings ..................7 Demonstration Procedure .............. 8 Basic Operation ................... 8 Advanced HMI 4RF SR+ SCADA Demo ............10 Laptop Configuration and Installation ..........10 SCADA Simulation / HMI ..............10 Default Configurations ..............11 Aprisa SR+ Radios ................ -
Page 4: Introduction
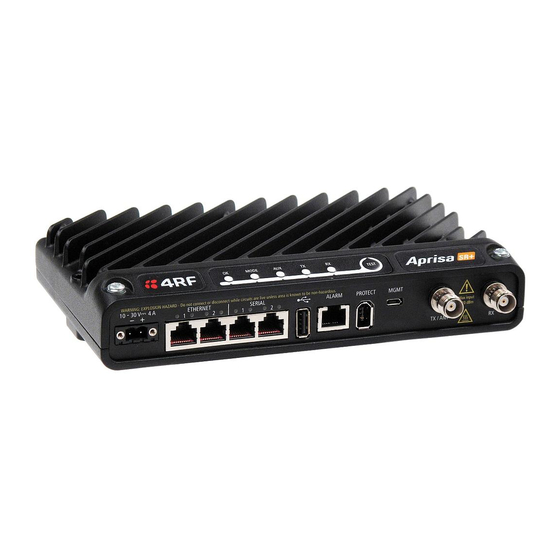
4 | Introduction Introduction The following instructions outline the equipment and procedure for demonstrating the operation of the Aprisa SR+. It runs through the steps to show the web browser management and Test Button operation. The demo kit demonstrates; • concurrent Ethernet and RS-232 serial data communications between an Aprisa SR+ base station and two Aprisa SR+ remote stations •... -
Page 5: Equipment List
Hardware 1. Aprisa SR+ Demo Kit 2. Laptop or PC 3. IP Camera (optional extra – to purchase please contact your 4RF representative) Software The software required for the demonstration has been provided on the included USB Flash Drive. 1. Web Browser (Internet Explorer) 2. -
Page 6: Demonstration Setup
6 | Demonstration Setup Demonstration Setup The following is a typical demonstration setup: When setting up the equipment for testing, note the following: Attenuators In a bench setup, there should be 60 - 80 dB at up to 1 GHz of 50 ohm coaxial attenuation, capable of handling the transmit power of +37 dBm (5 W) between the radios’... -
Page 7: Demonstration Settings
Demonstration Settings | 7 Demonstration Settings PC Settings The following are the PC settings required for this demo: Network Connections Terminal Emulator Local Area Connection COM Port Settings Properties BaudRate 38400 Internet Protocol TCP/IP Settings Data 8 bit IP Address 172.17.200.110 Parity None... -
Page 8: Demonstration Procedure
8 | Demonstration Procedure Demonstration Procedure All commands to be typed are shown in italics. Basic Operation 1. Open Internet Explorer and access 172.17.200.10 a. Username: admin b. Password: admin 2. Show basic Web browser management a. Tab through the various screens and explain about remote management 3. - Page 9 Demonstration Procedure | 9 8. Show RSSI change a. In Web browser, browse to the base station Maintenance Summary page and note the RSSI b. Browse to the remote radio 1 Radio Setup page c. Change the Tx Power from +37 dBm to +27 dBm and save this change d.
-
Page 10: Advanced Hmi 4Rf Sr+ Scada Demo
Port 1: green 3. On the base station laptop, go to Start menu > All Programs > 4RF Advanced HMI 4. Proceed with selecting the various inputs via either the laptop or the switches on the demo kit and... -
Page 11: Default Configurations
Default Configurations | 11 Default Configurations The Aprisa SR+ Demo Kit has been preconfigured to specific parameters in keeping with the demonstrations outlined in this document. Should at any stage parameters be changed and a reset to the original state is required, the following procedures may be used. -
Page 12: Layer 2 Filter
12 | Default Configurations Layer 2 Filter Layer 2 Filter enabled Layer 2 Filter Rules Source Destination Protocol Type MAC Address MAC Address Allow ARPS FF:FF:FF:FF:FF:FF FF:FF:FF:FF:FF:FF Allow Unicasts from ANY source FF:FF:FF:FF:FF:FF FE:FF:FF:FF:FF:FF Moxa RTU The RTU has been preconfigured to the requirements of this demo kit. However, should the settings be changed in any way, the parameters can be re-configured by following these steps: The factory default IP address of the RTU (MOXA ilogik E2124) is 192.168.127.254 1.
Need help?
Do you have a question about the Aprisa SR+ and is the answer not in the manual?
Questions and answers