
Related Manuals for Hellenbrand ProMate 1


Summary of Contents for Hellenbrand ProMate 1
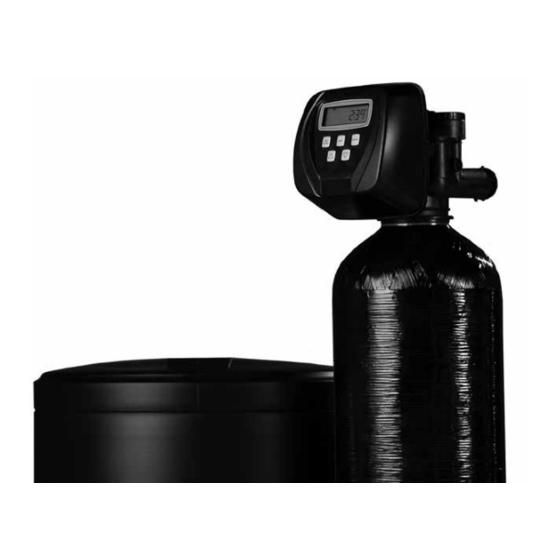
- Page 1 Owner’s Manual 106231 Rev A 6/24/19-LBRY ©2019 Manufactured by: HELLENBRAND hellenbrand.com • info@hellenbrand.com...
-
Page 2: Table Of Contents
This owner’s manual is designed to assist owners and installers with the operation, maintenance and installation of your new water softener. It is our sincere hope that this manual is clear, concise and helpful to both owner and installer. We have included detailed in- structions on general operating conditions, pre-installation and installation instructions, start-up, and timer and meter programming. -
Page 3: Job Specification Sheet
= _______ Total Grains Per Day *INSTALLATION DATE _________________________________________________________________________________ *REVISION (REV) NUMBER _______________________________________________________________________________ NOTES ______________________________________________________________________________________________ ____________________________________________________________________________________________________ Dealer Name __________________________________________________ Phone _______________________________ Address _______________________________________________________ Email ________________________________ ____________________________________________________________________________________________ Hellenbrand products are not for sale or distribution into the State of California effective 8/31/18... -
Page 4: Soft Water Basics
SOFT WATER BASICS Hardness Excess amounts of calcium and magnesium in water produce hardness. A water softener removes the majority of calcium and magnesium to produce softened water. Hardness is measured in terms of grains. (This grain weight is derived from the average weight of a dry grain of wheat.) When your water is tested the grain hardness is calculated and expressed as grains per gallon (gpg). -
Page 5: Pre-Installation Check List
PRE-INSTALLATION CHECK LIST (All electrical & plumbing should be done in accordance to all local codes) Water Pressure: A minimum of 25 pounds of water pressure free from lime and iron build-up. Piping that is built-up heavily with lime and/or iron must be replaced. If piping is blocked with (psi) is required for regeneration. -
Page 6: Installation Instructions
INSTALLATION INSTRUCTIONS (All electrical & plumbing should be done in accordance to all local codes) 5. The drain connection may be made using either 5/8” polytube • Do not use vaseline, oils, other hydrocarbon lubricants or (See figure 6a, page 6) or a 3/4” female adapter. If soldering, spray silicone anywhere. -
Page 7: Startup And User Display Settings
Initial Start Up “Diagnostic Mode” 1/2 way. Allow water to slowly fill The initial start up will probably be done by the technician install- the mineral tank. When a solid stream of water starts ing the softener system. If not, the following instructions will step coming out of the drain line, open the by-pass inlet you through the process. -
Page 8: Time Of Day And Installer Settings
SET TIME OF DAY Step 1 - Press SET CLOCK. STEP 1 Step 2 - Current Time (hour): Set the hour of the day using or buttons. AM/PM toggles STEP 2 after 12. Press NEXT to go to step 3. Step 3 - Current Time (minutes): Set the minutes of day using ... -
Page 9: Programming
CYCLE TIME ADJUSTMENTS Normally it is not recommended to adjust the lengths of the cycle times. However, certain water conditions may dictate adjustments. This should only be done from the recommendation of a water conditioning professional. The following charts shows the upper and lower limits of each cycle. Cycle Options Units Lower/Upper Limit... - Page 10 STEP 8S – Select the time for the fourth cycle (which in this example is RINSE) using the or STEP 8S button. Press NEXT to go to Step 9S. Press REGEN to return to the previous step. RINSE STEP 9S - Set Grain Capacity using the ...
-
Page 11: Set Salt Option
SET SALT MONITOR OPTION NOTE: This screen will not appear if system is set up as a filter or the 'set low salt warning' STEP 1US is set to off. See dealer for details Step 1US - Press the NEXT button until SALT appears in the display. It does not matter if the SALT display alternates with the LBS REMAINING display. -
Page 12: Diagnostics
DIAGNOSTICS STEP 1D STEP 1D – Press and simultaneously for three seconds. If screen in step 2D does not appear in 5 seconds the lock on the valve is activated. To unlock press , NEXT, , and SET CLOCK in sequence, then press ... - Page 13 STEP 8D STEP 8D – MAV Drive History in the direction of extended piston rod position. Display will not be shown if 1.0T is not selected in Step 2CS or OFF is selected in Step 4CS. If the display does ap- pear up to a four digit number will appear after the “L”...
-
Page 14: Deep Valve History And Cycle Sequence
VALVE HISTORY (Can not be reset) STEP 1VH – Press and simultaneously for three seconds, or until display changes and STEP 1VH release, then press and simultaneously and release. If screen in step 2VH does not appear in 5 seconds the lock on the valve is activated. - Page 15 Step 3CS – Allows selection of one of the following using or : STEP 3CS • the Control Valve to have no hard water bypass; • the Control Valve to act as an alternator; or • the Control Valve to have a separate source during the regeneration cycle; or •...
- Page 16 For systems using WS1, WS1.25 and WS1.5 valves there will WS1, WS1.25 and be an option to delay the last two cycles of regeneration (only WS1.5 Valves “Rinse” and “Fill”). This feature splits the regeneration into two portions. The first portion of the regeneration will start immediately and all programmed cycles before the “Rinse”...
- Page 17 STEP 3 CS Option – Seperate Source – Use or buttons to select SEPS. Selection requires that connection is made from 3-way MAV to two-pin connector on board labeled Al- ternator Drive. "C" port is connected to valve inlet. "A" port is connected to separate source supply.
-
Page 18: Water Softener Disinfection
WATER SOFTENER DISINFECTION The construction materials of your water softener will not support White Sail and Eagle Brand Bleach. If stronger solutions are bacterial growth nor will these materials contaminate a water used, such as those sold for commercial laundries, adjust supply. -
Page 19: Troubleshooting
TROUBLESHOOTING PROBLEM CAUSE CORRECTION After resolving the cause of any error code or any service work on valve, press NEXT & REGEN simultaneously for 5 seconds or disconnect power supply for 5 seconds at PC board and reconnect to resynchronize software with piston position. VALVE ERROR CODES Error Code 101 - Unable to recognize A1. - Page 20 TROUBLESHOOTING PROBLEM CAUSE CORRECTION 2. Blank or incomplete display on board A. Transformer unplugged A. Plug transformer into uninterrupted power supply, verify power connection is plugged into 4-prong connection on PC board B. No electric power at outlet B. Repair outlet or use working outlet, should read 115V with voltmeter at outlet.
-
Page 21: Troubleshooting
TROUBLESHOOTING PROBLEM CAUSE CORRECTION 10. Excessive water in brine tank. A. Plugged injector. A. Remove injector and clean ports. B. Faulty piston/seal assembly. B. Replace piston/seal assembly. C. Plugged or kinked drain line. C. Correct any kinking or plugging of drain line. D. -
Page 22: Parts Diagrams
PROMATE-1 CONDITIONER & BRINE TANK ASSEMBLIES ® Item Description Part # Metered Control Valve 107253-PM1-32K Top Diffuser 101539 3&4 Mineral Tank Assembly Item 3 only Item 4 only Mineral Tank Distributor Assy PM1-024 8 x 44 104535 101505 PM1-032 9 x 48 104539 101508 PM1-032-10 10 x 44... - Page 23 FRONT COVER AND DRIVE ASSEMBLY When replacing the battery, align QTY. ITEM NO. DESCRIPTION ORDER NO. positives and push down to fully seat. Correct 112590 Front Cover Assy w/Label Battery Battery replacement is 102096 Motor Orientation 3 volt lithium coin cell type 2032.
- Page 24 INJECTOR CAP, INJECTOR SCREEN, INJECTOR, PLUG AND O-RING ITEM NO. DESCRIPTION QTY. ORDER NO. 101375 Injector Cap 102159 O-ring 135 102457 Injector Screen 102319 Injector Assy. Z Plug-Filter 101825 Injector Assy. A Black 101826 Injector Assy. B Brown 101827 Injector Assy. C Violet 101828 Injector Assy.
- Page 25 DRAIN LINE - 3/4” QTY. ITEM NO. DESCRIPTION ORDER NO. 101414 Elbow Locking Clip 101871 Polytube Insert, 5/8” Optional 102131 Nut 3/4” Drain Elbow Optional 101618 Drain Elbow 3/4” Male Assy-Vent Optional 101619 Drain Elbow 3/4" Male Assy-No Vent 102153 O-ring 019 102406 DLFC Retainer Assy.
- Page 26 WATER METER AND METER PLUG QTY. ITEM NO. DESCRIPTION ORDER NO. 102141 Nut 1” QC 102051* Meter Assy. 102687 Turbine Assy. 102165 O-ring 215 102231 Meter Plug Assy.** *Order number 102051 includes 102687 and 102165, which are item numbers 3 & 4. **Only used if metering is not to be done (time clock units) The nuts and caps are designed to be unscrewed or tightened by hand or with the special plastic wrench.
-
Page 27: Installation Fitting Kits
INSTALLATION FITTING ASSEMBLIES 101639 - Fitting 1” PVC Male NPT 101640 - Fitting 3/4” & 1” PVC Solv 90 108618 - Fitting 1” Lead Free Brass Sweat 108617 - Fitting 3/4” Lead Free Brass Sweat 101643 - Fitting 1” Male NPT 101644 - Fitting 1-1/4”... -
Page 28: Specifications
Factory default setting are shown in bold Recommended minimum pipes sizes are copper pipe equivalent, when using PEX increase one nominal size Hellenbrand products are not for sale or distribution into the State of California effective 8/21/18. 800870 REV C... -
Page 29: Warranty
This warranty gives you specific legal rights, and you may also have other rights which vary from state to state. Hellenbrand products are not for sale or distribu-...