
Related Manuals for Stewart Filmscreen Corp Luxus


Summary of Contents for Stewart Filmscreen Corp Luxus
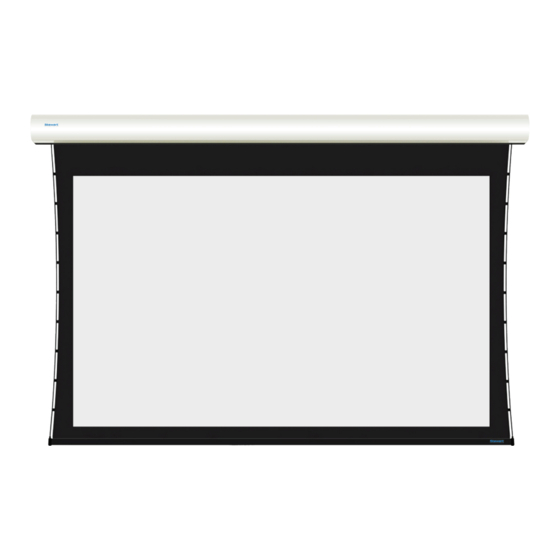
- Page 1 O W N E R S M A N U A L Luxus Retractable, Below Ceiling Screen System Producers of Professional Projection Screens...
- Page 2 Printed in U.S.A. ©2019 Stewart Filmscreen Corporation Stewart Filmscreen reserves the right to make changes to the product specified in this document. Sizes and specifications subject to change without notice at Manufacturer’s discretion. From time to time, this document is updated. Current versions of documentation are posted on the Stewart Filmscreen website at: www.stewartfilmscreen.com...
-
Page 3: Table Of Contents
Luxus O W N E R S M A N U A L Contents To the Owner About the Luxus Using This Manual for Installation EZ Mount Ceiling Flush Mount Electrical RTS Motor Operation Operating the Screen STI-100 Controller Installation... -
Page 4: To The Owner
It’ll also provide you with detailed instructions on how to care for your viewing surface From all of us here at Stewart Filmscreen, we’d like to thank you for choosing the Luxus Should you have any issues please don’t hesitate to contact our customer service department We’re here to help... -
Page 5: About The Luxus
ABOUT THE LUXUS A new redesign of an Old classic Stewart Filmscreens’ Luxus offers a premium below ceiling viewing experience The newly redesigned case allows the screen to deploy close to the wall or safely in front of your décor With the combination of your choice of several control / mounting options and Stewart Filmscreen’s world renowned premium screen materials, this screen is one of the most versatile screens... -
Page 6: Using This Manual For Installation
USING THIS MANUAL FOR INSTALLATION If you are using this manual to install the Luxus, be aware that it describes procedures for two types of mounting options Refer to the appropriate section for either mounting option EZ Mount Bracket System... - Page 7 The Luxus may have special retainers for the batten and roller tube If installed, these items may be left in place until after the screen has been mounted These items must be removed before operation...
-
Page 8: Ez Mount
EZ MOUNT Professional mounting techniques should be used Stewart Filmscreen cannot be liable for substandard or faulty installations BE CAREFUL NOT TO TOUCH OR SCRATCH THE VIEWING SURFACE! Identify the location of wall studs where you can securely mount the hanging bar 2 Use a level to accurately position the hanging bar on the wall 3 Drill holes through the bar into the studs 4 Use the provided 2”... -
Page 9: Ceiling Flush Mount
3 Screw the ceiling brackets to the ceiling Ensure the screws are mounting to solid wood and that the locking holes are in line 4 Slide the case onto the ceiling brackets 5 Place the locking pin into the ceiling brackets Luxus... -
Page 10: Electrical
ELECTRICAL The Luxus product can be controlled through a number of remote control devices, including keypads, dry contact outputs, and low-voltage trigger outputs i CAUTION To be installed and/or used in accordance with appropriate electrical codes and regulations Note: This manual refers to “AC” to represent electrical power Your location may use 120 V, 220 V, or... - Page 11 Press the “Down” button once, and the Luxus screen will automatically extend fully to its pre-set limit, and then will power itself off Press the “Up” button once and the Luxus screen will automatically retract back into the case and power itself off If a custom position is desired, simply press the “Stop” button at any time during the screen’s deployment or retraction...
-
Page 12: Rts Motor Operation
RTS MOTOR OPERATION RTS MOTOR The Somfy RTS motor is an advanced option that integrates well with home automation systems This unit can be used with the standard RF remotes provided by Somfy or, through their MyLink device With the help of MyLink, the RTS motor can be controlled by using Amazon Alexa, Google Home, IFTTT, or the MyLink app on your cell phone Stewart Filmscreen... -
Page 13: Operating The Screen
The 3-button, low-voltage keypad operates with only 3 conductors; common, up & down The “Stop” function shorts both directions internally to common You can use both switching functions simultaneously by simply connecting a splitter to the Luxus RJ Input jack The trigger input is only a 2 conductor connection... -
Page 14: Sti-100 Controller Installation
STI-100 CONTROLLER INSTALLATION INSTALLATION AND OPERATION INSTRUCTIONS Description The STI-100x Series of Controllers are designed to control residential, and commercial bidirectional blind, drapery and projection screen motors The STI uses low voltage signals to control the mains high voltage AC motor The STI-100 supports both a close contact ,and voltage sense inputs There are two close contact inputs, one for up and one for down These inputs require an external switch or relay to short these inputs to ground The voltage sensing input will trigger an up or down... - Page 15 LV2&LV2 Open Dry closure whereby the change of a signal must exist for a time greater LV1&LV2 Open 0V -> 12V Down than 80ms Any signal less that LV1&LV2 Open 12V -> 0V 80ms is ignored Luxus...
- Page 16 STI-100 CONTROLLER INSTALLATION (CONTINUED) Specification LV Connections Relay contacts 1/3 hp motor 120V LV 1 & 2 1/2 hp motor 240V Open circuit voltage ~5vdc <1 1mA 5 Amp resistive load Closed circuit current Power Requirement 120vac (<0 5w) STI Voltage min 3 2 v dc 240vac (STI-101) STI Voltage max...
- Page 17 If you turn this limit switch too much (clockwise) and the screen is now stopping short of where you want it, simply turn it in the opposite direction (counter-clockwise) and the screen will automatically drop in increments as you rotate the switch Luxus...
-
Page 18: How To Adjust Projection Screen Motor Limit Switches
HOW TO ADJUST PROJECTION SCREEN MOTOR LIMIT SWITCHES (SCREENS WITH STI100 ONLY) ADJUST THE SCREEN’S RETRACTED (UP) STOPPING POSITION We typically don’t advise users to make ad- justments of this switch because they can inadvertently damage the screen and or motor if the fully retracted stopping posi- tion is set “too high”... -
Page 19: Caring For And Cleaning The Screen
Contact the factory if you have questions about removing difficult spots i CAUTION Do not use any other cleaning materials on the screen Do not use chemicals or solvents to clean the screen Use only commercially available, water based de-greaser Luxus... -
Page 20: Troubleshooting
TROUBLESHOOTING Refer to the following guidelines if you encounter a difficulty in the operation of your Stewart Filmscreen product Problems related to electrical or motor function may require a qualified service person or electrician Should you have a problem that is not addressed here, call Stewart Filmscreen Corporation (310-784-5300) Toll free (800-762-4999) Problem Cause... - Page 21 Indentions appear on screen Debris or particles adhering to Check back of screen; gently surface screen due to static cling brush debris away with a soft brush Luxus...
- Page 22 LIMITED ONE YEAR WARRANTY STEWART FILMSCREEN CORPORATION (Stewart) warrants all products to the original purchaser only Stewart products are guaranteed to be free from defects in materials and workmanship for a period of one (1) year from the date of purchase by the original purchaser or eighteen (18) months from date of manufacture, as defined in the serial number Additionally, all products must be properly operated and maintained according to Stewart instructions and cannot be damaged due to improper handling or treatment after shipment from the factory This warranty does not apply to equipment showing evidence...
- Page 23 www.stewartfilmscreen.com 1161 W. Sepulveda Blvd., Torrance CA 90502 USA 800.762.4999 Tel: 310.784.5300 Fax: 310.326.6870 Email: request@stewartfilmscreen.com ©2019 Stewart Filmscreen. Specifications are subject to change without notice.
Need help?
Do you have a question about the Luxus and is the answer not in the manual?
Questions and answers