
Related Manuals for CareCo Corvus Rapide


Summary of Contents for CareCo Corvus Rapide
- Page 1 U S E R M A N U A L S E R I A L N U M B E R P R O D U C T C O D E M S03 083 Hubert Road, Brentwood, Essex, CM14 4JE...
-
Page 2: Table Of Contents
CONTENTS 1. INTRODUCTION 2. IMPORTANT PRECAUTIONS 3. IDENTIFICATION OF PARTS 4. OPERATION OF CONTROL PANEL 5. OPERATING YOUR SCOOTER 6. CHARGING THE BATTERIES 7. CARE AND MAINTENANCE 8. OTHER INFORMATION 9. TROUBLE SHOOTING 10. OPTIONS 11. TECHNICAL SPECIFICATIONS 12. WARRANTY... -
Page 3: Introduction
1. INTRODUCTION Thank you and congratulations on purchasing your new Corvus Rapide mobility scooter. It is designed to provide the transportation ability indoors and outdoors for person whose ability to walk is impaired, but who are still in terms of their eyesight and physically and mentally able to operate an electric scooter. -
Page 4: Important Precautions
» Keep your weight toward the middle of the deck. Putting most or all of your weight on the edge of the deck may cause an unstable condition. » Only one person at a time could ride a Corvus Rapide Mobility Scooter. Do not carry passengers under any circumstances. - Page 5 2. IMPORTANT PRECAUTIONS 2.2 CAUTIONS WHEN DRIVING » Please do the daily check before your journey always. (Refer to 7-1 Daily check.) » Do not extend your body over the mobility scooter. » Please make sure your safety when crossing the level crossing. »...
- Page 6 2. IMPORTANT PRECAUTIONS 2.3 GENERAL SAFETY INFORMATION FOR SCOOTER » Batteries should be fully charged before using for maximum performance and longevity. (see section 6-2) » The maximum load of the scooter is 160kg. Do not exceed the maximum permissible load. Exceeding the max.
- Page 7 2. IMPORTANT PRECAUTIONS » When driving down a ramp or uneven terrain, keep the scooter’s speed adjustment set to the slowest speed setting to ensure a safely controlled driving. » If the speed is too fast, release the throttle control lever, let the scooter stop. When you feel that you again have control of your scooter, push the throttle control lever forward and continue safely driving.
- Page 8 2. IMPORTANT PRECAUTIONS 2.7 SAFETY WARNING AND INSTRUCTION LABELS Figure 2 Warning Sticker 1. Please read the instruction booklet carefully before using your scooter. 2. Do not drive the scooter on slippery surfaces or on slopes over 6~10 degrees limit. 3.
-
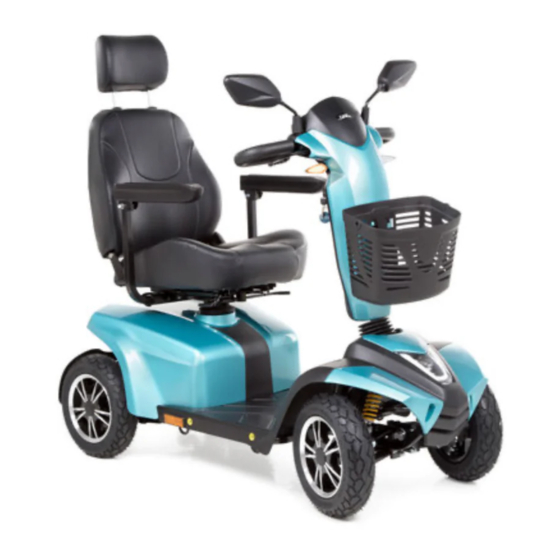
Page 9: Identification Of Parts
3. IDENTIFICATION OF PARTS ITEM Rear Mirror Emergency Hand Brake Tiller Angle Adjustment Lever Front Basket Headlight Decorative Light Side Reflector Seat fore-aft Adjustment Lever Seat Swivel Lever Width adjustable armrests Figure 3 Seat Back Angle Adjustment Lever Luxury Seat Throttle Level Control Panel Front Turn Signal... -
Page 10: Operation Of Control Panel
4. OPERATION OF CONTROL PANEL 4.1 IDENTIFICATION OF CONTROL PANEL Figure 5 - Corvus Rapide Control Panel BUTTON NAME OPERATION Hazard Light Press the Hazard lights button once to switch on, press again to switch off Hi/Lo Switch High / Low mode, see section 4-2... - Page 11 4. OPERATION OF CONTROL PANEL Main Key Switch: » Turn the key to the right - Turn scooter on. » Turn the key to the left - Turn scooter off. » Turn on the scooter, control panel will be in standby mode.
- Page 12 4. OPERATION OF CONTROL PANEL Speed Display Speed Display Max % Max % Max % Max % H / L Switch: » The max speed can be 100% (Max) if [H/L] is set to “H” » The Low Speed LED indicator will be on if [H/L] is set to “L”, the max speed in low speed mode can be up to 60% of max speed of scooter.
- Page 13 4. OPERATION OF CONTROL PANEL Battery Gauge: » When the vehicle is in operation, the battery level will only decrease. Status Display Capacity >80 <80 <65 <50 <35 <25 <20 Figure 9 Low Battery Warning: » Warning Condition: The low battery warning will be activated once the battery level is less 25% of max capacity.
- Page 14 4. OPERATION OF CONTROL PANEL 4.3 [MODE] SELECTION » Press [MODE] to change display mode: TIME, TEMP, ODO, and TRIP. Figure 11 [ TIME ] Figure 12 [ TEMP ] [ ODO ] [ TRIP ] Figure 13 Figure 14 Exit / Save: »...
- Page 15 4. OPERATION OF CONTROL PANEL 4.4 SETTING - USER DEFINE MODE Save/Exit / 1. Make sure the scooter (key) is off. Next Setu p 2. Press and hold both [ ] then Increase Set up turn on the key. Keep holding the buttons until the LCD screen is on.
-
Page 16: Operating Your Scooter
5. OPERATING YOUR SCOOTER 5.1 GENERAL OPERATION Brake » Release throttle, scooter will stop automatically. » If necessary, please use handbrake to stop scooter. (Figure 20) Throttle » Pull the right throttle to move scooter forward. Pull the left throttle to move scooter backward. - Page 17 5. OPERATING YOUR SCOOTER Seat fore-aft Adjustment: » Set at a comfortable position by lifting lever forward to adjust the seat. (Figure 24) Seat back Angle Adjustment: » Set at a comfortable seat back angle by moving seat angle lever. (Figure 25) Figure 24 Figure 25 Armrest angle, height, and width adjustment:...
- Page 18 5. OPERATING YOUR SCOOTER Free wheel operation is only recommended on flat surfaces. Never leave your scooter on gradient with its motors disengaged. When adjusting N-D lever, do not sit on the scooter. It’s not able to drive the scooter when the lever is in Neutral.
- Page 19 5. OPERATNG YOUR SCOOTER 5.5 DISASSEMBLING BATTERIES » Release the battery velcro straps and disconnect the battery connectors to remove the batteries. (Figure 33~38) » Batteries are heavy, be careful when removing the batteries. » Do not connect battery terminal [+] [-] with any metals to avoid danger. »...
-
Page 20: Charging The Batteries
6.CHARGING THE BATTERIES 6.1 OPERATING THE CHARGER Batteries must be charged before using the scooter for the first time and should be recharged after each day use. You will need the scooter and the battery charger. » Each country may supply different charger. »... - Page 21 6.CHARGING THE BATTERIES 6.2 INFORMATION FOR BATTERY & CHARGER Battery: Only be used for 12V lead-acid battery, not used for other type of battery or other voltage. » Do not turn the key on while scooter is in charging. » Charge the batteries after each trip.
-
Page 22: Care And Maintenance
7.CARE AND MAINTENANCE 7.1 DAILY CHECK Please always check your scooter before you start your every journey. Check point Inspection Ref. What to do if the inspection is failed N-D leaver Check for correct function. P.12 Contact your dealer. Horn Check for correct function. - Page 23 7.CARE AND MAINTENANCE 7.3 MONTHLY CHECK Check point Inspection Ref. What to do if the inspection is failed Seat / Check for movement and if P.11 Contact your dealer. Upholstery it’s worn. Check if all the battery cables Electronics and connectors are firmly P.13 Contact your dealer.
- Page 24 7. CARE AND MAINTENANCE Follow these easy steps to replace the tyre: 1. Turn off the scooter and remove the key. Make sure the lever is in D position before you lift the scooter. 2. Use an ratchet and socket to remove the drive wheel screw from the centre hub of the wheel.
-
Page 25: Other Information
8. OTHER INFORMATION 8.1 RECYCLING & DISPOSAL The equipment wrapping is potentially recyclable. » The metal parts are used for scrap metal recycling. The plastic parts are used for plastic » recycling. Electric components and printed circuit boards are disposed of as electronic scrap. »... -
Page 26: Trouble Shooting
9.TROUBLE SHOOTING Here are some suggestions about solving problems you may have with your scooter. There is a self-diagnostic warning light on the control panel. To check the self-diagnostic warning light, turn on the key and count the number of blinks on the warning light. 9.1 SCOOTER WON’T MOVE WHEN KEY IN TURNED ON Check point Solution... -
Page 27: Options
10. OPTIONS We offer below options to add functionality for your scooter, please contact the authorized dealer for more information. Height Adjustable Armrests 12V/75Ah Battery 8A Charger Safety Turning Speed Reduction (Gyro Meter) When turning left and right, scooter will reduce the speed itself according turning space to ensure safety. -
Page 28: Technical Specifications
11.TECHNICAL SPECIFICATIONS Overall Length 1400 mm / 55.1” Overall Width 680 mm / 26.8” Overall Height 1325 mm / 52.2” Front Wheels 330 mm / 13” Rear Wheels 330 mm / 13” Weight W/ Batteries 144 kg / 317 Ibs Max. -
Page 29: Warranty
12. WARRANTY There is a comprehensive twelve-month warranty from the date on which your new scooter is delivered. The warranty covers the scooter for repairs or replacement during this period. For more details, please see the warranty conditions below. Warranty conditions: Any work or replacement part installation must be carried out by an authorised service agent. - Page 30 NOTES...
- Page 31 NOTES...
- Page 32 U S E R M A N U A L Hubert Road, Brentwood, Essex, CM14 4JE...
Need help?
Do you have a question about the Corvus Rapide and is the answer not in the manual?
Questions and answers