Sign In
Upload
Download
Table of Contents
Contents
Add to my manuals
Delete from my manuals
Share
URL of this page:
HTML Link:
Bookmark this page
Add
Manual will be automatically added to "My Manuals"
Print this page
×
Bookmark added
×
Added to my manuals
Manuals
Brands
Canon Manuals
Camcorder
XA40
Instruction manual
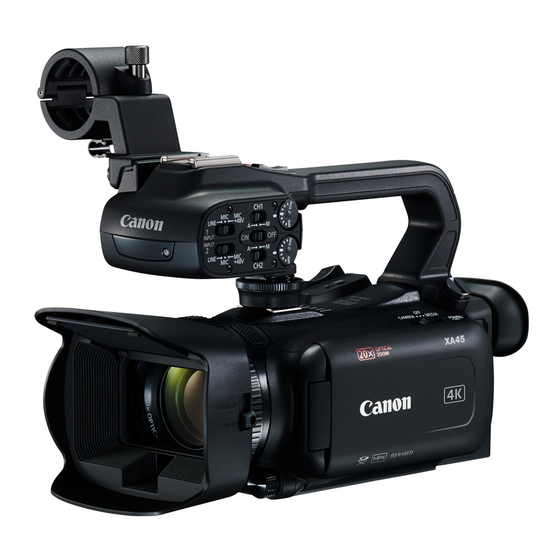
Canon XA40 Instruction Manual
4k camcorder
Hide thumbs
Also See for XA40
:
User manual
(115 pages)
1
2
3
4
Table Of Contents
5
6
7
8
9
10
11
12
13
14
15
16
17
18
19
20
21
22
23
24
25
26
27
28
29
30
31
32
33
34
35
36
37
38
39
40
41
42
43
44
45
46
47
48
49
50
51
52
53
54
55
56
57
58
59
60
61
62
63
64
65
66
67
68
69
70
71
72
73
74
75
76
77
78
79
80
81
82
83
84
85
86
87
88
89
90
91
92
93
94
95
96
97
98
99
100
101
102
103
104
105
106
107
108
109
110
111
112
113
114
115
116
117
118
119
120
121
122
123
124
125
126
127
128
129
130
131
132
133
134
135
136
137
138
139
140
141
page
of
141
Go
/
141
Contents
Table of Contents
Troubleshooting
Bookmarks
Table of Contents
Table of Contents
1 Introduction
About this Manual
Conventions Used in this Manual
Supplied Accessories
Names of Parts
2 Preparations
Attaching the Ferrite Core
Charging the Battery Pack
Preparing the Camcorder
Attaching the Microphone Holder Unit
Attaching the Handle Unit
Using the Lens Hood
Adjusting the LCD Screen
Using the Viewfinder
Grip Belt and Straps
Basic Operation of the Camcorder
Turning the Camcorder on and off
Setting the Camera Mode
Using the MENU Button and Joystick
First Time Settings
Setting the Date and Time
Changing the Language
Changing the Time Zone
Using the Menus
Setup Menus
FUNC Menu
Using SD Cards
Compatible SD Cards
Inserting and Removing an SD Card
Initializing an SD Card
Selecting the SD Card for Recordings
Dual Recording and Relay Recording
Recovering Clips
3 Recording
Recording Clips and Photos
Basic Recording
Reviewing the Latest Clip Recorded
Video Configuration: Resolution, Bit Rate and Frame Rate
Selecting the Resolution and Bit Rate
Selecting the Frame Rate
Slow & Fast Motion Recording
Shooting Modes
Special Scene Modes
Exposure Adjustment
Manual Exposure (N)
Automatic Exposure
Touch Exposure
Exposure Lock (AE Lock)
Exposure Compensation
ND Filter
Using the Zebra Pattern
Backlight Correction
Automatic Gain Control (AGC) Limit
White Balance
Using Looks
Zooming
Using the Focus/Zoom Ring
Using the Zoom Rockers
Using the Touch Screen's Zoom Controls
Using an Optional Remote Controller
Soft Zoom Control
Digital Tele-Converter
Focus Adjustment
Manual Focus
Autofocus
Face Detection & Tracking
Image Stabilization
Dynamic IS or Standard IS
Setting the Time Code
Selecting the Time Code Mode
Selecting Drop Frame or Non-Drop Frame
Setting the User Bit
Recording Audio
Selecting the Audio Recording Format
Audio Settings and Recorded Audio Channels
Connecting an External Microphone or External Audio Input Source to the Camcorder
Terminal
Audio Recording Level (INPUT Terminals)
External Microphone Connected to the MIC Terminal
Audio Recording Level (Built-In Microphone/MIC Terminal)
Microphone Attenuator (Built-In Microphone or MIC Terminal)
Using Headphones
Color Bars/Audio Reference Signal
Pre-Recording
Onscreen Displays
Infrared Recording
Using the Optional RC-V100 Remote Controller
Using the GP-E2 GPS Receiver
4 Customization
Assignable Buttons
Saving and Loading Menu Settings
5 Playback
Playback Controls
Adjusting the Volume
Clip and Photo Operations
Trimming Clips
6 External Connections
Connecting to an External Monitor
S Using the SDI out Terminal
Audio Output
7 Saving Clips
Copying Clips and Photos between SD Cards
8 Additional Information
Setup Menus
Appendix: Onscreen Icons and Displays
Troubleshooting
List of Messages
Safety Instructions and Handling Precautions
Camcorder
Battery Pack
Built-In Rechargeable Lithium Battery
Maintenance/Others
Using the Camcorder Abroad
Optional Accessories
Specifications
Reference Tables
Index
Advertisement
Quick Links
Download this manual
PUB. DIE-0525-000
4K Camcorder
Instruction Manual
Table of
Contents
Previous
Page
Next
Page
1
2
3
4
5
Advertisement
Table of Contents
Need help?
Do you have a question about the XA40 and is the answer not in the manual?
Ask a question
Questions and answers
Related Manuals for Canon XA40
Camera Accessories Canon XF705 User Manual
System expansion (115 pages)
Camcorder Canon XA45 Instruction Manual
4k camcorder (141 pages)
Camcorder Canon XA10 User Manual
Canon camcorder user manual (191 pages)
Camcorder CANON XA10 Study Manual
Canon xa10 hd camcorder (12 pages)
Camcorder Canon XA25 Instruction Manual
Hd camcorder (184 pages)
Camcorder Canon XA20 Instruction Manual
Hd camcorder (20 pages)
Camcorder Canon XA20 Manual
(17 pages)
Camcorder Canon XA20 Instruction Manual
Hd camcorder (187 pages)
Camcorder Canon XA20 Connection Manual
Using remote browse (12 pages)
Camcorder Canon XA20 Connection Manual
Uploading recordings to youtube and facebook using an ios device (10 pages)
Camcorder Canon XA35 Instruction Manual
(192 pages)
Camcorder Canon XA30 Instruction Manual
(192 pages)
Camcorder Canon XA11 Instruction Manual
(7 pages)
Camcorder Canon XA50 Instruction Manual
4k camcorder (147 pages)
Camcorder Canon XA60 Instruction Manual
4k camcorder (157 pages)
Camcorder Canon XA70 Instruction Manual
4k camcorder (154 pages)
This manual is also suitable for:
Xa45
Table of Contents
Save PDF
Print
Rename the bookmark
Delete bookmark?
Delete from my manuals?
Login
Sign In
OR
Sign in with Facebook
Sign in with Google
Upload manual
Upload from disk
Upload from URL


Need help?
Do you have a question about the XA40 and is the answer not in the manual?
Questions and answers