Advertisement
Table of Contents
- 1 Table of Contents
- 2 Safety
- 3 Your Luggie Scooter
- 4 Battery and Charging
- 5 IV. Operation
- 6 Operation
- 7 Comfort Adjustments
- 8 Frequently Asked Questions
- 9 VII. Basic Troubleshooting
- 10 Basic Troubleshooting
- 11 VIII. Care and Maintenance
- 12 Optional Accessories
- Download this manual
See also:
User Instruction Manual
Advertisement
Table of Contents
Troubleshooting

Related Manuals for FREERIDER LUGGIE series


Summary of Contents for FREERIDER LUGGIE series
- Page 1 LUGGIE series - USERS INSTRUCTION MANUAL - OPERATION COMFORT MAINTENANCE CHARGING...
- Page 2 FOREWORD Please read and follow all instructions in this Users Instruction Manual before attempting to operate your Scooter for the first time. If there is anything in this manual that you do not understand, or if you require additional assistance for setting it up, contact your authorised Luggie dealer.
-
Page 3: Table Of Contents
CONTENTS SAFETY GUIDELINES ......... . 2 SAFETY . -
Page 4: Safety
I. SAFETY WARNING: DO NOT attempt to operate your new Luggie scooter for the first time without completely reading and understanding all of the facts in this User's Manual. NOTE: Your Luggie scooter is fitted with a number of safety warning & instruction labels see page 7. - Page 5 I. SAFETY BRAKING Your Luggie scooter is equipped with two powerful brake systems: 1. Regenerative: This uses the electricity generated in your Luggie drive motor to rapidly slow your scooter when the wig-wag lever is returned to the stop position. 2.
- Page 6 I. SAFETY INSURANCE Although it is not a legal requirement for accident insurance coverage (third party), it is a sensible precaution. Your insurance company will be able to advise you of the available options. Your authorised Luggie dealer will be able to give you details of specialist insurance companies or your own insurance company will be able to advise you.
- Page 7 I. SAFETY INCLINES for illustration purposes only. 6 degrees maximum incline More and more modern buildings are designed with disability access in mind. Ramps have specified percentage of incline designed for easy and safe access. Some ramps may have turning switchbacks (180 degree turns) that require you to have good cornering skills on your scooter.
- Page 8 I. SAFETY SAFETY WARNING & INSTRUCTION LABELS The following labels are positioned on your Luggie. These labels communicate important warnings or instructions regarding the safe operation of you scooter. Please familiarize yourself with their location. ● Located on front wheel cross member CROP.
-
Page 9: Your Luggie Scooter
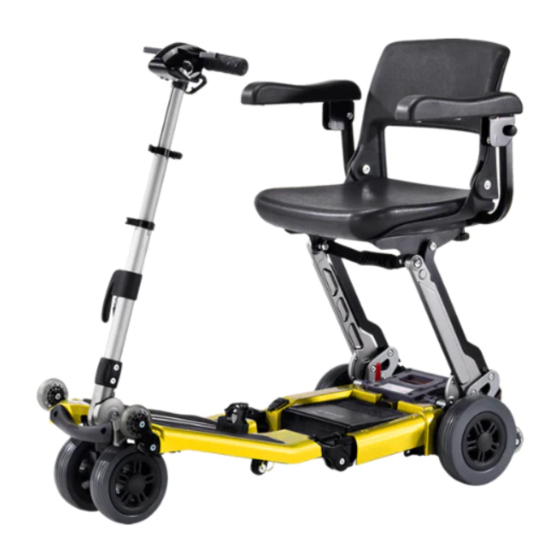
II. YOUR LUGGIE SCOOTER Your Luggie scooter is a "Class A" vehicle and designed for pavement use only. The Luggie must only be used on roads with caution if a sidewalk is not available. It is designed for a single occupant who experiences difficulty or discomfort when walking for prolonged periods, but has the use of visual and cognitive ability to operate the scooter safely. - Page 10 II. YOUR LUGGIE SCOOTER 1. Top Console 7. Charging Socket 2. Tiller Adjustment Clamp 8. Battery Release Button 3. Folding Trigger 9. Lithium Battery 4. Transport wheel 10. Magnetic Brake Release 5. Front Bumper 11. Rear Bumper 6. Chassis Hook 12.
- Page 11 II. YOUR LUGGIE SCOOTER Your Luggie scooter is delivered in a strong carton. When unpacking the carton, remove and dispose of all of the sharp metal staples which are located on the top to avoid injury. Remove all packing materials and follow the steps outlined in QUICK START GUIDE shipped with your Luggie scooter.
-
Page 12: Battery And Charging
Please note that each carrier reserves the right not to carry what may be termed Hazardous cargo. FreeRider cannot be held responsible for their final decision. ● Lithium battery installation Slide lithium battery with Luggie logo against the edge of the battery compartment under the seat before snapping it into place to lock. - Page 13 III. BATTERY AND CHARGING SAFE & LASTING BATTERY 1. For longest battery life, your battery should be re-charged when the battery meter indicator is in the red region or after use whenever possible. 2. If your Luggie battery will not be used for an extended period, fully charge the battery and disengage from the battery compartment of the Luggie before storage.
- Page 14 III. BATTERY AND CHARGING TROUBLE SHOOTING 1. If the green indicator is off, check the AC input. If the AC input works normally, the battery charger may be defective. 2. If the charging indicator (orange) is still off when charging, the battery charger may be defective.
-
Page 15: Iv. Operation
OPERATION Before setting out on your Luggie, you need to make sure that your seat is in the correct riding position. Set the seat to your desired height for your needs. UNFOLD LUGGIE SCOOTER On certain models, you can unfold your Luggie. 1. - Page 16 OPERATION 4. Release the tiller locking clamp. (FIG 5) 5. Pull the trigger outward to raise the tiller to a comfortable position. (FIG 6) FIG 5 FIG 6 6. Flip the seat back up. 7. Refer to THE QUICK START GUIDE to install your battery. Gently put the battery pack in the proper location (Battery compartment).
-
Page 17: Operation
OPERATION THE LUGGIE ARMRESTS INSTALLATION GUIDE RIGHT ARMREST LEFT ARMREST ADJUSTMENT KNOBS ADJUSTMENT PIN HOLES (bottom side of armrest) INSTALLATION ARMRESTS Locate the armrests and adjustment knobs included with your Luggie scooter order. The adjustment knobs can be found wrapped around each of the armrests. 1. - Page 18 OPERATION The controls of your scooter are located on the top console in front of the handlebars when seated on the Luggie. 1. Status Light: The power switch on your Luggie doubles as the status light indicator. When the Luggie is powered "on", the light on the switch will be illuminated as a solid for the entire duration of the "on"...
- Page 19 OPERATION WARNING: DO NOT hang bags or other belongings over the steering handlebars, doing so may interfere with the movement of your control lever. Failure to observe this warning could put you in a dangerous situation. WARNING: If you are not an accomplished outdoors powered vehicle driver, we strongly recommend that you first practice in an open, safe area, free from traffic, preferably with a care provider who can assist you.
-
Page 20: Comfort Adjustments
V. COMFORT ADJUSTMENTS A great deal of thought and consideration has gone into the design of your state-of- the-art, life-changing Luggie scooter. Your Luggie will help increase your mobility; thus, giving you more time to enjoy life. The Luggie scooter is a compact, mobility scooter that will allow you to navigate obstacles in confined areas. -
Page 21: Frequently Asked Questions
VI. FREQUENTLY ASKED QUESTIONS ▲about SAFETY Q1: Are there safety modes in place even when the magnetic brake release has been disengaged? A1: Yes. If the attendant pushes the scooter too quickly while the magnetic brake release is disengaged, the scooter will brake or stop. If this happens, come to a complete stop to allow the safety mechanism to reset before starting again. - Page 22 VI. FREQUENTLY ASKED QUESTIONS Q7: How do I move forward, reverse and stop on the Luggie scooter? A7: Gripping the right wig-wag lever lets you move forward on Luggie scooter. Gripping on the left wig-wag lever allows you to move in reverse. To stop, simply let go of the wig-wag lever.
- Page 23 VI. FREQUENTLY ASKED QUESTIONS ▲about BATTERY AND CHARGING Q14: When should I charge my battery? A14: Charge your battery when the battery indicator is in the red region on the battery indicator on the top console of your scooter. Q15: How long will it take to fully charge the battery? A15: The time required to fully charge your battery will depend on the depth of discharge on the battery.
- Page 24 VI. FREQUENTLY ASKED QUESTIONS Q19: What should I do if my battery doesn't charge? A19: Call the customer service department to trouble shoot. DO NOT REMOVE THE SEAL FROM THE BATTERY. YOUR BATTERY WARRANTY WILL BE VOID IF THE SEAL IS BROKEN. If the battery is faulty and still under warranty, request a RMA (Return Merchandise Authorization) number from your Authorized Luggie Dealer before shipping back the battery for replacement.
- Page 25 VI. FREQUENTLY ASKED QUESTIONS BATTERY WARRANTY The battery shipped with your Luggie has a limited warranty to be free of material defect or workmanship for a period for 12 months. Any battery faults due to a defect in manufacture or materials will be obvious within a few weeks of use. The condition of your battery will be dependent on the actual use of the scooter and how often the battery is cycled ie discharged and charged.
- Page 26 VI. FREQUENTLY ASKED QUESTIONS WARNING: When working on or disposing of your batteries: 1. DO NOT allow metal objects to short out the terminals of your battery. This could cause the battery to explode and cause injuries. 2. DO NOT allow your battery to freeze. If frozen allow it to naturally thaw out before charging, failure to observe this warning may damage the battery.
-
Page 27: Vii. Basic Troubleshooting
VII. BASIC TROUBLESHOOTING When the battery voltage is low, the 'status' indicator light situated on power switch will flash slowly as a warning for you to recharge your batteries. If the 'speed controller' detects a fault, the light will flash more rapidly, with the number of flashes indicating the nature of the fault. -
Page 28: Basic Troubleshooting
VII. BASIC TROUBLESHOOTING STATUS FAULT CODES Flash Description Meaning The batteries are running low. Battery Low → Recharge the batteries. The batteries have run out of charge. → Recharge the batteries. Low Battery Fault → Check the battery and associated connections and wiring. - Page 29 VIII. CARE AND MAINTENANCE METAL WORK Components, such as the frame work and bright metal parts require special attention and may deteriorate in certain conditions. Moisture and salt may corrode parts if left unattended. Auto cleaner polishes should be used to prevent long term damage. Failure to clean and protect these components may void your warranty.
-
Page 30: Viii. Care And Maintenance
VIII. CARE AND MAINTENANCE SERVICE CHECKS AND WARRANTY SERVICE If your Luggie should need attention due to failure as defined under the warranty terms, please contact the dealer from whom you purchased your scooter. The Luggie shown and described in this manual may not be exactly identical in every detail as your own Luggie. - Page 31 VIII. CARE AND MAINTENANCE SERVICE RECORD This section is designed to assist you in keeping records of any service and repairs done to your Luggie scooter. Should you decide to sell or exchange your scooter in the future, this will prove most helpful to you. Your service agent will also benefit from a documented record.
-
Page 32: Optional Accessories
VIIII. OPTIONAL ACCESSORIES Luggie is a one piece foldable mobility scooter with optional accessories for your convenience. For information regarding these optional accessories listed below, please contact your authorized Luggie dealer. WARNING: DO NOT over load accessories as this will affect the weight capacity of your scooter and decrease stability. - Page 33 T O B E F I L L E D I N B Y L O C A L D E A L E R Headquarter and Kaohsiung Facility: No.22, Bengong 5th Rd., Gangshan Dist., Kaoshiung City 820, Taiwan(R.O.C.) TEL: 886-7-6223093 FAX: 886-7-6230373 EMAIL: sales@freerider.com.tw www.freerider.com.tw www.luggie.com.tw PL90-0514 2019.03.20 V1...
Need help?
Do you have a question about the LUGGIE series and is the answer not in the manual?
Questions and answers
my battery is in the detached tray fir charging, The light is green, BUT IS FLASHING GREEN. What is my problem
A flashing green light is not mentioned in the provided information, so its meaning cannot be determined.
This answer is automatically generated